Sunday, November 20, 2011

Yuzu Gin & Tonic

059edited1

I can’t believe there are only a few days left before Thanksgiving (for those who live in the States)!  Are you ready for the celebration, gathering and fun?  I know it’s quite chilling out there especially for those who live in areas that have already started snowing.  If you are one of the 'lucky' few, you would probably consider serving a pot of hot apple ciders during your gatherings instead.  However, I think it’s also important to offer a variety of drinks at a party.  I mean, what is a celebration without a signature cocktail, right?  With your heater at full blast, I’m sure some of your Guests would appreciate a refreshing cocktail while celebrating the holidays with you.    Smile with tongue out

063edited

I got a bottle of yuzu juice from a Japanese supermarket recently.  Originally, I purchased the yuzu juice to marinate some fish (I’ll post that recipe in the future).  Yuzu is a citrus fruit and plant originated in East Asia. It is believed to be a hybrid of sour mandarin and Ichang papeda. The fruit looks a bit like a very small grapefruit with an uneven skin, and can be either in yellow or green color depending on the level of ripeness.  The citrus flavor from a yuzu is very distinctive.  It’s a combination of tart, slightly sweet, and a hint of bitterness flavor.  In my opinion, it’s perfect for this cocktail!  If you can't find a Japanese or Asian market that carry the yuzu juice, you can also purchase it online here.

083edited

This Yuzu Gin & Tonic is super easy to prepare.  Which means it is perfect for parties and gatherings! Here’s what I did.  I used an 6-ounce glass, filled with about 1/4 cup of crushed ice.  Add 10 splashes of yuzu juice (about 1/2 teaspoon), then add a shot of dry gin.  Last but not least, fill the glass with tonic water.  That’s it.  It’s unbelievably refreshing and tasty.  I’ve been enjoying this goodness ever since the first time I’ve mixed this cocktail up accidentally.

151edited

Below is a close up picture of the yuzu bottle.  Make sure to get the 100% yuzu juice but not yuzu marinate or anything that has a “filler”.   If you look closer, you can see that I have almost finished the entire bottle already.  Gosh, I better get a new bottle before it runs out.  The yuzu juice is great in this cocktail and many marinate recipes.

109edited1

I hope you’ll try this easy and refreshing cocktail this holiday season in your gatherings.  Remember, know your limits and drink responsibly.  The most important thing is to have a fun and safe holiday.  I want to thank you all of you for reading and stopping by today.  I wish you and your family a fun, festive, and blessed Thanksgiving!  Don’t forget to count your blessings.  I know I have a long list and many reasons to be grateful for this year.  Happy Thanksgiving!

149edited


Yuzu Gin & Tonic Printable Recipe
Serves 4 (feel free to double or triple the recipe for gatherings)
1 cup of crushed ice
2 teaspoons of yuzu juice
4 shots of dry gin
2 cups tonic water
4 citrus peel (for garnish)

Equally divide the crushed ice into 4 (6 ounce) glasses.  Add 10 splashes (about (1/2 teaspoon) of yuzu juice into each glass.  Then add a shot of dry gin in each glass and fill the glasses up with tonic water. Top with a citrus peel for garnish.  Enjoy!


This recipe is shared with:

Tuesday Talent Show
On the Menu Monday

Friday, November 18, 2011

Little Old Lady Recipes Book Review—Candied Nuts Recipe And a Giveaway

009edited

Have you ever giggled while reading a recipe book?  It’s hard not to if you have the “Little Old Lady Recipes-Comfort Food and Kitchen Table Wisdom” on your hands.  I had such a wonderful time reading through the recipes and "Kitchen Table Wisdom" over the weekend.

“When it comes to comfort food, little old ladies know what's up. They know what will taste good, how to fatten up a family, and what will leave their diners craving seconds (if not thirds and fourths). Collecting these gum-smacking, finger-licking-good recipes from the matriarchs of society is Little Old Lady Recipes by Meg Favreau.”

Book Cover Image from Quirk Books’ site

Little Old Lady Recipes honors the extraordinary women who create pot luck dinners, church socials, wedding banquets, and the best desserts you've ever tasted. Every page features their simple, no-frills recipes for pot roast, meat loaf, dumplings, corn bread, fried chicken, bundt cake, and other mouth-watering favorites-along with gorgeous photography of the chefs at work and generous portions of their kitchen table wisdom ("Butter comes from a cow. Tell me where the heck margarine comes from, and then maybe I'll eat it!").”


067edited

I followed one of the little old ladies’ advise and recipe and made some of these scrumptious Candied Pecans. “A good hostess makes big show-stopping meals, but a great hostess pays attention to the details. Place a bowl of these nuts in every room guests occupy during the cocktail hour before a dinner party; it’ll give them something to munch on and help ensure people don’t get sauced too quickly.” I took the advise a step further and packaged some of these candied pecans for guests to take home after the party. Winking smile They are great for holiday gift-giving as well!

139edited

Here are a couple Kitchen Table Wisdoms that I love….”A grandmother isn’t the same thing as a restaurant. Shut up and eat the eggs.”—Ruth, transcriptionist, 77. LOL…Does that sound familiar or what?
Here’s another one, “Club soda is a wonderful thing. You can use it to remove any stain, or mix it with gin and drink until you don’t care about the stain anymore.”—Chastity, deli clerk, 72. 

170edited

While I was searching which wonderful recipe to make from the Little Old Lady Recipes book, I came across this quote on the Pumpkin Butter Recipe.  “Like good-looking people, pretty pumpkins are often really stupid on the inside.  Find an ugly, knobby variety for this recipe, because it’s likely to be sweeter.  Also keep this point in mind when looking for a husband….”  Opps…..I guess it’s too late for me to follow this advise as I’m already married to my handsome hubby for 7 years now.  hahahaha….

The Little Old Lady Recipes book is definitely a fun book to read for all.  Guess what, the size of the book will make it the perfect stocking stuffer as well!  Pack it along with a bag of these Candied Pecans and you’ll be all set.  For sure your foodie friends and family would waive about them. 


Rules for the Giveaway:

With the courtesy of Quirk Books, one lucky uTry.it reader (with an U.S. mailing address only) will have a chance to win a copy of The Little Old Lady Recipes Book.   You have until November 27th, 12 midnight PST to enter this giveaway.  Winner will be announced and contacted via email shortly after the deadline.

Mandatory Entry: 

Simply leave a comment and tell me what your favorite holiday treat is.  

Additional Entries: (You can do any or all of the following, just leave a separate comments for each entry.  If you already did, they do count.  Simply leave a comment to tell me so.)

1) Add uTry.it to your Google+ circle.  (See sidebar to the right)
2) Click on the +1 button. (See sidebar to the right)
3) “Like” uTry.it’s Facebook page.  Here’s the link. 
4) Follow uTry.it on Twitter.  Here’s the link.
5) Tweet about this giveaway.  Or share this giveaway with your Facebook friends.
6) Subscribe to my blog via email.  You’ll receive an email to verify the subscription.  
7) Subscribe via RSS feed.


Good luck everyone!


Disclaimer: I was given a copy of The Little Old Lady Recipe Book free of charge for the purpose of this review. I was not compensated in any other way.  All opinions are 100% my own and always will be.


Candied Nuts (adopted from Little Old Lady Recipes)
Printable Recipe

2 egg whites
1/2 cup sugar
1/2 cup brown sugar
3/4 tsp cinnamon
1/2 tsp salt
4 cups pecan halves or other nuts*
a dash of vanilla extract*

Whisk egg whites with a spoonful of water (*I substituted with a dash of vanilla extract instead).  Combine everything else but the nuts in another bowl.  Coat the nuts in egg whites.  Toss in sugar mixture.  Spread on a greased baking sheet and bake 45 minutes at 250F, stirring occasionally. 

*Note: The original recipe calls for 2 cups of nuts only.  I was able to cover all 4 cups of pecans halves with the same amount of egg whites and sugar mixture.


This post is shared with:

Foodie Friday
Sweet Tooth Friday
Simply Delish
Friday Food and Recipe
Friday Potluck
This Week's Craving

Tuesday, November 15, 2011

Holiday Shopping Made Easy and Fun

Have you heard of One Kings Lane?  I’ve been a big fan since I came across this site.  With two young kids and a hubby to take care of, it’s really a lot easier for me to shop online these days.  Not only that I can compare the prices and deals before I buy, online shopping also eliminates impulsive purchases.  I can enjoy shopping in the comfort of my own home, which save me some travelling time and gas money as well.

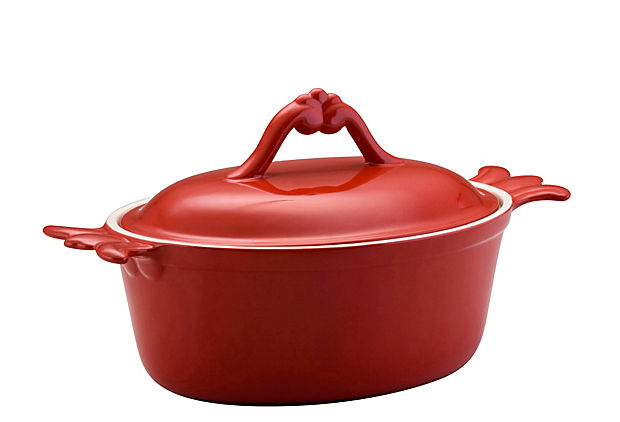
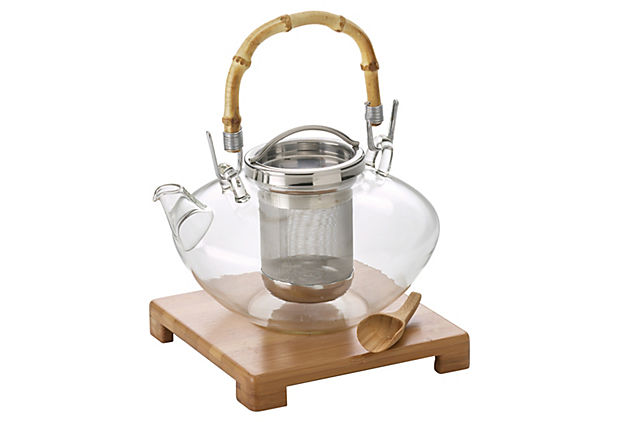
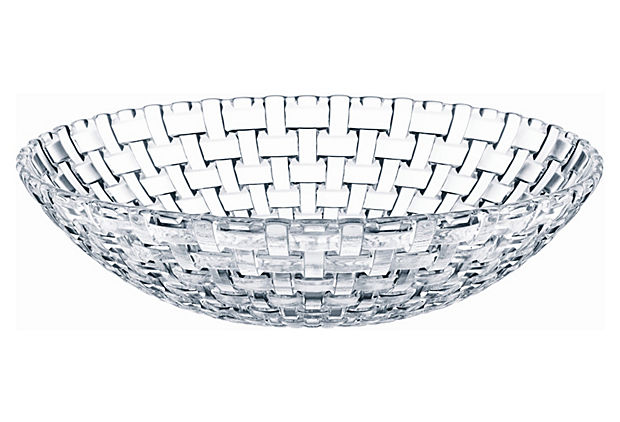
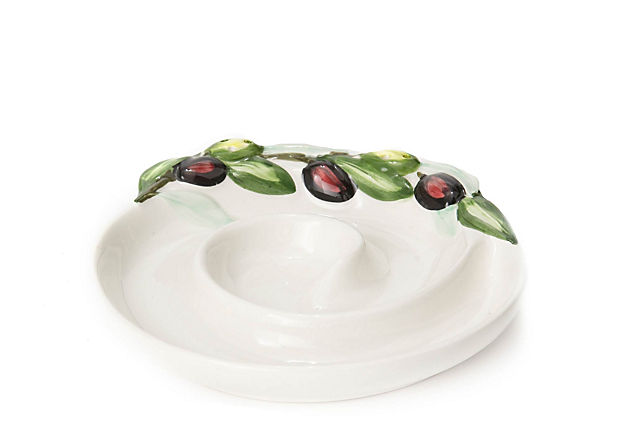
Back to the site, One Kings Lane.  They carry top-brand and designer furniture, decor, art, gifts, cookware, serve ware and vintage items up to 70% off.  Here are a few items that I love from their site.  You know….the foodies essentials. Winking smile
2.5-Quart Oval Casserole, Red

2.5-Quart Oval Casserole, Red by Bonjour at $24.00


Glass Teapot w/ Infuser & Bamboo Stand
Glass Teapot w/ Infuser & Bamboo Stand at $29.00
Nachtmann Bossa Nova Bowl, 12
Nachtmann Bossa Nova Bowl, 12" at $17.00

Olive Serving Spiral Plate

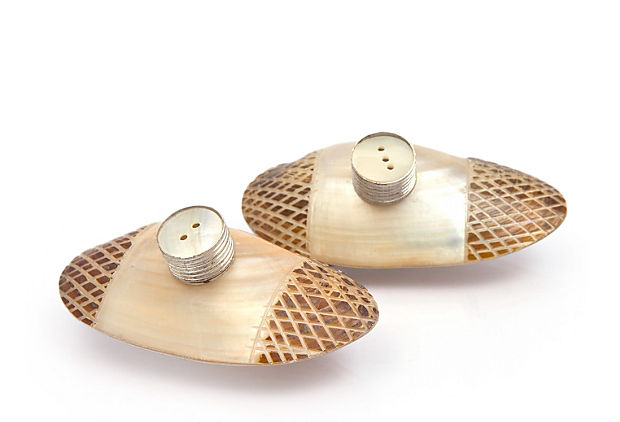
Olive Serving Spiral Plate at $19.00River Shell Salt & Pepper SetRiver Shell Salt & Pepper Set at $19.00

These are just a few that I came across lately.  Not only me, I think my foodies friends would love to receive these as gifts this holiday season as well.  One Kings Lane have different deals and discount items updated on a daily basis.  For sure you’ll find something that you love.  Smile   Best of all, you’ll get $15 credit to spend at the site when you sign up through this link here.  So, hurry and sign up while the deal last.  Honestly, I don’t enjoy the Black Friday chaos shopping at the stores at all.  So, guess where I’ll be making most of my holiday shopping this year?  Yup, online from the sites that I love.  Enjoy and have fun shopping.

 (Photos on this post are from One Kings Lane)

Friday, November 11, 2011

Homemade Dark Chocolate Marshmallows

804edited

Have you ever try making marshmallows at home?  Sounds like a crazy idea, right?  Well, not so much if you have tasted a home made marshmallow before.  Compared to the store bought packaged version, the home made ones are much lighter, more flavorful, silkier, fluffier, and less chewy.  Best of all, you can infuse them with your favorite ingredients.  What did I infuse these Marshmallows with?  Of course I can’t resist but to add some dark chocolate into these pillow-y treats.  Once you’ve tasted the home made version, you can never go back to the packaged ones.  Trust me, you don’t want to go back to the packaged ones.

728edited

They are the perfect treats as the way they are.  But boy oh boy, drop a few into a cup of hot chocolate and you’ll have a decadent treat.  Yes, I love my hot chocolate topped with some whipped cream, the real stuff.  Simply whip some heavy cream with a dash of real vanilla extract and a little powdered sugar and you’re all set.  I happened to have some in my fridge on stand-by.  Lucky me!  Smile

Home Made Dark Chocolate Marshmallow-3

Hm….see the air bubbles inside these marshmallows (see picture below)?  They are pillow-y and fluffy like clouds.  I can definitely sleep on some of these airy goodness.  Or at least dream about them in my naps. Open-mouthed smile   For sure that would be one sweet dream.

876edited

These home made Dark Chocolate Marshmallows are perfectly gooey when half way melted into the hot chocolate.  I can definitely take a good nap after a cup of this luscious and decadent hot chocolate.  Oh, who am I kidding?  I still have so much to do around the house and definitely got no time for a nap.  But at least, I can take a moment to relax and day dream while enjoying my favorite drink in the afternoon before I start the work.  Smile  Thanks for stopping by today and wish you all a wonderful weekend. 

752edited


Dark Chocolate Marshmallow Printable Recipe

1/2 cup cocoa powder, divided
3/4 cup cold water, divided
2 tablespoons light corn syrup
2 (1/4-ounce) packets unflavored gelatin
3 large egg whites, at room temperature
1 teaspoon pure vanilla extract
1 1/4 cups sugar
4 ounce dark chocolate, chopped
pinch of kosher salt
1/4 teaspoon instant coffee granulate

Line an 8 by 8-inch baking sheet with parchment paper, sprinkle 2 tablespoons of cocoa powder on the bottom and the sides of the parchment paper, set aside.

In a microwave safe bowl, add chopped chocolate, salt and instant coffee, heat on high until chocolate is melted.  Stop and stir at 30 seconds intervals.  When chocolate is melted, stir in 1/4 cup cocoa powder.  Set aside to let cool.

In a medium saucepan, add 1/3 cup of the water, the sugar and the corn syrup and heat over medium heat.  Stir until the sugar dissolves. Once the sugar is dissolved, do not stir the mixture and continue to cook the syrup until it reaches 265 degrees F on the candy thermometer, about 8 to 10 minutes.

While the syrup is cooking, work on the gelatin and egg whites. In a microwave-safe bowl, sprinkle the gelatin over the remaining cold water and let it sit for about 5 minutes.  Then heat the gelatin in a microwave for 25 to 30 seconds to liquefy it.

In the bowl of a stand mixer fitted with the whisk attachment, beat the egg whites on medium-high speed until firm.  As soon as the syrup reaches 265 degrees F, remove the pan from the heat.  Transfer the syrup to a heat proof beaker with handle (I used my heat proof glass measuring cup.  It’s safer and easier to control using a beaker to pour the hot syrup into the running mixer than pouring the hot syrup directly from the saucepan.)

With the mixer on medium low speed, slowly add the syrup to the egg whites.  Pouring it between the spinning beater and the sides of the bowl. Add the gelatin and continue to beat for another 3 minutes.  When the ingredients are fully incorporated and slightly cooled, beat in the vanilla and chocolate mixture until well combined.

With a rubber spatula, scrape the mixture onto the prepared baking sheet. Spread the mixture into the corners and smooth the surface.  Dust the top of the marshmallow with the remaining 2 tablespoons of cocoa powder. 
Leave it in a cool, dry place to set.  It takes about 2 to 3 hours.  Once the marshmallow is cooled and set, cut into small pieces with a pair of scissors or a long thin knife.  I cut some of mine with cookie cutters.  Lightly dust the cookie cutters with cocoa powder to prevent sticking.  Eat them as is or add them into hot chocolate for a decadent treat.  Enjoy.

This recipe is shared with:

Sweets for Saturday
Sweet Tooth Friday
I'm Lovin It
On the Menu Monday
Melt in Your Mouth Monday
Mingle Monday
Simply Delish Saturday
Tuesday Talent Show
Success U
Mouth Watering Monday
Full Plate Thursday
Friday Food & Recipe

Sunday, November 6, 2011

Smoky Butternut Squash Soup—A Guest Post for Make-Ahead Meals for Busy Moms

029edited

I was thrilled and honored when Jane from Make-Ahead Meals for Busy Moms invited me to write a guest post for her.  I’ve been following Jane’s blog for many months now and I’ve always enjoyed reading her blog.  If you have not visited her blog yet, you should.  In addition to simple and delicious make-ahead meals recipes, you can also find wonderful giveaways, Linky party/Blog Hop, news, and inspirations from her life stories….etc.  Jane is a busy mom of two, a second grade and preschool teacher, and the author of the wonderful blog Make-Ahead Meals for Busy Moms.  I don’t know how she finds the time to do it all.  All I can say is that I’m very inspired and impressed by her achievements.

051edited-1

Did I mention this is my very first time doing a guest post?  Oh yes, it is.  More fun than I can imagine, too.  When I was testing out recipes for this guest post, I wanted to prepare something seasonal and one that can be made-ahead!  Smile  As a busy Mom myself, I can definitely take advantage of making some meals ahead for my family.  This is one of the most tasty recipe for the season.  Best of all, it’s super easy to prepare and it tastes even better after a day or two.  This recipe is definitely a keeper and you can bet that I have a batch in my fridge that I can easily heat up for tonight’s dinner.  With the temperature getting lower and lower, a hot bowl of Smoky Butternut Squash Soup will definitely warm your heart, soul, and tummy as well.  If you haven’t cut a butternut squash before, here’s how.  Just a few simple steps.

How to Cut A Butternut Squash

First, with a very sharp knife, cut off a small piece of the skin on the bottom of the squash (as shown in picture #2) so the squash can stand flat without moving around.  Then, cut the squash in half like picture #3 above.  Next, cut/peel off the skin around while the squash is standing flat on the cutting board.  You can do the same with the top half of the squash.  Somehow, I find it easier to peel the top half with a vegetable peeler.  Then, split the bottom half of the squash in half (as shown in picture #4) and spoon out the seeds.  Cube the squash and you’re all done.  Just be very careful and the squash can be slippery.  It a lot safer and easier to use a sharp knife to cut the squash.

Ingredients and Soup

The smoky flavor in this recipe came from a chipotle pepper that I added.  It adds a lot of smokiness and some heat to the soup.  If you’re serving the soup for younger kids and only want the smokiness but not the heat, you can definitely replace the chipotle with a tablespoon of smoke paprika, which only have smoky flavor but not the heat.  Besides Butternut squash in this recipe, I added a little red yam for sweetness to balance out the heat and smoky flavor.  I also added a little bit of freshly grated ginger for earthiness to round out the overall flavor.  When ready to serve, put a dollop of crème fraîche for creaminess and a teaspoon or so of toasted pine nuts for some crunch.  You can serve this soup as a side dish or bigger portion with toasts or baguette as a meal.  Either way, your tummy and family will thank you.  Smile

125edited

You can store this soup in the fridge (without the crème fraîche and nuts, only add those right before serving) for up to a week.  Or, you can store the soup in the freezer for even longer.  Simply heat it up on the stove right before you serve and that is faster than ordering take-outs, and a lot healthier too!  I hope you’re enjoying the cooler temperature that the season brings.  I know I am.  With a healthy soup such as this one, it is satisfying and tasty.  It’s simple enough to make on a weeknight for the family and it’s also elegant enough to serve if you have guests visiting.

035edited

Thank you again, Jane, for inviting me to write a guest post for your blog.  It’s been a pleasure and I had so much fun preparing this recipe and photo shoot.  I hope you’ll enjoy this recipe as much as I do.  Thank you everyone for visiting and reading today.  Don’t forget to hop over to Jane’s blog to check it out and have fun.  Until next time, please take care and I’ll see you real soon.

181edited


I'm submitting this recipe to the Holiday Recipe Swap as well.  Come join the fun at the My Baking Addiction and GoodLife Eats Holiday Recipe Swap sponsored by Pacific Natural Foods.


Smoky Butternut Squash Soup Printable Recipe

3 tablespoons extra-virgin olive oil
3 garlic cloves, minced
1 small leek, use white and pale-green parts only, thinly sliced and rinsed well
1 Granny Smith (green) apple, cored, peeled, and cut into 1-inch chunks
1 teaspoon finely grated fresh ginger
2 pounds Butternut squash, peeled, seeded and cut into 1-inch cubes
1 pound red yam, peeled and cut into 1-inch cubes
6 cups chicken/vegetable stock
1 medium chipotle chili (canned in adobo sauce), can substitute with 1 tablespoon of smoke paprika for no heat version of this recipe
Kosher salt and freshly ground pepper
1/4 cup crème fraîche
1/4 cup pine nuts, toasted

In a large pot, heat oil over medium heat. Saute garlic and leek until soft and translucent, about 4 minutes. Add apple, ginger and cook for 3 minutes. Add butternut squash, yam and stock; simmer until squash and yam are tender, about 15 minutes. Add chipotle or paprika.

Working in batches, transfer mixture to a blender, and puree until smooth; transfer pureed soup to a large bowl or another pot. For safety, remove cap from the blender lid and cover with a dish towel to prevent spattering. Season with salt and pepper to taste. Dollop a teaspoon of crème fraîche and a teaspoon of toasted pine nuts right before serving.


This Recipe is Shared with :

Melt in your Mouth Monday
On the Menu Monday
Mingle Monday
Homemaker Monday
Tuesday Talent Show
Success U
Squash Love Blog Hop
Full Plate Thursday
Foodie Friday
I'm Lovin' It
Fresh Bite Friday
Everyday Sisters Sharing Sunday