Showing posts with label Mom. Show all posts

Friday, September 23, 2011

Pinwheels Cookies, The Cookiepedia Review and a Giveaway

029edited

My Mom was staying with me when my hubby was out of town for a few days last week.  It was one of the relaxing afternoons, with no plans of going out but just hung out in the kitchen.  We wanted to bake something together, then relax and enjoy the afternoon at the backyard with a cup of tea.  So, we were flipping through The Cookiepedia, searching for something fun to make. 

177edited

It didn’t take long for us to decide and we had a winner.  There were many classic and fun cookie recipes in this book, but the pinwheels really caught my eyes (pun intended).  These pinwheels looks whimsical and I know my little boy would enjoy them as much as we did when he returned from school.

051edited


“Full of delightful hand-drawn illustrations and mouth-watering full-color photographs, The Cookiepedia, by Stacy Adimando, features delicious recipes and inventive variations for all the cookies everyone loves, from Amaretti, Butter Balls, and Chocolate Spritz to Gingersnaps, Rugelach, and Snickerdoodles, as well as dozens of other favorites—more than 50 in all.”  

053edited

There were many things I love about this book.  I summarized them into ten main points:

1) Hard cover—I intended to use this recipe book over and over again and the durability is important to me.  I don’t know about you, but I had some other cookbooks that I used so often that the cover is coming off.

2) The spiral binding—This let the middle pages of the book stay opened easily, without having to press hard and winkle the pages.  Imagine your recipe book stay nicely opened on the book holder (if you have one of those fancy thingy) or on your counter top, making it easier to read.

249edited

3) Mouth-watering full-color photographs—Don’t you want to know how the end-products supposed to look like?  That’s how the Pinwheels caught my eyes!  Winking smile Don’t people always say a picture is worth a thousand words?

4) Easy to follow instructions—Very important in any recipes book. 

056edited

5) Tips—Tips in this book are very helpful.  Some gave me the “ah-ha” moments.

6) Variations—These are all classic cookie recipes that we all familiar with, in The Cookiepedia.  It’s fun to try the original, but then it adds a little more excitement with the variations added. 

057edited

7) Note space area next to the recipe—I love writing my own notes on recipes.  Weather it is the variation I made on a recipe, or an idea for a tweak I wanted to try next time; the note space to me is a thoughtful gift from the author to the end users.

8) Personal experience—On each recipe, Adimando added a little background of the the recipe.  Some are her own childhood memories, some are the experiences she had with that recipes, some are just facts about the cookies.  I love reading those little stories and memories.  The stories made it more personal than just a recipe book.

239edited

9) Varieties—From Italian Biscutts, Chocolate sandwich cookies, to fig bars and Molasses Spice Cookies, the variety is broad and for sure you’ll find something you like.


10) I love and adore cookies, period.  I mean, who doesn’t?  Do I need a better reason to love this book?  Winking smile
072edited

This Giveaway is now closed.  Winner will be announced shortly.  


Rules for the Giveaway:

With the courtesy of Quirk Books and Stacy, one lucky uTry.it reader (with an U.S. mailing address only) will have a chance to win a copy of The Cookiepedia.  Must be a uTry.it public follower/member through Google Friends Connect to participate.  (See the right hand side bar under “Follower” with the button “Join this site”).  You have until September 30th, 12 midnight PST to enter this giveaway.  Winner will be announced and contacted via email shortly after the giveaway is closed.

Mandatory Entry: 

Simply leave a comment and tell me what your favorite cookie is.  Or you can describe if you like your cookies buttery, crunchy, or chewy?  Or how much you love cookies!  Let's have a cookie talk, shall we?

Additional Entries: (you can do any or all of the following, just leave a separate comments for each entry)

1) “Like” uTry.it’s Facebook page.  Here’s the link. 
2) Share this giveaway with your friends on Facebook.  Please include the link to this post when you share.
3) Follow uTry.it on Twitter.  Here’s the link.
4) Tweet about this giveaway.  Please include my Twitter handle @utry_it and the link to this post in your tweet.
5) Subscribe to my blog via email.  You’ll receive an email to verify the subscription.  
6) Subscribe via RSS feed.


Good luck everyone!

These Pinwheel cookies are whimsical and perfect for gift-giving for the holiday season.   I'm entering this to the Holiday Recipe Swap.  Come join the fun at the My Baking Addiction and GoodLife Eats Holiday Recipe Swap sponsored by Beanilla.


Disclaimer: I was given a copy of The Cookiepedia free of charge for the purpose of this review. I was not compensated in any other way.  All opinions are 100% my own and always will be.


Pinwheels: (from The Cookiespedia) Printable Recipe
Makes 4 Dozen Cookies

3 cups all-purpose flour
1/2 teaspoon baking powder
1/4 teaspoon salt
1 cup unsalted butter, at room temperature
1 1/2 cups sugar
2 eggs
2 teaspoons vanilla extract
2 tablespoons cocoa powder

Get to work sifting the flour, baking powder, and salt into a bowl.  Set it aside for the moment.

Cream together the butter and sugar for several minutes, until light and fluffy.  Add the eggs and vanilla and mix until incorporated.

Start tipping in the flour a third at a time; stop mixing when it’s just combined.  When the dough forms, divide it into two parts.  Reserve one half in plastic wrap and keep it in the fridge.  Mix the cocoa powder into the other half using a spatula.  Form the chocolate dough into a disk. wrap in plastic wrap, and chill both doughs in the fridge for at least 1 hour, until firm.

Roll out the chocolate dough to about 1/4-inch thickness, using just a little flour as needed.  Move it to a large piece of parchment paper.  Do the same with the vanilla dough, flattening them to around the same height and dimension.  Place the vanilla dough on top of the chocolate and run a rolling pin lightly over the two doughs to press them together.  Trim the doughs into a rectangle shape so they each have the same edges.

Starting at one of the short ends, carefully roll the dough up into a log, using the parchment paper to help.
Wrap it tightly in plastic wrap or parchment paper and chill for at least an hour.  Do the same with the reserved pieces of dough.

Line a few cookie sheets with parchment paper.  Unwrap the log and slice it into cookies about 1/4-inch thick using a very sharp knife.  Lay the cookies on the sheets about 2 inches apart.

Bake for 10 to 12 minutes, until you start seeing hints of edges turning golden.  Remove and let cool for a minute, then spatula to a wire rack.

This Recipe is Shared with:
I'm lovin It
Friday Favorites
Sweets for Saturday
On the Menu Monday
Mouth Watering Monday
Tuesday Talent Show
Homemaker Monday
These Chicks Cooked
Sweet Treats Thursday
Thursday, November 18, 2010

Black Sesame Seed Mochi

Black Sesame Seed Mochi

The other day when I was rolling out dough to make a loaf of bread.  Out of nowhere, my son asked me if I’m making Black Sesame Seed Mochi (he calls them “Gee-Mah”, means sesame in Chinese).  I guess rolling out dough for bread/buns reminds him the similar process in making Mochi!  Isn’t he smart?  :)  Since that day, he’s been asking me to make him some “Gee-Mah, everyday!!!  A few times a day!!!  It’s not that I don’t want to make the Mochi for him.  But let me explain to you all, a batch of Mochi makes 36 mini ones, and they CAN’T be refrigerated because cold temperature would harden the rice cake.  The Mochi usually only last for around 3 days, more or less depending on the weather, at room temperature.  I hesitated to make them just for his and my enjoyment for 3 days and waste whatever we couldn’t finished (yeah, my hubby doesn’t eat anything too sticky!)  I’m pretty sure that my son (not even 3 year old) and I can’t finish all 36 Mochi in 3 days, doesn’t matter how much we love them.  So, I promised my son I would make Mochi when Grandma and Grandpa visit.  Hence, they can take some home.  So, when my Mom called the other day and informed us they’ll visit the day after for lunch, my son was overjoyed!  Of course, he was very excited because he got to spend time with his Grandparents!  :D 

Black Sesame Seed Mochi

As usual, my parents bought Dim Sum over to our place and we all had lunch together.  After lunch, my Dad went for a walk with my son at the community playground.  I was chatting with Mom and I mentioned how my son has been asking me to make Mochi for him.  Coincidently, my Dad had been requesting Mom to make the same thing for him!  :)  And for the same reason, my Mom didn’t make them!  LOL…  Didn’t people say great minds think alike!?  Oh well, I guess the sweet tooth runs in the family.  So, here we go, I was getting the bento cups and mini muffin cups ready for the Mochi.  Aren’t they cute?

Bento Cups


Bento Cups and Mini Muffin Cups

Besides black sesame seed fillings, you can also fill these Mochi with red bean paste.  They are available in most Asian markets, fresh or canned, very convenience.  However, I personally don’t like red beans, so, I only fill them with black sesame seeds paste.  These Black Sesame Seed Mochi are soft, chewy, fragrant, and flavorful!  Those coated with toasted sesame seeds outside got an extra crunch and toasted flavor.  Yum…


Black Sesame Seed Mochi Ingredients


Black Sesame Seed Mochi


Black Sesame Seed Mochi: Printable Recipe

Servings: 36 (1-inch Mochi)

Ingredients:
1 Pound Glutinous Rice Flour
3 Cups Water
1 Cup Sugar
1/2 Cup Toasted Black and White sesame seeds (or 1/4 Cup Potato Starch), to coat mochi
 
Ingredient for Black Sesame Seed Filling:
150g (around 1 cup) Black Sesame Seed Powder
150g (around 1 cup) Powdered Sugar
1/2 cup Vegetable Shortening
 
In a medium bowl, mixed sesame seed powder, powdered sugar and shortening with a pastry blender (or a fork if you don't have one) until well combined, set aside.

In a medium pot, bring water to boil. Add sugar and stir with a wooden spoon until all sugar dissolved.

Remove from heat and add glutinous flour all at once and stir quickly to combine. Set stove to the lowest heat setting and return pot to stove, stir mochi dough until no lumps. It'll be very hard to stir at the end as the dough thickened (that also means it's ready). Remove from heat.

Let dough cool down a bit until it's not too hot to handle.  Meanwhile, place toasted sesame seeds and/or potato starch on a shallow plate, separately.  Take a small portion of dough (about 1 tablespoon) and knead it a few times in your palms.  Form it into a small disc.  Spoon 1 teaspoon sesame filling onto the dough and fold the edges to seal the mochi.

Lightly roll it into a ball shape using both palms, then coat with toasted sesame seeds or potato starch. Place them in the mini paper muffin cups until ready to serve.

Tips: Wear a pair of disposable plastic gloves while handling mochi dough as the dough is very sticky.  Before handling the dough, spray a little cooking spray on plastic gloves and rub your hands together for even distribution. Thus, the dough won't stick on the gloves either.


This recipe is link to:
Sweets for a Saturday

Saturday, September 25, 2010

“Mickey Mouse” Seafood Over Brown Rice


“Mickey Mouse” Seafood Over Brown Rice
 
It’s not easy being a Mom, I learned that after I became one myself.  LOL…Not sure if the moms out there have troubles having your kids sit still until they finished their meals?  Sound familiar, right?  Sometimes, we all need a little tools and gadgets to make a kid’s meal looks fun and festive.  I found one and just want to share with you.  Look at the picture below, it’s a really fun plate to eat, don’t you agree? 

   “Mickey Mouse” Seafood Over Brown Rice

This Mickey Mouse ring is supposed to be an egg ring (haven’t make an egg with it yet, this is the very first use of the ring).  I do plan to mold eggs, pancakes, and cakes, with it in the future, stay tune.  I love the non-stick coating because it’s really easy to clean up.  The material is very sturdy and I’m sure it’ll maintain its shape over time.  Please click here if you’re interested to get one for your kids or for the kids in you.  :)  My son loved it and he finished his dinner in record time!  Happy kid and happy mom!


This Post is Shared with:

Everyday Sister Sharing Sunday

Wednesday, September 22, 2010

Mid-Autumn Festival 中秋節

Moon Cakes

Happy Mid-Autumn Festival to you all! 

The Mid-Autumn Festival is also known as the Moon Festival or 中秋節 in Chinese.   It’s a popular harvest festival celebrated by Chinese and Vietnamese, dating back over 3,000 years.  The Mid-Autumn Festival is held on the 15th day of the eighth month in the Chinese calendar, which is usually around late September or early October in the Gregorian calendar.   The moon is supposedly at its fullest and roundest. The traditional food of this festival is the moon cake, of which there are many different varieties.  I personally preferred the traditional ones, with white lotus seed paste and preserved egg yolks. 
 
Moon Cakes

Honestly, I’m not a big fan of moon cakes.  Usually, they are a bit too rich and too sweet for my liking.  However, since this is a much observed tradition for the Chinese, and the moon cakes are usually given to friends, families and colleagues as gifts before the festival.  It’s hard not to have them in the house around this time of the year.  Every year in the past, I’ll have just a piece or 2 of the moon cake when we celebrate this festival.  (1 piece = 1/8 of a moon cake) Okay, okay, the most maybe 1/2 of a cake, that’s it.  That total consumption is over a few days period, not all at once!

Moon Cakes

This year, I got a box of moon cakes from my Mom.  Look at the tin cover, it’s an art of itself!  Don't you agree?

MOON CAKE TIN


Picture marked number 1 above is the Chinese character of moon, with an image of the moon as well.  Picture marked number 2 is the Chinese word means cake, along with the cake images and a rabbit.  There’s an ancient Chinese story about the rabbit.  Click here if you want to read more on the rabbit story.  Look up into the sky with the full moon tonight, will you?  Don’t you see a shadow on the moon that looks just like the profile of a rabbit?  Alright, maybe I’ve been drinking too much!  LOL…

Picture marked number 3 and 4 is the name of a very popular bakery in Hong Kong, named Maxim’s.  They literally means beautiful heart.  In picture 3, there’s the image of Lady Chang'e (嫦娥 in Chinese).  In picture number 4, that is the image of the Hong Kong harbor and buildings.  I really love the design of the tin cover, almost better than the moon cakes, almost!

Moon Cakes
 
Traditionally on this day, Chinese family members and friends will gather to admire the bright mid-autumn harvest moon, and eat moon cakes and pomelos under the moon together, along with a cup of hot tea (to cut the grease from the cakes). Accompanying the celebration, there are additional cultural or regional customs, such as carrying brightly lit lanterns and watch dragon dance.  Too bad I didn’t have a chance to get the pomelos (one of my favorite fruit) nor the lanterns.  And of course, no dragon dance here either.  I did manage to cut myself a piece of the moon cake and enjoy it with a cup of hot tea though.   
 
Moon Cakes

So, this is how a traditional moon cake looks like.  This particular moon cake is with white lotus seed paste and double preserved egg yolks fillings (my favorite type and combinations).  Not kidding you, the bakers managed to jam 4 yolks in one moon cake, I think that’s a bit too much though.  Some other combination of fillings include but not limited to ham and nuts!  Aren’t these supposed to be desserts?  Oh well, that’s why I usually stick with the traditional ones.  Anyway,when I cut into this moon cake, the natural oil from the yolk burst and started dripping.  I was thinking wow, that’s such a nice yolk!  It surely was a pleasant surprise.  Then the fragrant from the white lotus seed paste and yolks filled the whole room.  I couldn’t wait to take a bite (that’s so not me, remember, I don’t really like moon cakes)!  Look at the inside of the moon cake!  Does the preserved egg yolk look like a full moon to you?  That’s the whole idea of putting a preserved egg yolk inside the moon cake, to resembling the full moon.  :)

Moon Cakes

Let me tell you, I fall in love with this moon cake.  The skin layer of the cake is soft and thin, it is important for a nice moon cake to have a "thin skin" and that takes some pastry skills to do that.  The white lotus seed paste is not too sweet (compared to those I had in the past), also it’s very smooth and creamy.  The preserved egg yolks are crumbly and not too salty.  They tasted rich but not greasy at all.  The hint of saltiness from the preserved egg yolk balances perfectly with the sweetness from the lotus seed paste.  No wonder Maxim’s is one of the best bakery in Hong Kong now.  They really did use the best ingredients and what a great recipe they have!  Most importantly, I got to enjoy it with my family!  Guess what? I bet my moon cake consumption will break the past 30 years’ records!  LOL…  Thank you for the moon cakes again, Mom.  To all of you, Happy Mid-Autumn Festival again and hope you get to spend time with your family and love ones as well.

Moon Cakes

Wednesday, September 1, 2010

Chocolate and Hazelnut Meringue Cake

Chocolate and Hazelnut Meringue Cake
Here comes another Birthday celebration.  Yes, twice in a month; and don’t be surprised if there’s a 3rd one coming up!  This time, Mom and Dad brought Dim Sum to our place and we had lunch together.  I prepared this cake so we can have the cake cutting and wish making rituals; I remember we always have birthday cakes and other goodies to celebrate our birthdays when we were young.  Those were precious memories.  Mom even brought over some of our childhood pictures.  It was so nice to see those pictures again.  Gosh, I really looked young back then!
 
Childhood Picture
Next to me was my older brother.  Doesn’t he look handsome?  I remember we had many birthday pictures with this background until we moved to the new place when I was 7 or 8.  I still remember those bright pink plastic plates we always use for birthday cakes!  Come to think of it, I should have made some jelly to go around mom’s birthday cake also!  :P  

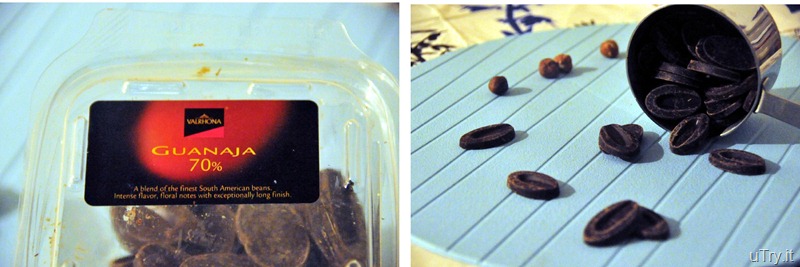
Valrhona Chocolate

Back to the Chocolate and Hazelnut Meringue Cake.  I had so much fun making this cake because I knew my Mom would love it a lot.  I used some good quality bitter-sweet chocolate for the cake base (flourless).  It’s worth it to invest a little more on the chocolate because you can totally taste the difference.  The chocolate is so rich that you want to close your eyes, enjoy and savor every moment when you take your first bite (oh well, maybe that’s just me).  I love the contrasting texture of this cake.  The meringue is light and fluffy, the toasted hazelnuts add a nice crunch, along with the smooth and silky chocolate base.   Hope mom enjoyed this cake as much as I did.  Happy Birthday again, Mom.  I love you! 

Chocolate and Hazelnut Meringue Cake


Chocolate and Hazelnut Meringue Cake


Chocolate and Hazelnut Meringue Cake


Chocolate and Hazelnut Meringue Cake:
Makes one 9-inch cake
  • 10 tablespoons unsalted butter, plus more for pan
  • Cocoa Powder, for pan
  • 1 cup hazelnuts
  • 3/4 cup firmly packed light-brown sugar
  • 6 large whole eggs, separated
  • 4 large egg whites
  • 12 ounces bittersweet chocolate, melted and cooled, plus 4 ounces roughly chopped
  • 2 teaspoons pure vanilla extract
  • 1 tablespoon espresso
  • 1 pinch of salt
  • 1 tablespoon cornstarch
  • 1/4 teaspoon cream of tartar
  • 3/4 cup caster sugar
Preheat oven to 350 degrees. Butter a 9-by-3-inch spring form pan. Line bottom and sides with parchment. Butter parchment, and sprinkle with cocoa powder; tap out excess. Set aside.
Toast hazelnuts until fragrant and skins start to crack. Rub vigorously with a clean kitchen towel to take off skins. Let cool; roughly chop. Set aside.
In the bowl of an electric mixer fitted with the paddle attachment, cream butter and brown sugar until pale and smooth. Add egg yolks, one at a time, beating well after each addition, until mixture is light and fluffy. Add melted chocolate, vanilla, and espresso; beat until combined. Set aside.
In a clean mixer bowl, combine 6 egg whites and salt; using the whisk attachment, beat on high speed until soft peaks form, about 2 minutes. Stir one-third of the egg whites into chocolate mixture. Fold in remaining beaten egg whites just until combined. Pour batter into prepared pan, and bake 25 minutes.
Meanwhile, make meringue: Combine hazelnuts, chopped chocolate, and cornstarch in a small bowl, and set aside. Place remaining 4 egg whites and cream of tartar in a clean mixer bowl; using a clean whisk attachment, beat on high speed until frothy. With mixer running, slowly add caster sugar; continue beating until stiff peaks form, about 8 minutes. Fold in hazelnut mixture.
Remove cake from oven. Using an offset spatula, spread meringue mixture on top of cake, and return to oven. Bake until meringue is lightly browned and crisp, 25 to 30 minutes. Transfer pan to a wire rack; let stand 10 minutes. Run a knife around the edge of the cake to loosen, and release sides of pan. Let cool, about 30 minutes, before slicing and serving.