Thursday, February 24, 2011

Baked Alaska—First attempt

Baked Alaska

The blow torch is one of my favorite kitchen tools that I love to play with use.  Yeah, better don’t play with fire.  I was thinking, beside crème brûlée, what else can I use my blow torch with?  First thing that came in mind was Baked Alaska!  I was thinking to myself... “Really?  Do I have to go that far just to play with use the blow torch?”  Yes, really. And here we go... even though I was rather hesitatant. 

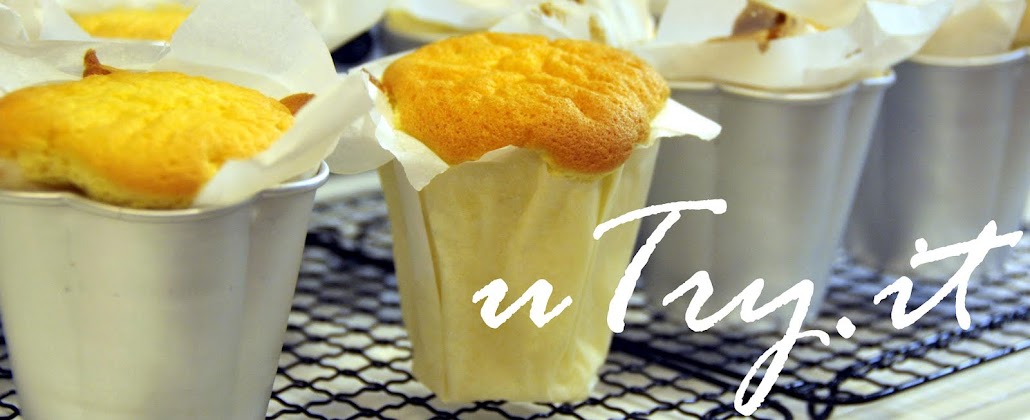
Since I already have some cupcakes baked-up, I sliced them up into 1/2 inch disks to fit into my bowls.  This way, I was already a step ahead and didn’t need to bake a whole sheet of cake just to try out this dessert.  That was a huge “motivation” for me.  Yeah, I get lazy sometimes, even in the kitchen.   :P  And you can definitely use the in-store chiffon cakes or any cakes you have on hand for the cake layer.  Guess we all love a little short cuts in the kitchen every once in a while.

Baked Alaska

So, for my very first attempt of Baked Alaska, I used previously baked chocolate cupcakes, then layered them with our favorite coffee ice cream.  It came out so perfect, so delicious, and just the flavor we love.  It’s to die for and so beautiful to look at as well.  When I make this Baked Alaska again in the future, I will have no problem baking a sheet of cake just for this.  It’s totally worth it.  Plus, it’s much easier to make than it looks.  You’ve got to give it a try and you’ll agree with me.


Baked Alaska

The meringue layer was warm, foamy, smooth and crunchy from the slightly browned tips.  Inside were layers of soft and spongy chocolate cakes and strong coffee flavor of creamy, icy-cold ice cream.  Every bite was interesting and delicious.  Hm…I couldn’t wait to make this again.  Now, here’s a small issue.  Since I used the cupcakes that I already have on hand, I just scooped out whatever last bit of ice cream I had in that tub to make this Baked Alaska, and I didn’t have the exact measurement for these 2 ingredients.  I know!  I know. What a mistake.  Anyhow, I will put the approximate amount as a guildline.  I do have the recipe for the meringue layer and that’s really the key to this dessert.  I used a bowl as my mold for the cake and ice cream layers and that bowl measured 5 1/2-inch in diameter and 3 1/2-inch in height.  I’ll provide the recipe below to make an 1-inch thick meringue layer to cover this cake.  I promise I’ll measure everything and write them down when I make this dessert again.  Guess I was too excited knowing that I can get my hands on the blow torch again!  Yeah, what a lame excuse, but so true.  :P 

Last but not least, just be very careful when you use the blow torch.  I know it’s sounds like fun (in fact, it is) to use.  But after all, it could be dangerous and definitely not a toy.  I always make sure my kids are not around when I use it (you know how kids like to copy everything we do) and store it away in a secured place that they can’t reach.  :)  Better be safe than sorry.


Baked Alaska


Baked Alaska: Printable Recipe
Servings: 4


Approximately 5 to 6 Chocolate cupcakes, cut into 1/2-inch disks
Approximately 1/2 pint of your favorite ice cream (I used coffee here)
1/2 cup sugar
2 large pasteurized egg whites
A dash of vanilla extract

Line a small bowl, 5 1/2-inch in diameter and 3 1/2-inch in height with plastic wrap.  Leaving extra plastic wrap hanging over the sides of the bowl.  Put a layer of the cupcake to cover the bottom of the bowl.  Spoon  1/3 of the ice cream onto the cake layer (about 1/2-inch thick).  Smooth the top of the ice cream and top with another layer of cupcake disks.  Break the cakes to fit into the bowl if necessary.  Top with remaining ice cream and smooth the top.  Cover with the final layer of cupcake disks, again, break the cakes to fit the surface if necessary.  Fold the plastic wrap over the cake and place in freezer for at least 45 minutes to harden.

Put the sugar and egg whites in the bowl of the stand mixer over a saucepan of simmering water and whisk constantly, keeping the mixture over the heat, until it feels hot to the touch, about 3 minutes.  Remove from heat and secure the mixer bowl to the stand mixer, beat the egg whites mixture with the whisk attachment on medium-high speed until stiff peaks form, about 5-7 minutes.  The meringue should be very thick and shiny.  Mix in vanilla extract.  Place meringue into a pastry bad with a large star tip.  Take the prepared ice cream cake out from the freezer, lift the cake out by pulling the sides of the plastic wrap.  Invert the cake and place it onto an oven safe plate, discard the plastic wrap.  Pipe the meringue onto the cake, starting from the bottom.  The meringue layer should be around 1-inch thick.   Follow manufacturer’s instruction of the blow torch and brown the tips of the meringue.  Let cake stand for 5 to 8 minutes before cutting into it.  Enjoy!

**Note: If you don’t have a blow torch, you can preheat oven to 500F before you take the cake out from the freezer to pipe.  Brown the piped cake for 4 minutes or until the meringue tips are golden brown.

This recipe is linked to :
Full Plate Thursday
Foodie Friday
Sunday, February 20, 2011

Cosmopolitan Las Vegas—Hotel Review

Cosmopolitan Las Vegas

It was our first time staying with Cosmopolitan in Las Vegas.  It’s grand opening was in Mid-December of 2010.  It’s one of the best resorts we’ve experienced on the Las Vegas Strip.  Also, this resort was one of the most “Hi-tech” hotel on the Strip.  The room was spacious, the services were excellent, and the amenities were amazing.
 Cosmopolitan Las Vegas

Each room features state-of-the-art technology control panels, plasma-screen televisions, entertainment system, wireless internet and a custom in-room bar.

Cosmopolitan Las Vegas

The oversized bathrooms offer moments of unexpected tranquility combined with breathtaking views.  I loved the Japanese soaking tubs and the rain showers.  It was a pleasant bath experience.

Cosmopolitan Las Vegas


Cosmopolitan Las Vegas

 Cosmopolitan Las Vegas

This new 2,995-room resort features oversized residential style living space with a kitchen area.  With 2 young kids myself, a microwave and a fridge in the hotel room made my life much easier.  

 Cosmopolitan Las Vegas


Cosmopolitan Las Vegas

Somehow, we got upgraded to the Terrance One Bedroom with Premium View.  The view was spectacular!  Our room balcony was facing right in front of the Bellagio water fountain.  So, we got to enjoy the lovely water fountain show in our own room, on this cozy couch (please see picture below).  In the comfort of our own room, we enjoyed this nice view of the famous Las Vegas Strip.  

Cosmopolitan Las Vegas

The Cosmopolitan is walking distance from the City Center, or you can be as lazy explorative as my kids and take the monorail (they love it and didn’t want to get off the tram after 10 rounds of ride, yes, there’s a “0” behind that “1”!)  Anyway, we got off at Aria Hotel, finally, just to visit our best friend, Jean. Jean Philippe Patisserie that is.  Then, we were in big trouble!!!  Just look at the pictures below and you’ll know why.

Jean Philippe Patisserie

Jean Philippe Patisserie

Jean Philippe Patisserie
Everything looked so delicious and it’s hard to decide what to get.  So, we settled with the Chocolate Imperial!  So yummy!  That was the afternoon tea.  For dinner, we dined at the Wicked Spoon Buffet located in The Cosmopolitan.  The food was excellent and I’ll show you more on a different post.  Stay tuned.

Before you go, here’s the Bellagio Water Fountain Show I captured just for you.  How can I not share this beautiful show with you.  Please enjoy.


Disclaimer
*Pictures of the hotel room are from the Cosmopolitan website.

Wednesday, February 16, 2011

Broccoli-Beef and Shiitake Mushroom Rice Noodle

Broccoli-Beef and Shiitake Mushroom Rice Noodle

Just realized I haven’t post that many Asian or Chinese dishes on my blog.  You might see all kinds of breads, cookies, and desserts here.  But trust me, those are not what we normally consume everyday, although I have no problem with that at all…LOL.  On average, at least five out of seven days a week, I cook a traditional Chinese dinner, which includes steam rice and 1 to 2 main dishes that contains meat (or seafood) and vegetables.  I tend to make more simple dishes on the weekdays and perhaps make the more time consuming ones over the weekends.  Nevertheless, it’s still not a simple task to cook up 2 different dishes every night, let alone came up with new dishes to cook every day.

Broccoli-Beef and Shiitake Mushroom Rice Noodle

Thanks to my son, our dinner menu has been changed quite a bit lately!  He is a big time noodle lover, really, any kind of noodles.  Whenever I serve noodle instead of rice for lunch or dinner, he sits down quietly and finishes his plate in no time.  So, we’ve been eating noodles and pastas more often, well, a lot more often lately!  Happy kids, happy parents, why not?!  :)  Now, this Broccoli-Beef and Shiitake Mushroom Rice Noodle is one of the most requested dish in the house, beside spaghetti with meat balls and pink sauce.  It’s easy to make, delicious and very flavorful.  Of course, I have no problem cooking this, any day of the week.  Simply change up the protein and veggies and you got a whole new dish!  I used beef and ham here for the protein, you can substitute with shrimp, chicken, pork, squid or eggs.  Besides broccoli, you can use spinach, asparagus, carrots, enokitake mushroom, snow peas or bak choy for the veggies.  Why this dish is so delicious?  The secret is in the shiitake mushroom sauce and the noodle base seasonings.  Of course, I’ll include the recipe for you below.  After you try this recipe yourself, please kindly let me know how you like it.  :)  Once you’ve tried this recipe, maybe that would change up the dinner menu at your home, too.   

Broccoli-Beef and Shiitake Mushroom Rice Noodle


                                          **Giveaway**

Canadian Beef is sponsoring a wonderful giveaway at Kitchen Play. Simply recreate any one recipe from this month’s Progressive Party, post about the experience on your blog and provide a link to your post on Kitchen Play to enter.  All qualifying bloggers in each course will be entered to win $100 (6 prizes total).  This contest is open through February 28, 2011. Please review the complete contest rules before entering. Good luck!

I recreated the Thai-Inspired Beef and Vegetable Soup with Rice Noodles into my Broccoli-Beef and Shiitake Mushroom Rice Noodle.  Since I don’t think my son can stand the heat from the Thai chili,  this would be a more kids’ friendly version for him. 


Broccoli-Beef and Shiitake Mushroom Rice Noodle:

Main Ingredients:
1 (14 ounce) package rice noodle
1/2 pound beef flanks, cut across the grain into 1/4-inch thick slices, then julienne to 2-inch long pieces
1 cup cooked ham, cut into thin strips
1 pound broccoli florets
10 pieces dried shiitake mushrooms, soak in hot water for at least 2 hours or over night
2 cups chicken stock
2 tablespoons fish sauce (I used the brand called 3 Crabs Fish Sauce, it’s the best flavor fish sauce out there.)
2 teaspoons toasted sesame oil
5 green onions, cut into 2-inch long pieces

Beef Marinate Ingredients:
1 teaspoon soy sauce
1 teaspoon oyster sauce
1/2 teaspoon toasted sesame oil
1/4 teaspoon pepper

Shiitake Mushrooms Marinate Ingredients:
1 tablespoon oyster sauce
1 teaspoon sugar
1 teaspoon corn starch
1 teaspoon toasted sesame oil
pinch of grounded white pepper

In a large stockpot, bring water to boil and blanch broccoli for a few minutes until crisp-tender.  Remove broccoli with a slotted spoon, set aside.  In the same pot, add the rice noodle and cook to el dente (check package instructions). Drain well and return noodles back to the pod.  Off the heat, add the fish sauce and sesame oil, mix well until all noodles are coated with seasonings.  Taste the noodle to check seasoning, add more fish sauce to suit your taste. 

Add the beef strips with the beef marinate ingredients and mix well, set aside.
Wash the re-hydrated mushrooms and squeeze out excess liquid.  Cut into 1/8-inch strips.  Mix mushrooms with mushroom marinate ingredients.  In a medium sauce pan on medium-high heat, add mushroom and sauté for 1 minute.  Add chicken stock and bring to a boil.  Turn heat to low and cover with a lid to simmer.  Stir occasionally to prevent mushrooms from sticking to the bottom of the pot.  Cook until 1/4 cup of liquid remains. 

Meanwhile, heat a sauté pan on medium-high heat.  Add a teaspoon of oil and sauté the beef strips until cooked through.  Remove from heat and add them into the broccoli.  In the same pan, sauté the ham for a few minutes until edges are slightly brown.  Remove from heat and add to the broccoli mixture.

Heat the pot of noodle on low, add broccoli-meat mixture to the pod, add mushrooms and all liquid/sauce into the noodle.  Stir and mix all ingredients together until noodle heated through.  Off the heat, mix in the green onion.  Serve warm.


This recipe is linked to:
Hearth and Soul Hope
Slight Indulgent Tuesday
Tuesday at the Table
Real Food Wednesday
Gluten-Free Wednesdays

Saturday, February 12, 2011

Chocolate Dipped-Strawberry Meringue Roses—Happy Valentines Day

Chocolate Dipped-Strawberry Meringue Roses 

I don’t need a dozen of roses for Valentine’s Day.  Just give me a few of these Chocolate Dipped-Strawberry Meringue Roses and I’ll be a very happy girl (my hubby should be really happy, too, when he reads this post).  But really, who needs roses when you have something so beautiful and delicious like this, all-in-one?!  In fact, not just me, my kids love these meringue cookies a lot as well.  Especially, when they get to help out in the dipping process.  End results?  Beautiful Chocolate Dipped-Strawberry Meringue Roses, and melted chocolate all over their hands and faces.  Well, that’s really the fun part for them.  :)

Chocolate Dipped-Strawberry Meringue Roses

These Chocolate Dipped-Strawberry Meringue Roses are crisp, airy and flavorful.  I added some freeze dried strawberries that I found in Trader Joe’s and they enhanced the flavor of these cookies tremendously.  I didn’t have any strawberry flavor extract at home, so, these freeze dried fruit is perfect for this recipe.  Plus, I think the real fruit always tastes better than extract.  I really love the tangy flavor from the strawberries. 
 Chocolate Dipped-Strawberry Meringue Roses

It’s never too late to make some of these beauties for your Valentine.  Hope you all have a wonderful and romantic time with your loved ones.  Happy Valentine’s Day!

I'm submitting this recipe to Holiday Recipe Swap.  Come join the fun at the My Baking Addiction and GoodLife Eats Holiday Recipe Swap sponsored by OXO.


Chocolate Dipped-Strawberry Meringue Roses: Printable Recipe

Makes: 28 2-inch cookies


3 large egg whites
1 package (3 ounces) Strawberry Jell-O
1/4 cup caster sugar
1/4 cup freeze dried strawberries
1/2 teaspoon pure vanilla extract
Chocolate Chips (for dipping, I used bittersweet chocolate here)

Preheat the oven to 200°F. Line 2 baking sheets with parchment paper or silicone mat.

Grind freeze dried strawberries and sugar in a food processor until powdery. Set aside.

Place the egg whites in a large bowl and with an electric mixer fitted with the whisk attachment, beat on medium until frothy. Pour the Jell-O, and strawberry mixture into the bowl in a slow, steady stream. Turn mixer on high and continue to beat until the egg whites are stiff and shiny, about 5 minutes.  Add vanilla extract until just combined.

Scrape the meringue into a pastry bag fitted with a medium star tip and pipe the cookies onto the lined baking sheets.  Starting in the middle and make 2 full circles, about 2-inch in diameter and 1 1/2-inch apart. 

Bake the meringues until they are firm, about 2 hours. Turn off the oven and leave them in there overnight.

In a microwave heated bowl, melt your favorite chocolate chips on high.  Stirring chocolate in 30 second interval until chocolate chips are just melted.  Slightly cool melted chocolate before dipping the bottom of the meringue roses and place them on a lined baking pan.  Refrigerate for 15 minutes or until chocolate firmed up.

This recipe is linked to:
Sweets for Saturday
Tuesday Twister
Permanent Posies
The King’s Court IV
Slight Indulgent Tuesday
Simply Sweet Home
Foodie Friday 
Full Plate Thursday
Friday Potluck

Tuesday, February 8, 2011

The Perfect Valentine’s Day Cake--Meyer Lemon and Strawberry Mousse Cakes

Meyer Lemon and Strawberry Mousse Cakes

I love the autumn and winter season.  There’s something in the air that makes everything more romantic.  Maybe it’s the chilling weather that makes you want to cuddle up with your significant other.  Or, it could be the falling leaves from the back yard that resemblance some romantic movie scenes.  Perhaps, it’s the warmth and sweet scents of a cake baking in the oven that brings back some loving memoires.  Oh, isn’t Valentine’s Day just around the corner?  I guess that is probably why.  :P
   

Meyer Lemon and Strawberry Mousse Cakes

Meyer Lemon is one of my favorite fruit.  It is a citrus fruit native to China, very much to my surprised somehow.  I don’t recall seeing or using much of them back home (Hong Kong).  Meyer lemon is a cross between a lemon and either a mandarin or common orange.  Its trees produce fruit throughout the year and the majority of the crop is ready in winter.  Maybe that’s another reason why I love winter so much because I get to harvest more of these yummy fruit from my in-law’s yard.  Hooray!     

Meyer Lemon and Strawberry Mousse Cakes

These Meyer Lemon and Strawberry Mousse Cakes are festive, beautiful, and delicious.  They represent layers of love and happiness.  Just like lives, there are sweet and sour moments.  I cherish and savor every moment of it.  If you haven’t plan on how to celebrate your Valentine’s Day yet, why not make this cake to celebrate with your loved ones.  (*wink wink*)  I’m sure you’ll fall in love all over again. 

DMeyer Lemon and Strawberry Mousse Cakes


Meyer Lemon and Strawberry Mousse Cakes:
 
Ingredients for the cake layer:

5 eggs, separated
3 oz butter
1/4 cup heavy cream
1/4 cup plain yogurt
1/2 cup cake flour
1/2 cup + 2 tablespoon caster sugar
1 teaspoon vanilla extract
5/8 teaspoon cream of tartar
pinch of salt

For the cake layer:

Preheat the oven to 350F. Grease a 10X15-inch baking sheet (or jelly roll pan) and line it with parchment paper, set aside. Melt butter in a microwave oven, let cool. Separate the egg yolks and the egg whites.
Use an electrical mixer to beat egg whites and salt for 3 minutes, then add cream of tartar and continue beating until soft peaks. Pour in about half of the sugar in the egg whites and beat until stiff peaks, set aside.

In another bowl, beat egg yolks and the remaining of the sugar until pale yellow (3-5 mins). Then add heavy cream, yogurt and vanilla extract, beat until well combined. Add melted butter and continue to beat mixture.
Turn mixer to low speed and sift in cake flour, mix until just combined, do not over mix.

Fold egg whites into the flour mixture gently with a rubber spatula just until all ingredients are incorporated. Do not stir or beat. For a better result, fold in egg whites in 3 batches.
Pour batter onto baking sheet. Bake at 350F for 8-10 minutes. When the surface is dry and spongy when touch, it's done. Let cakes cool completely in the baking pan on a wire rack.


Ingredients for the Meyer Lemon Mousse:

Grated zest of 1 Meyer lemon
1/2 cup (125 ml) Meyer lemon juice
1/4 cup (50gr) sugar
2 eggs
1 cup (250 ml)heavy cream
1/2 teaspoon vanilla extract

For the Meyer Lemon Mousse:

Combine the zest, sugar, and juice in a saucepan, bring to a simmer. In a small bowl, beat the eggs until light. Beat half of the lemon mixture into the eggs to temper. Scrape the egg mixture back into the saucepan and cook, stirring constantly until it thickens up, about 3 minutes. Strain and let it cool to room temperature.

In a stand mixer, whip the cream to stiff peaks. Incorporate the cooled lemon curd to the cream in three additions.

Ingredients for the Strawberry Mousse:
2 teaspoons powdered gelatin
1 tablespoon water
8 oz (210gr) strawberries, pureed
1/4 cup (50gr) sugar
1/2 teaspoon lemon zest
1 tablespoon lemon juice
3/4 cup (6oz - 190ml) heavy cream

For the Strawberry Mousse:

Sprinkle the gelatin over the water in a small bowl and set aside to bloom (soften).
In a medium saucepan set over medium heat, stir together the strawberries and sugar just until hot. Add the gelatin and stir until it is completely melted. Let cool to room temperature.

Whip the heavy cream to medium peaks. Once the strawberries are cooled, carefully fold the whipped cream into the fruit base.

To assemble:

Spray a 9 by 5-inch nonstick loaf pan with cooking spray. Using 2 pieces of parchment paper, line the pan, allowing the excess to hang over the ends and sides.  Cut the cooled cake in thirds, vertically, creating 3 pieces of 9 by 5-inch cake layers.  Place a layer of cake on the bottom of the lined loaf pan. Top with half of the lemon mousse. Use a specula to even out the surface. Place another piece of cake on top and spread it with the strawberry mousse. Top it with the last layer of cake and the remaining half of the lemon mousse. Smooth the top with a specula and fold the overhanging parchment paper over the mousse and refrigerate overnight.

When ready to serve, lift the cake out with the overhanging parchment paper. Peel off the paper and cut into 1.5 inch thick slices. Top with strawberry and/or candied Meyer lemon and enjoy.


This recipe is linked to:
Foodie Friday
Sweets for Saturdays

Saturday, February 5, 2011

Philly Friendship Braided Bread

I believe every dish and every new recipe has a story behind it.  The story could be cooking with your loved ones' favorite ingredients, so that you can cheer him/her up after a long day of work.  Or it could be a story of eating healthy for yourself and/or for the family.  How about a story to celebrate friendship?  This Philly Friendship Braided Bread I created is especially made for Suzanne, someone I know and connected through food, to celebrate our friendship.


Philly Friendship Braided Bread 

I know Suzanne through The Philadelphia Cream Cheese Recipe Contest less than 6 months ago.  We’ve never met but I felt like she’s my long lost sister.  We shared recipes, ideas, and our life’s stories through the Philly community, and later on, through my blog.  Little did I know, a recipe competition site is so welcoming and supportive.  The Philly community is filled with love and caring, pretty much to my surprise and totally not what I had expected when I submitted my very first entry.

Besides Suzanne, there are many other “brothers and sisters” I get to know through that site.  Hop over and check it out here.  I promise you won’t be disappointed.

Back to this particular recipe.  What inspired me to create this bread?  It started with a comment left by Suzanne on my Birthday Post

“Happy Birthday Amy!!! I tried your TangZhong style white bread and my family is now your best friend! It was amazing, easy to make and really fun. Best of all it was so delicious. I made my son's lunch sandwich with it and my daughter and her boyfriend ate a whole loaf (he snuck it home with him). I've made it twice with the same great results. I can't wait to try something like the angel cake soon. Thanks for this amazing blog.”

It was the best birthday gift I’ve received this year!  As a blogger and foodie, nothing makes me more happy than knowing my readers and my friends tried my recipes and loved them.  (especially with my blog name, hello…?) I know many of you might have tried my recipes, but might not had posted a comment to let me know.  (hey, it’s never too late.  I still accept belated birthday gifts! LOL)  So, thank you Suzanne, from the bottom of my heart. 

Then we went on exchanging emails and talked about what we can make with this basic bread recipe.  I shared with Suzanne some other fillings I’ve tried and loved.  Then, I was thinking to myself, I knew Suzanne through the Philadelphia recipe contest, why not create a recipe for her using Philly Cream Cheese?  So, here we go.  Philly Friendship Braided Bread.  It’s as beautiful as Suzanne herself, both inside and out. 

Philly Friendship Braided Bread

By the way, Suzanne sent a picture of her creation of a loaf bread using my TangZhong recipe.  Isn’t it amazing!? 

Suzannes Loaf

Thank you again Suzanne for your inspiration.  I know you love visual tutorial.  So, I included the step-by-step pictures instructions here, just for you!  ;)  I hope you and your family enjoy this recipe as much as my family does!  These Philly Friendship Braided Breads are my family’s new favorites now. 

This pictures below shows step number 4 and 5 from the recipe below.  After you roll out the dough to a 5 by 5-inch square, cut off the 4 corners of the dough as shown.  Then cut the two sides of the dough a few times to make even sized strips(about 1/2-inch wide each).  Then, spread a tablespoon of cream cheese in the middle and top with a tablespoon of your favorite preserves.  I used orange marmalade here.  You can use, strawberry preserve, lemon curd, or blueberry preserves.

Philly Friendship Braided Bread

Then, fold the top and bottom parts of the dough to the center.

Philly Friendship Braided Bread

Take one strip of dough from one side and fold it over the fillings at an angle, alternating with the other side like crossing arms, until all pieces are done.  Make sure to overlap the strip in the middle so they stick together during second proof. 

 Philly Friendship Braided Bread


Philly Friendship Braided Bread

Let the filled dough proof the 2nd time in a warm place for 30 to 45 minutes, or until doubled in size.  Brush egg wash on top and bake.  They turned out really soft, fluffy and delicious.  I love the oozing creamy filling inside.  They are best served warm or at room temperature.  My kids love the Blueberries and Strawberries preserves fillings the most.  I personally love the orange marmalade and lemon curd.  Of course, you can make different kinds of filling in the same batch too.  That’s the fun part.

Philly Friendship Braided Bread

I'm submitting this recipe to the Holiday Recipe Swap.  Come join the fun at the My Baking Addiction and GoodLife Eats Holiday Recipe Swap sponsored by Red Star Yeast. 


Philly Friendship Braided Bread: Printable Recipe

Makes 8 individual braided buns

TangZhong 湯種 Ingredients:
1/2 Cup Boiling Water
1/4 Cup Bread Flour


Bread Dough Ingredients:
1/2 Cup Warm Milk
1/2 Teaspoon Salt
3 Tablespoon Sugar
3 Tablespoon Melted Butter
1 1/2 Cup Bread Flour
1 1/3 Teaspoon Active Dry Yeast
Filling Ingredients:
4 ounces of Philadelphia Cream Cheese, room temperature
1/2 cup of your favorite preservers, marmalade or lemon curd

Egg Wash Ingredients:
1 Beaten Egg
1 Teaspoon water


To Make The TangZhong 湯種:
Place bread flour in a small bowl, pour boiling water over the bread flour and stir quickly with a fork to combine until no lumps.
Wrap mixture (it'll be a very wet dough) with plastic wrap, form dough in ball/round shape and leave in refrigerator overnight.


To Make The Bread:
1. Take out the TangZhong 湯種 from the fridge at least an hour before use (I usually leave it on countertop until it's room temperature).
2. In a bread machine, pour in ingredient in this order, warm milk, TangZhong 湯種, salt, sugar, butter, bread flour and yeast. Set bread machine to dough setting according to its user menu.
3. When dough is ready, take it out from bread machine and punch it a few times to deflate it. Divide dough into 8 equal portions and shape them into balls. Leave them in a warm place to rest 15-20 minutes
4. On a slightly floured board, roll each portioned dough with a floured rolling pin to a 5 by 5-inch square.  Cut off the 4 corners of the dough, then slit the two sides of the dough a few times to make even size strips(about 1/2-inch wide) as shown on the pictures above.  Spread a tablespoon of cream cheese in the middle and top with a tablespoon of your favorite preserves. 
5. Fold the top and bottom parts of the dough to the center.  Take a strip of dough from one side and fold it over the fillings at an angle, alternating with the other side like crossing arms, until all pieces are done.
6. Let dough proof the 2nd round for 30 to 45 minutes in a warm and moist place.
7. Preheat oven 355°F. Brush egg wash on top and bake for 15 to 17 minutes. Cool on rack.

Tips: When proofing the dough, make sure it's in a warm place and covered with wet towel or plastic wrap so it won't dry out. I usually place it in the oven with a bowl of hot water.

Note: The dough setting on my bread machine kneads the dough for 27 minutes and keeps the dough warm to proof for 1 hour.  If you don’t have a bread machine and knead your dough by hand, make sure you knead the dough for 15 to 20 minutes (depends on your strength and speed) and proof it for a hour until the dough double in size before you move on to step 3 from above.)


This recipe is linked to:
Tuesday Night Supper
It’s a Blog Party
Midnight Maniac Meatless Mondays
A Southern Fairytale
Full Plate Thursday
Sweet Rolls that Rock
Themed Bakers Sunday

Wednesday, February 2, 2011

Happy Chinese New Year—恭喜發財 (Gong Hay Fat Choi)

Butter Cookies

Today is the first day of the Chinese New Year or the Lunar New Year, and 2011 is the Year of the Rabbit.  Chinese New Year is the longest and most important festivity in the Chinese Lunar Calendar.  It is the tradition that on the Eve of Chinese New Year, supper is a feast with families.  Early the next morning, children will greet their parents by wishing them a healthy and happy new year(Gong Hay Fat Choi), and receive money in red paper envelopes like those from the picture below (yeah, I know, these are not red.  They are more modernized designs and the Chinese believe that gold is another lucky color besides red). 

Butter Cookies

Another tradition on the first day of Chinese New Year is that the families visit the oldest and most senior members of their extended family, usually their parents, grandparents or great-grandparents and so forth (pretty much like Thanksgiving in the U.S.)  Along with our visits, we always bring some delicious treats.  And butter cookie has been a popular item that people would bring as a treat.  However, I think the popularity of the butter cookie treat is totally influenced by the British culture.  This is because Hong Kong was a British Colony from 1841 until 1997, when China regained sovereignty.  Nevertheless, these butter cookies are delicious treats, addictively delicious treats!  They are buttery and got the melt-in-your mouth texture.  I made a batch 2 days ago and they were all gone in a few hours.  So, I made 2 more batches yesterday just to make sure I have enough to share with my parents and brothers.  (I better wrap them up before they all migrate to my stomach before the new year!)

Butter Cookies with Chocolate Chips


Since butter is the star ingredient in this recipe, I used the best I could find, Pure Irish Butter!  The cookies came out richer and creamier than those with just regular butter. Since one of the Chinese New Year tradition is to go all out to celebrate, it is time to bring out the good stuffs!  :)   And, how can I resist from adding a chocolate chip on top of each cookie!?  I used bitter-sweet chocolate chips, a nice match with these butter cookies since they are not overly sweet.  Oh my, I can’t find words to describe their deliciousness any more, they are out of this world yummmmy! 

Butter Cookies with Chocolate Chips


Although I may not be able to visit all of you to deliver a Gong Hay Fat Choi and a basket of butter cookies in person, I want to share this recipe with you and hope you’ll make some at home to enjoy with your family.  恭喜發財(literally means wish you good wealth), also, wish you good health, happiness, longevity and prosperity in the Year of Rabbit!


Butter Cookies


I'm sharing this post with Holiday Recipe Swap.  Come join the fun at the My Baking Addiction and GoodLife Eats Holiday Recipe Swap sponsored by Kerrygold.


Butter Cookies:  Printable Recipe

2 1/4 cups cake flour
10 tablespoons butter, room temperature (I used Kerrygold Pure Irish Butter)
3 tablespoons caster sugar
1/2 cup powdered sugar
3 egg yolks 
1/2 tsp vanilla extract
Pinch of salt

Preheat oven to 375F.  Place rack on the upper 3rd of the oven.

Cream butter with an electric mixer with paddle attachment over medium speed until light.  Add caster sugar and powdered sugar, continue to beat until fluffy.

Add egg yolks into the butter mixture, one at a time.  Continue to beat until well combined.  Then, beat in vanilla extract.

Sift flour and salt into the butter mixture. Use a spatula to combine all ingredients.  Transfer the batter into a pastry bag with a large star tip.

Pipe the batter on a lined baking sheet in 1 1/2-inch rounds and 1 1/2-inch apart. Bake for 12 to 13 minutes, or until edges are golden brown. Cool on a wire rack.


This recipe is linked to:

Tailgating Time
Sunday at One Food Club
Mouth Watering Monday
Let’s Do Brunch
Midnight Maniac Meatless Mondays
It’s a Blog Party
Tuesday Night Supper Club
Slightly Indulgent Tuesday
Tempt My Tummy Tuesday
Miz Helen's Country Cottage
Passionately Artistic
Sweets for Saturdays