Tuesday, September 28, 2010

A Loaf of White Bread with TangZhong Method (白方包--湯種法)

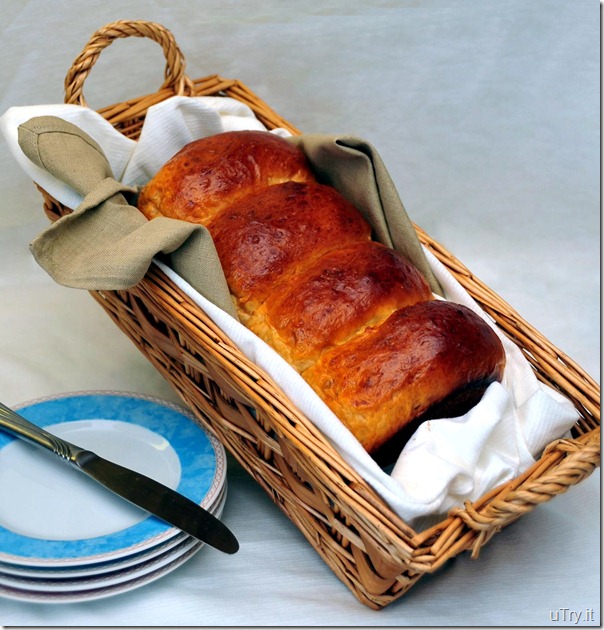
White Bread with TangZhong Method


There are many recipes and methods of making bread.  Ever since I discovered how amazing this TangZhong Method (湯種法) is, I never switched back to the old recipes.  TangZhong method was originated from Japan, to make soft and fluffy bread.  The most amazing part is, the bread made with this method stays soft and fluffy even after a few days.  Simply reheat the slice of bread/bun in the microwave for 10 to 15 seconds, you’ll have a warm, soft and fluffy bun on hand, just like it’s fresh out of the oven.
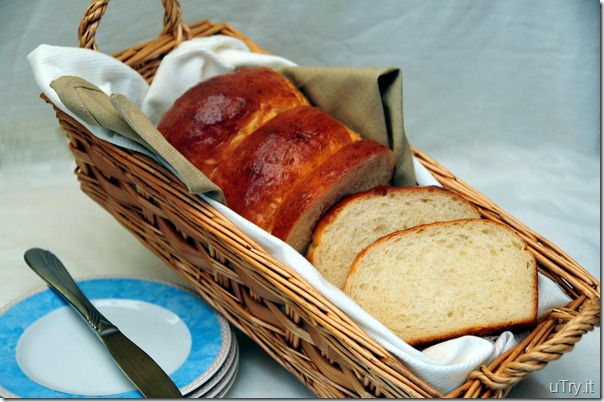
  White Bread with TangZhong Method

Basically, the TangZhong method is to mix 1 part of bread flour with 5 parts of water (by weight) at 65°C (149 °F) to form a paste/wet dough.  At 65°C, the gluten in the bread flour and water mixture would absorb the moisture and become leavened.  Thus, when the TangZhong is added into other ingredients of a bread dough, it will be heightened and produce fluffier bread.

White Bread with TangZhong Method


With the basic TangZhong bread recipe, you can wrap the dough with any ingredients you preferred, the sky is the limit.  Whether sweet or savory, or simply just white toast, they’ll all be wonderful.  With the TangZhong bread recipe, I’ve made Hong Kong Bakery style hot dog buns, ham and cheese rolls, crab and sweet corn buns, coconut custards loaf, sesame paste buns, BBQ Pork Buns, etc.  The simple white loaf is the one I always go back to make more. 
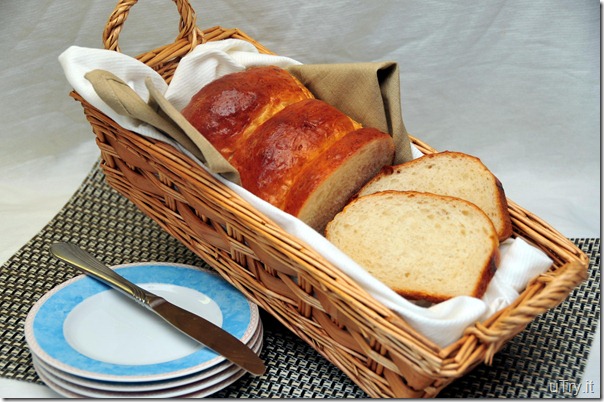

White Bread with TangZhong Method

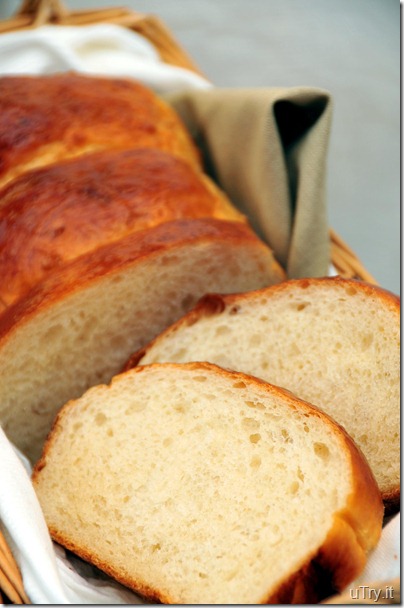
It’s soft and fluffy, melt in your mouth goodness.  It has a hint of sweetness and buttery flavor.  Look at the air bubbles in between the bread, it’s lovely.  You can slather it with butter, your favorite preserves, wrap your kind of meat or veggies in between 2 slices….or just like me, eat it plain!  :)  Yes, you really don’t need anything with this bread, it’s that good!  Go give it a try and you’ll fall in love with this recipe, just like I did.


White Bread (Loaf) with TangZhong Method (白方包--湯種法):
Printable Recipe

 
Makes a 9x5-inch Loaf


TangZhong 湯種 Ingredients:
1/2 Cup Boiling Water
1/4 Cup Bread Flour


Bread Dough Ingredients:
1/2 Cup Warm Milk
1/2 Teaspoon Salt
3 Tablespoon Sugar
3 Tablespoon Melted Butter
1 1/2 Cup Bread Flour*
1 1/3 Teaspoon Active Dry Yeast


Egg Wash Ingredients (optional):
1 Beaten Egg
1 Teaspoon water


To Make The TangZhong 湯種:
Place bread flour in a small bowl, pour boiling water over the bread flour and stir quickly with a fork to combine until no lumps.
Wrap mixture (it'll be a very wet dough) with plastic wrap, form dough in ball/round shape and leave in refrigerator overnight.


To Make The Bread:

1. Take out the TangZhong 湯種 from the fridge at least an hour before use (I usually leave it on countertop until it's room temperature).

2. In a bread machine, pour in ingredient in this order, warm milk, TangZhong 湯種, salt, sugar, butter, bread flour and yeast. Set bread machine to dough setting according to its user menu.

3. When dough is ready, take it out from bread machine and punch it a few times to deflate it. Divide dough into 4 equal portions and shape them into balls. Leave them in a warm place to rest 15-20 mins.

4. Knead each dough ball a few times and shape each into an oval shape. Place them diagonally into a 9x5-inch loaf pan. Let dough proof the 2nd round for 45 mins in a warm and moist place.

5. Preheat oven 355°F. Brush egg wash on top (optional) and bake for 23-25 mins

Tips: When proofing the dough, make sure it's in a warm place and covered with wet towel or plastic wrap so it won't dry out. I usually place it in the oven with a bowl of hot water.

Note: The dough setting on my bread machine kneads the dough for 27 minutes and keeps the dough warm to proof for 1 hour.  If you don’t have a bread machine and knead your dough by hand, make sure you knead the dough for 15 to 20 minutes (depends on your strength and speed) and proof it for a hour until the dough double in size before you move on to step 3 from above.)

*If the weather in your area is rather humid, fell free to add up to 1/4 cup of bread flour so the dough will be easier to handle.  I usually look at the dough in the bread machine to determine if additional flour is needed.
Saturday, September 25, 2010

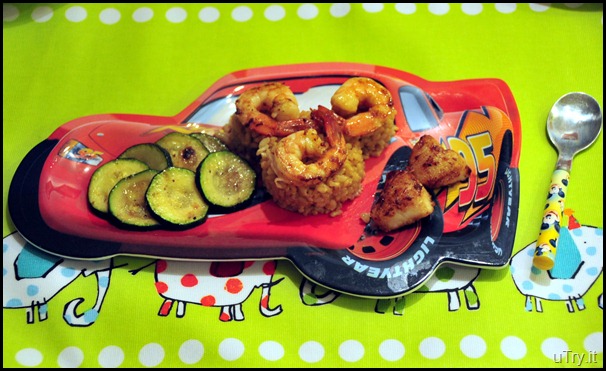
“Mickey Mouse” Seafood Over Brown Rice


“Mickey Mouse” Seafood Over Brown Rice
 
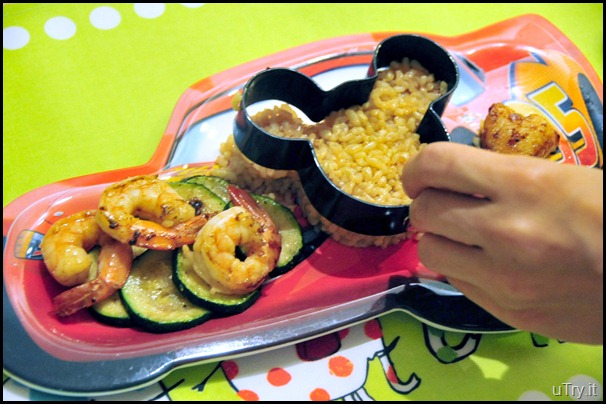
It’s not easy being a Mom, I learned that after I became one myself.  LOL…Not sure if the moms out there have troubles having your kids sit still until they finished their meals?  Sound familiar, right?  Sometimes, we all need a little tools and gadgets to make a kid’s meal looks fun and festive.  I found one and just want to share with you.  Look at the picture below, it’s a really fun plate to eat, don’t you agree? 

   “Mickey Mouse” Seafood Over Brown Rice

This Mickey Mouse ring is supposed to be an egg ring (haven’t make an egg with it yet, this is the very first use of the ring).  I do plan to mold eggs, pancakes, and cakes, with it in the future, stay tune.  I love the non-stick coating because it’s really easy to clean up.  The material is very sturdy and I’m sure it’ll maintain its shape over time.  Please click here if you’re interested to get one for your kids or for the kids in you.  :)  My son loved it and he finished his dinner in record time!  Happy kid and happy mom!


This Post is Shared with:

Everyday Sister Sharing Sunday

Wednesday, September 22, 2010

Mid-Autumn Festival 中秋節

Moon Cakes

Happy Mid-Autumn Festival to you all! 

The Mid-Autumn Festival is also known as the Moon Festival or 中秋節 in Chinese.   It’s a popular harvest festival celebrated by Chinese and Vietnamese, dating back over 3,000 years.  The Mid-Autumn Festival is held on the 15th day of the eighth month in the Chinese calendar, which is usually around late September or early October in the Gregorian calendar.   The moon is supposedly at its fullest and roundest. The traditional food of this festival is the moon cake, of which there are many different varieties.  I personally preferred the traditional ones, with white lotus seed paste and preserved egg yolks. 
 
Moon Cakes

Honestly, I’m not a big fan of moon cakes.  Usually, they are a bit too rich and too sweet for my liking.  However, since this is a much observed tradition for the Chinese, and the moon cakes are usually given to friends, families and colleagues as gifts before the festival.  It’s hard not to have them in the house around this time of the year.  Every year in the past, I’ll have just a piece or 2 of the moon cake when we celebrate this festival.  (1 piece = 1/8 of a moon cake) Okay, okay, the most maybe 1/2 of a cake, that’s it.  That total consumption is over a few days period, not all at once!

Moon Cakes

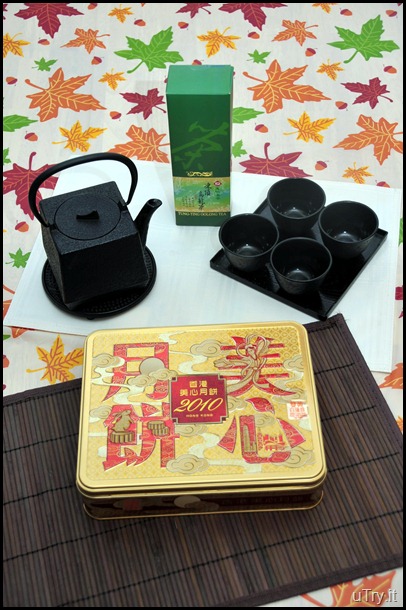
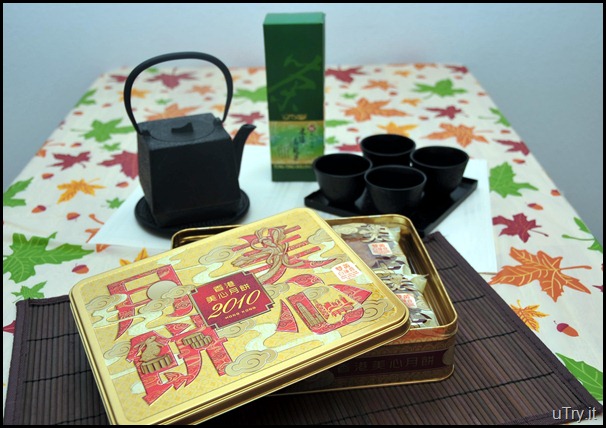
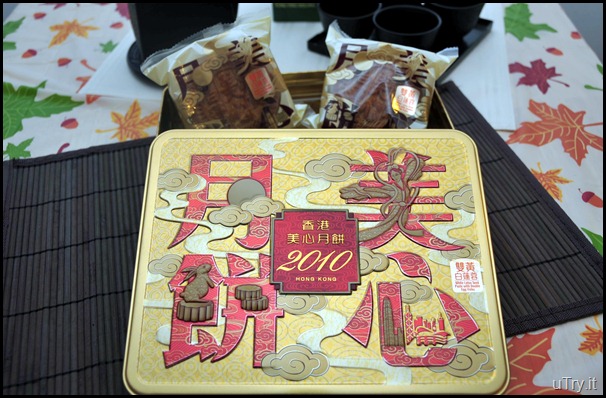
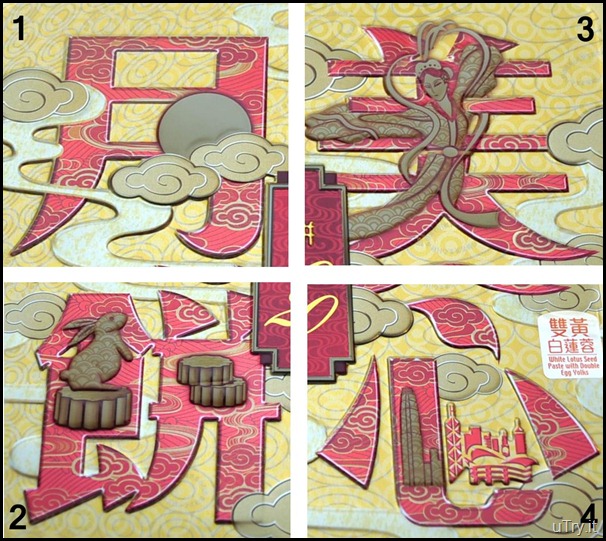
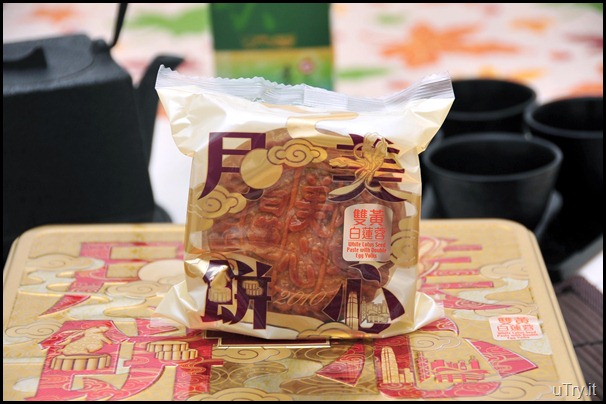
This year, I got a box of moon cakes from my Mom.  Look at the tin cover, it’s an art of itself!  Don't you agree?

MOON CAKE TIN


Picture marked number 1 above is the Chinese character of moon, with an image of the moon as well.  Picture marked number 2 is the Chinese word means cake, along with the cake images and a rabbit.  There’s an ancient Chinese story about the rabbit.  Click here if you want to read more on the rabbit story.  Look up into the sky with the full moon tonight, will you?  Don’t you see a shadow on the moon that looks just like the profile of a rabbit?  Alright, maybe I’ve been drinking too much!  LOL…

Picture marked number 3 and 4 is the name of a very popular bakery in Hong Kong, named Maxim’s.  They literally means beautiful heart.  In picture 3, there’s the image of Lady Chang'e (嫦娥 in Chinese).  In picture number 4, that is the image of the Hong Kong harbor and buildings.  I really love the design of the tin cover, almost better than the moon cakes, almost!

Moon Cakes
 
Traditionally on this day, Chinese family members and friends will gather to admire the bright mid-autumn harvest moon, and eat moon cakes and pomelos under the moon together, along with a cup of hot tea (to cut the grease from the cakes). Accompanying the celebration, there are additional cultural or regional customs, such as carrying brightly lit lanterns and watch dragon dance.  Too bad I didn’t have a chance to get the pomelos (one of my favorite fruit) nor the lanterns.  And of course, no dragon dance here either.  I did manage to cut myself a piece of the moon cake and enjoy it with a cup of hot tea though.   
 
Moon Cakes

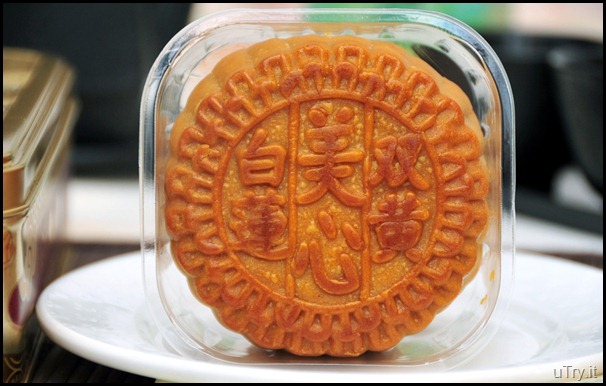
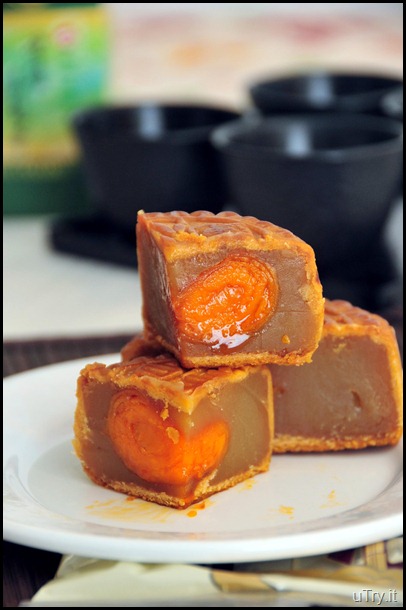
So, this is how a traditional moon cake looks like.  This particular moon cake is with white lotus seed paste and double preserved egg yolks fillings (my favorite type and combinations).  Not kidding you, the bakers managed to jam 4 yolks in one moon cake, I think that’s a bit too much though.  Some other combination of fillings include but not limited to ham and nuts!  Aren’t these supposed to be desserts?  Oh well, that’s why I usually stick with the traditional ones.  Anyway,when I cut into this moon cake, the natural oil from the yolk burst and started dripping.  I was thinking wow, that’s such a nice yolk!  It surely was a pleasant surprise.  Then the fragrant from the white lotus seed paste and yolks filled the whole room.  I couldn’t wait to take a bite (that’s so not me, remember, I don’t really like moon cakes)!  Look at the inside of the moon cake!  Does the preserved egg yolk look like a full moon to you?  That’s the whole idea of putting a preserved egg yolk inside the moon cake, to resembling the full moon.  :)

Moon Cakes

Let me tell you, I fall in love with this moon cake.  The skin layer of the cake is soft and thin, it is important for a nice moon cake to have a "thin skin" and that takes some pastry skills to do that.  The white lotus seed paste is not too sweet (compared to those I had in the past), also it’s very smooth and creamy.  The preserved egg yolks are crumbly and not too salty.  They tasted rich but not greasy at all.  The hint of saltiness from the preserved egg yolk balances perfectly with the sweetness from the lotus seed paste.  No wonder Maxim’s is one of the best bakery in Hong Kong now.  They really did use the best ingredients and what a great recipe they have!  Most importantly, I got to enjoy it with my family!  Guess what? I bet my moon cake consumption will break the past 30 years’ records!  LOL…  Thank you for the moon cakes again, Mom.  To all of you, Happy Mid-Autumn Festival again and hope you get to spend time with your family and love ones as well.

Moon Cakes

Friday, September 17, 2010

Chocolate Mousse Cakes

Chocolate Mousse Cakes

The weather in L.A. is weird, it could be cool as the temperature range in the mid to high 60s Fahrenheit on one day, then, hot like an oven in the mid 90s F. the next day.  The temperature between day and night is easily 20+ degree different!  According to the Chinese/Luna calendar, the Mid-Autumn Festival will be here in less than a week.  Why are we still in the 90s F?  I couldn’t wait for the weather to get cooler! 


Chocolate Mousse Cakes


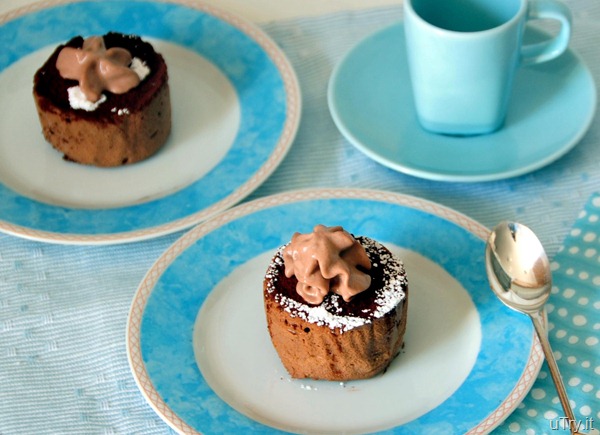
The reason I mentioned the temperature was because during the photo shoot of this mousse cake, the chocolate whipped cream on top of the cake melted too quickly before I had a chance to capture a nice shot (see above picture)!!!  Oh well, I guess I should work on my photography skills instead of “complaining” about the temperature! LOL…at least, L.A. has 99% sunny days on average.  :P 


Chocolate Mousse Cakes


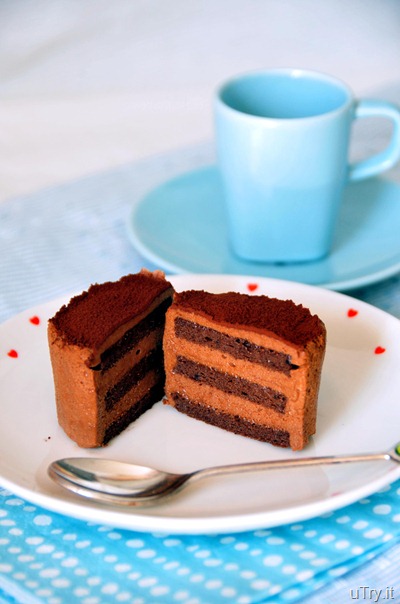
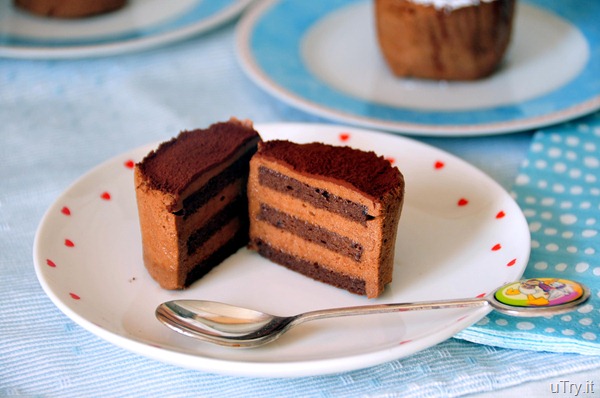
Anyhow, my son finished the whole (2-inch) cake all by himself right after lunch and wanted more!!!   Apparently, the melted whipped cream didn’t bother him!  I guess he really wanted a chocolate cake as he’s been asking me to make him one for a while.  In the past, I’ve made chocolate Swiss Rolls, many times.  I wanted something new.  Something with even more chocolate flavor.  So, I created this Chocolate Mousse cake.  It is simply perfect for chocolate lovers (did I mention before that my family loves chocolate?)  This Chocolate Mousse Cake is soft, fluffy, creamy, and chocolaty.  Hm…heavenly in every bite. 


Chocolate Mousse Cakes


Chocolate Mousse Cakes:

Makes about 16 2-inch cakes

For the Chocolate Cake:

1/4 Cup Cocoa Powder
1/4 Cup Cake Flour
3 Large Eggs, separated, plus 2 Egg Yolks
1/4 Cup plus 2 Tablespoons Caster Sugar
4 Tablespoons (1/2 Stick) Butter, melted
1/4 Cup Whipped Cream
1/2 Teaspoon Vanilla Extract
Pinch of Instant Coffee Granulate
Pinch of Salt

For the Chocolate Mousse

3/4 Cup Whole Milk
1/4 Cup plus 2 Tablespoons Sugar
1/4 Teaspoon Salt
2 Teaspoon Instant Coffee Granulate
6 Large Egg Yolks
1 1/4 Teaspoons Powdered Gelatin, dissolved in 1 tablespoon cold water
5 Ounces Bittersweet Chocolate, roughly chopped
1 Cup Whipping Cream
1/2 Teaspoon Vanilla Extract

To make the cake:

Preheat the oven to 450 degrees F. Spray an 11 x 17 baking pan with cooking spray, line with parchment paper. In a bowl, sift the cocoa powder and cake flour together, set aside.

In a stand mixer with the whisk attachment, whisk the egg whites with a pinch of salt at medium-high speed until soft peaks. Add 1/4 cup of the sugar, a tablespoon at a time. Continue whisking until medium peaks. Transfer the egg whites mixture into another bowl.

Place all 5 egg yolks in the mixer bowl with the rest of the 1/4 cup sugar and whisk on medium speed until pale yellow. Pour in whipped cream, vanilla extract and instant coffee, beat for another minute. Add butter and continue to beat until well combined. Turn mixer to low and add cocoa and cake flour. Mix until just combine, do not over mix the batter.

Fold egg whites into the egg yolk mixture with a rubber spatula in 2 batches. Spread the batter onto the lined baking pan and even out the surface. Bake for 6 to 7 minutes. The surface should be just dry and springy to the touch. Let cake cool completely on a rack .

To make the mousse:

Combine the milk, sugar, and salt in a small saucepan, bring to a simmer. Whisk in the instant coffee and stir until fully dissolved. Remove mixture from heat.

Whisk the egg yolks in a large bowl. Pour in about half of the milk mixture in a steady stream while whisking constantly. Pour the egg mixture back into the saucepan and return to the stove. Cook for another 2 minutes on low heat, stirring constantly.

Remove saucepan from heat and add the gelatin. Stir until the gelatin is fully dissolved. Add in the chocolate and stir until melted and incorporated. Let chocolate mixture sit and cool to room temperature.

Whip the cream and vanilla to stiff peaks. Stir a quarter of the whipped cream into the chocolate mixture to lighten up. Fold the rest of the whipped cream gently into the chocolate mixture. The mixture may look a bit runny now but it will firm up as it cools and the gelatin sets.

To assemble the cakes:

Place 16 2-inch cake rings on a baking sheet lined with parchment paper. Use a slightly under 2" round cookie cutter to cut out circles from the cake. You need 3 circles of cakes for each cake ring. Place a circle of cake into the bottom of a cake ring, then spoon a heaping spoonful of mousse in. Top with another circle of cake, then another heaping spoonful of mousse. Top with the final circle of cake, and then the final heaping spoonful of mousse, gently even out the surface. Chill cakes in the refrigerator overnight. Unmold cakes shortly before serving them. Dust a little cocoa powder on top and enjoy.

Tuesday, September 14, 2010

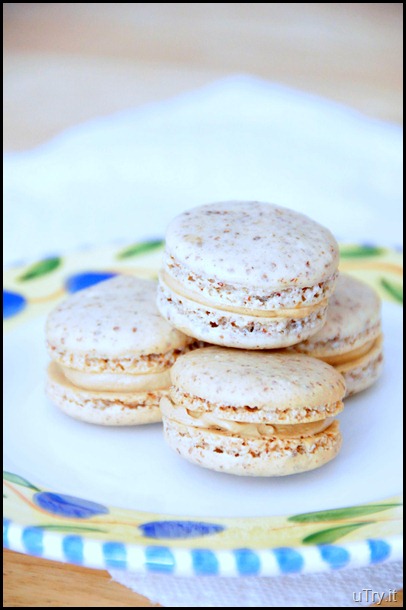
Opera Macarons

Opera Macarons

I had been wanting to bake up some of these French Macarons for a while before I really put things into actions.  Why was I procrastinating?  Mainly was due to afraid of failure.  I’ve came across so many different recipes and they seemed hard to make and required lots of skills.  However, once I baked up my first batch, I was ecstatic!  I couldn’t wait to bake more, with different varieties and flavors. These French Macarons are not to be confused with the American Macaroons, the later one has shredded coconut as the main ingredient.  Versus the French Macarons, which are made from a mixture of egg whites, almond flour, and both granulated and confectionery sugar.  It’s a blank canvas that you can be creative and put many different ingredients into it.

Opera Macarons

Did I mention they were hard to make?  Actually, not at all!  As long as you follow a few tips and you’ll be good to go.  First of all, precise measurement is important, as in all baking.  Measure all ingredients with a digital kitchen scale is essential to the success of a perfect Macarons.  You’ll always get a more precise measurement by weight than by volume.  So, if you still don’t have a kitchen scale, what are you waiting for?  Click here to check out the one I use.  I love it.

Second of all, follow each step of the recipe and don’t be lazy (like I am).  There are reasons behind each process.   For example, this recipe calls for aged egg whites and it is important because there’s less moisture in the aged egg whites, in ratio of protein.  If the batter is to runny, your cookies won’t bake up properly.

Last but not least, practice makes perfect.  My skills in using pastry bags was really classified as “beginner” (or worse, don’t even know what class that is) when I first started to make Macarons.  After 4 to 5 batches (forming more than 200 cookies shells), I upgraded my skills to intermediate level.  Yes, I’m still not perfect but it’s much better than before.   


Opera Macarons

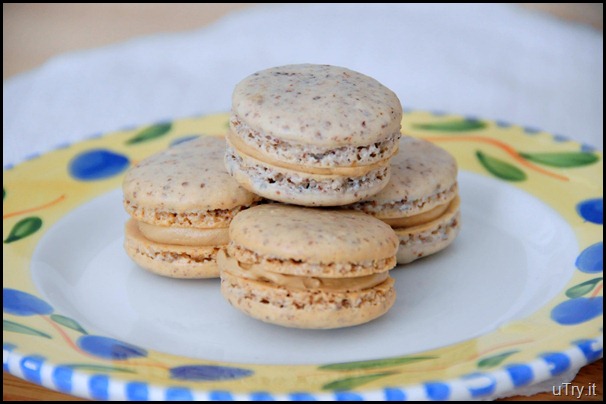
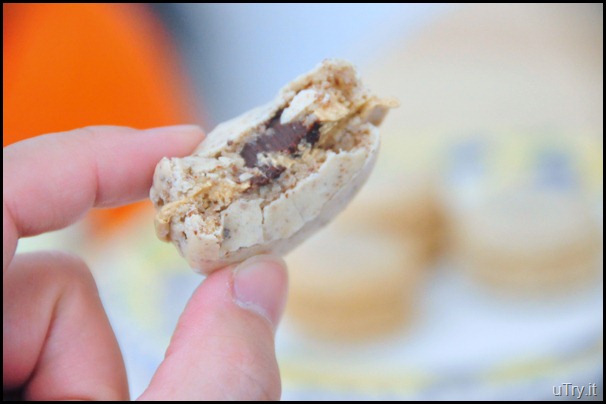
These Opera Macarons are super delicious!  Crunchy on the outside, chewy on the inside.  Your taste buds will jump for joy when your tongue come across with the smooth and creamy coffee buttercream.  When you bit into the center, you’ll experience the "melt in your mouth" goodness with the rich chocolate ganache.  Ending with a hint of the hazelnut and almond flavor from the shells.  As I’m typing this post, I’m popping one (and another….and another… X \infty) in my mouth.  So, don’t just imagine how good it is.  Go make a batch and experience it yourself! 
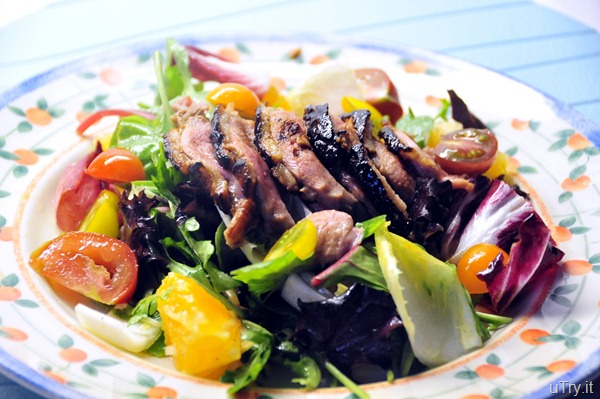


Opera Macarons:   Adopted from Tartelette
Makes about 30-35 filled macarons
Printable Recipe

For the shells:
3 egg whites (110 gram) (I like to use 2-3 day old egg whites)
30 gram granulated sugar
200 gram powdered sugar
60 gram ground almonds
55 gram skinned and ground hazelnuts
1/2 Teaspoon Vanilla Extract
1 Tablespoon Espresso Powder

In a stand mixer fitted with the whisk attachment, whip the egg whites to a foam, gradually add the sugar until you obtain a glossy meringue. Then, add the vanilla extract and espresso powder until well combined.

Combine the ground almonds, ground hazelnuts and powdered sugar in a food processor and give them a quick pulse. It will break the powdered sugar lumps and combine your nuts with it evenly. Add them to the meringue and fold the mass carefully until you obtain a batter that flows like magma or a thick ribbon. The whole folding process shouldn't be more than 50 strokes.

Test a small amount on a plate: if the tops flattens on its own you are good to go. If there is a small beak, give the batter a couple of turns. Fill a pastry bag fitted with a plain tip with the batter and pipe small round (about 1.5 inches) onto parchment paper baking sheets. Let the macarons sit out for an hour to harden their shells a bit. Preheat the oven to 280F and bake for 15-20 minutes, depending on their size. Let cool completely.

Chocolate Ganache:
3/4 cup heavy cream
1 cup bittersweet chocolate
In a heavy saucepan set over medium heat, bring the heavy cream to a boil. Remove from the stove and add the chocolate to it. Let stand 2 minutes and then stir until fully combined. Let cool until firm enough to put in a small piping bag.

Coffee Buttercream:
1/2 cup sugar
2 large egg whites
1 1/2 sticks (6 ounces) unsalted butter, at room temperature
1/2 teaspoon Vanilla Extract
1 1/2 Tablespoon Instant Espresso

Put the sugar and egg whites in a large heatproof bowl over a saucepan of simmering water and whisk constantly, keeping the mixture over the heat, until it feels hot to the touch, about 3 minutes. The sugar should be dissolved, and the mixture will look like marshmallow cream.

Stir in the instant espresso until dissolved. Pour the mixture into the bowl of a stand mixer fitted with the whisk attachment and beat the meringue on medium speed until it cools and forms a thick shiny meringue, about 5 minutes.

Switch to the paddle attachment and add the butter, one tablespoon at a time, beating until smooth. Once all the butter is in, add the vanilla extract and beat the buttercream on medium-high speed until it is thick and very smooth, 6-10 minutes. If not using right away, refrigerate for up to a week or freeze for up to 1 month.

To Assemble:
Put the coffee buttercream in a piping bag and pipe a circle around the edges of a macaron shell. Pipe a dollop of ganache in the middle and top with another shell

Note: I only make half of the ganache and buttercream from the above recipes and there were enough to fill all the shells. If you make full recipe for the fillings, left over can be freeze for up to 3 months.

Tips: To age the egg whites, simply place them in a covered container and store in refrigerator for 2-3 days, or uncover at room temperature overnight.

This Recipe is linked to:
Sweets for Saturday
These Chicks Cooked

Friday, September 10, 2010

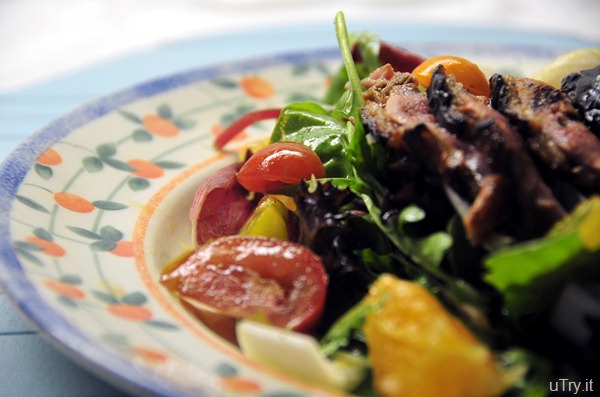
Orange Duck Salad

Orange Duck Salad

Yes, another salad for dinner.  This time, it is not just any salad though.  Duck is the star of this dish.  Somehow, I think duck is a very special ingredient to cook with.   Not that we don’t eat ducks often (we get BBQ ducks from the Chinese restaurants all the time).  It’s just that I don’t cook with it a lot.  Maybe because the duck seems too hard to handle?  However, this Orange Duck Salad is quite easy to make and it’s definitely one of my new favorite. 

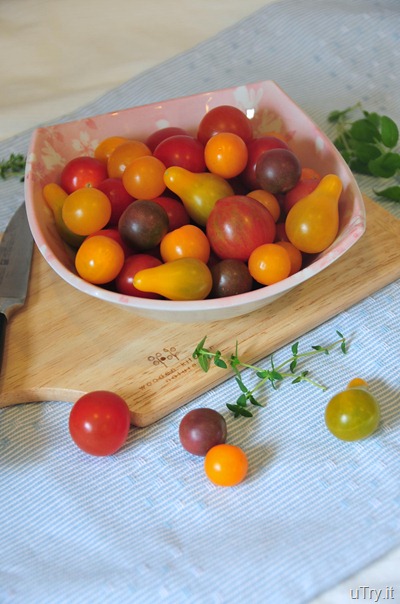
Mini Heirloom Tomatoes


Orange Duck Salad Ingredients
I love using ingredients that are in season.  Not only they are in their best quality, they are very affordable as well.  These beautiful mini heirloom tomatoes (in assorted colors too) were sitting on the trays in the market that I couldn’t resisted bringing home.  My husband loves the spicy and crisp Belgium Endives, they balance well with the sweetness of the orange vinaigrette.  So, they’re all coming home with me.

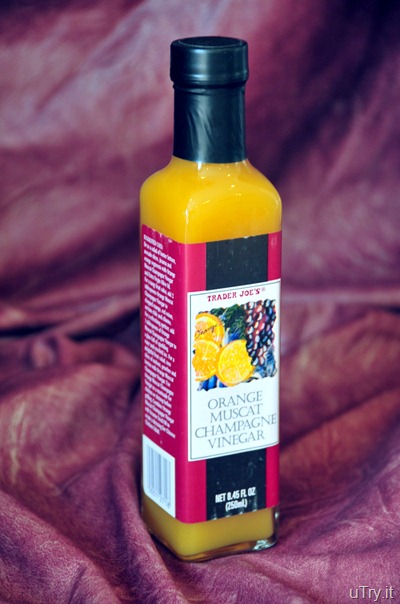
Orange Muscat Champagne Vinegar

I got this Orange Muscat Champagne Vinegar from Trader Joe's.  If you don't have one near by, you can purchase the vinegar online from here.

Orange Duck Salad

The Orange Duck Salad pairs perfectly with a glass of red.  It was such a perfect meal for summer weekend.  Really look forward to making this salad again, very soon.

Orange Duck Salad


Orange Duck Salad: Printable Recipe

Servings: 2

To brine the duck:
2 Teaspoon Kosher Salt
1/2 Cup Pineapple Orange Juice
5 Whole Black Peppercorns
5 Springs of Fresh Thyme
1 Garlic Clove, smashed
1 Shallot, minced
2 Duck Breast, bone in and skin on

For the vinaigrette:
1 Shallot, minced
2 Tablespoons of Orange Champagne Vinegar (or regular champagne vinegar)
2 Tablespoons Good Quality Olive Oil
1 Tablespoon Fresh Orange Juice
1 Teaspoon Grated Orange Zest
Salt and Pepper, to taste

For the Salad:
1 Orange, segmented and cut into bite size pieces
3 Belgium Endives, trim the bottom half-inch and cut into 1/2-inch slices
1 Cup Arugula
A handful of Mini Heirloom Tomatoes, split in half
2 Cups of Springs Mix Greens or Mesclun

Clean and dry the duck breasts, lay your knife flat against the skin and make 3 marks in one direction and then in the other, making an X. Make sure that you are cutting through the skin and not the meat.
Combine all brine ingredients and duck breasts in a zip lock bag. Seal the bag, ensuring that all air is removed from the bag. Place the bag in a plastic container and brine the duck over night in the refrigerator.

Heat a heavy duty or cast iron skillet over medium high heat. Sear the duck breasts, skin side down for 2 minutes. Reduce heat to medium low and cook for another 2 minutes. Drain out the duck fat from the skillet often. Flip the breast and cook other sides. Total cook time should be around 8 to 10 minutes or until medium-rare, depending on the size. Remove duck from skillet and cover with foil to rest the meat.

For the vinaigrette, combine the shallots, vinegar, orange juice, orange zest, salt and pepper. Whisk in olive oil and set aside.

Remove the duck breast from the rib bones. Slice the duck breasts into 1/4- inch thickness. Toss all vegetables in a large mixing bowl. Drizzle enough vinaigrette to moisten . Place duck breast slices on top and serve.

Tuesday, September 7, 2010

Labor Day Weekend

Chocolate and Hazelnut Meringue Cake

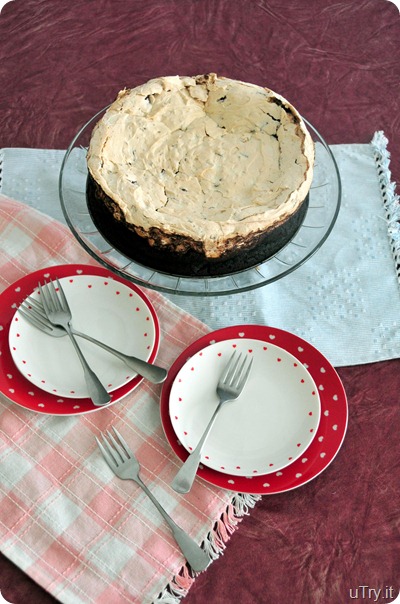
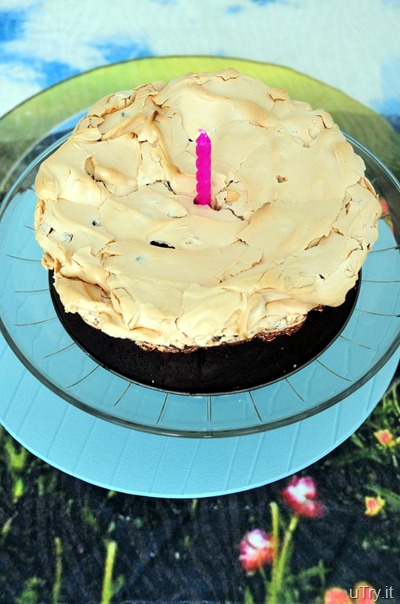
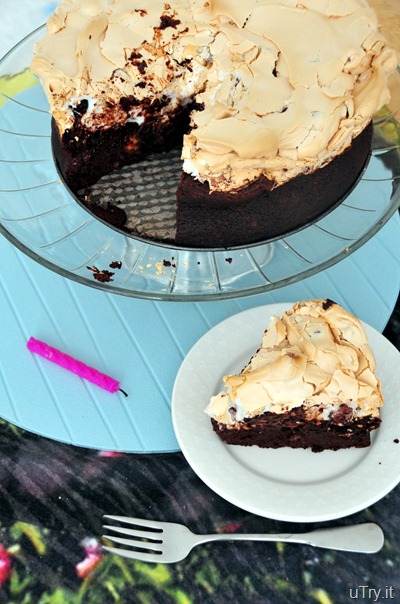
As “promised” from my previous post, there will be another birthday celebration.  This round is for my loving Mother-in-law’s birthday.  It also falls onto the Labor Day long weekend.  So, we celebrated her birthday with a “sleep over” at my in-law’s place.  I’m sure you all recognized this cake.  Yes, it’s another Chocolate and Hazelnut Meringue Cake.  Sorry if I disappointed you for not making something new for my Mother-in-law’s birthday.  But this cake is just so delicious that I have to make it one more time in such a short period of time.  Not to mention, my Mother-in-law is also a chocolate lover!  I guess it runs in the family! hehehe…

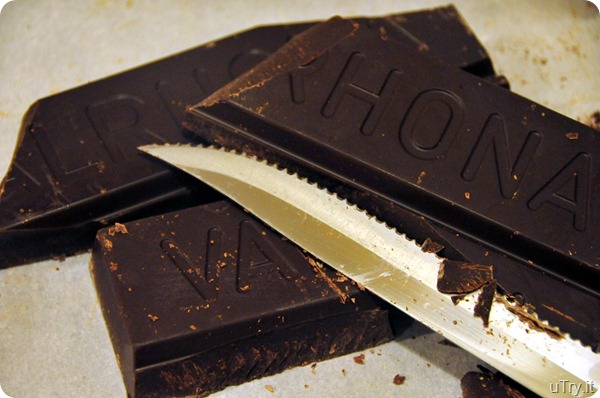
Valrhona Chocolate
Of course, I used the best chocolate I can get.  This time with some chopping to do since the market ran out of those in small chips size.  I think the cake looks better this time around, too.  Don’t you think? 

Chocolate and Hazelnut Meringue Cake
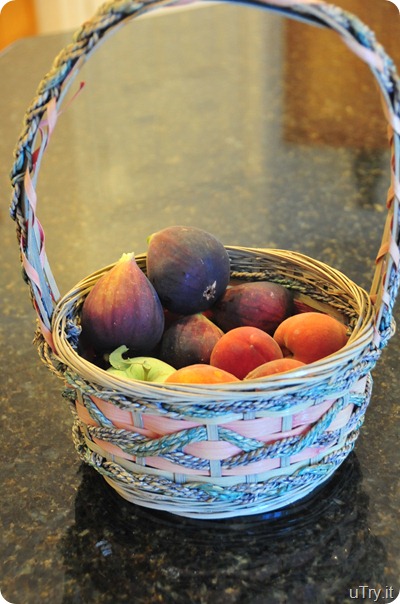
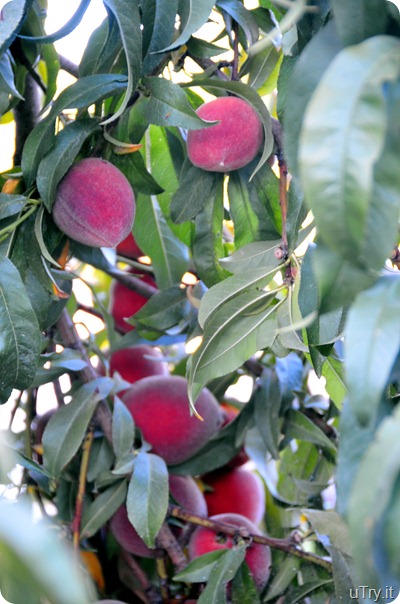
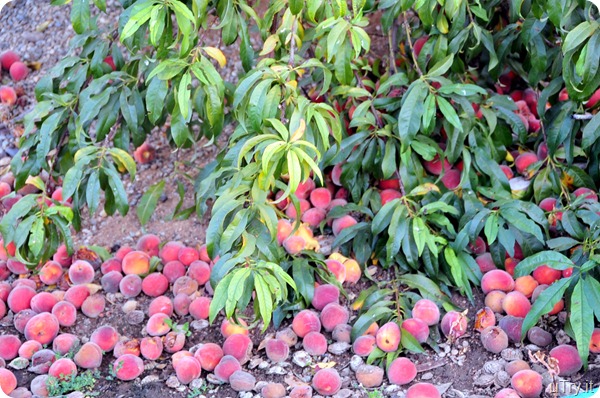
To make it up to you for not having a new cake recipe on this post, I’ll share more pictures with you that I took over the weekend.  Did I mention that there are a few dozens of fruit trees at my in-law’s place?  So, I picked some fruits that are in season.  Unfortunately, my little boy got a fever over the weekend and he was not allowed to go outside (the outside temperature was 110 degree Fahrenheit).  Otherwise, he would be my fruit picking buddy.  Here are some of the harvests: juicy peaches, sweet figs and tart apples….

Fresh Picked Fruits

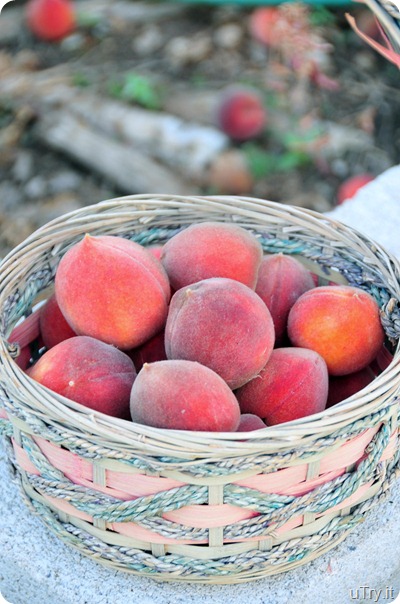
These peaches are so sweet and juicy.  Look at that vibrant color.  I love it!

Peaches

Fresh Peaches
Really hate to see food going to waste!  So, I picked a basket full of peaches, maybe I’ll make some preserves out of them later on. 
Peaches 
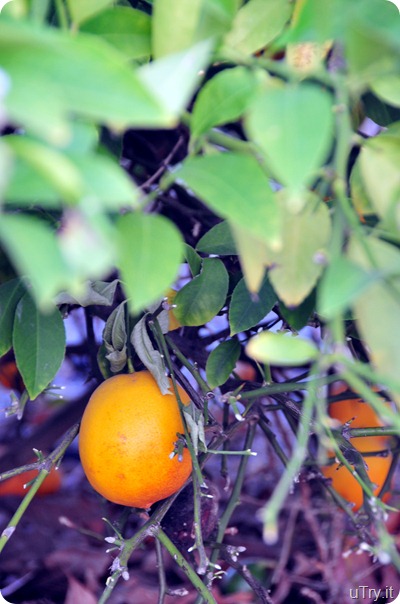
The picture below is a Meyer Lemon.  It’s a cross between a lemon and a mandarin.  They’re not only great for cookies and cakes, but also really nice in savory dishes, marinates and vinaigrettes. 

Meyer Lemon

Michelia
This is the flower from the Michelia tree (白蘭花).  You can smell its fragrant whenever you walk by.  The color of the flower should be ivory.  Somehow, this one turned into orange.    

Figs
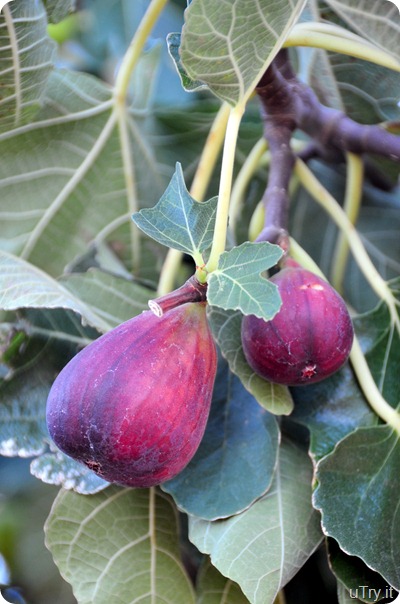
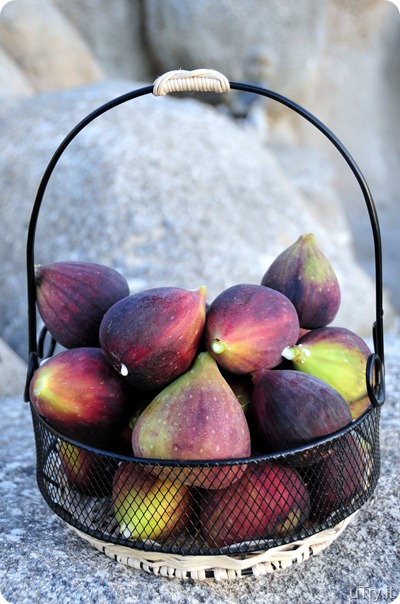
These figs are super sweet.  They’re really good as is, excellent when you put them into Chinese soup, and divine if you wrap them with prosciutto!   Yup, another basket full! 

Fresh Figs

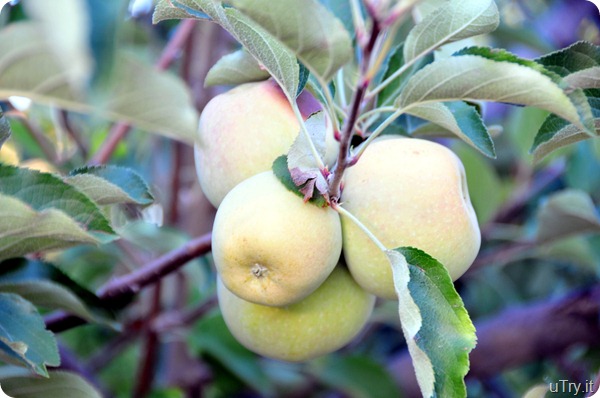
Not too sure what kind of apples these are.  They’re a bit too tart and firm to be eaten fresh.  Guess they’ll be really good in apple tarts/pies.

Apples
Up next, I was eying these pomegranate.  They’re not really ripe yet.  Not until the end of this month.  So, I’ll be visiting my in-laws again, soon.  Please wait for me, pomegranate!!!

Pomegranate

It’s such a luxury to have the freshest fruits whenever you want them, right off the trees from the backyard.  Not many people are as fortunate as we do to have this garden of plants and fruits.  I truly appreciate and cherish it.  Once again, thank you Mother- and Father-in-law!

Fresh Picked Fruits

Wednesday, September 1, 2010

Chocolate and Hazelnut Meringue Cake

Chocolate and Hazelnut Meringue Cake
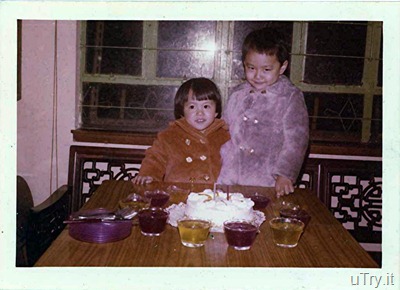
Here comes another Birthday celebration.  Yes, twice in a month; and don’t be surprised if there’s a 3rd one coming up!  This time, Mom and Dad brought Dim Sum to our place and we had lunch together.  I prepared this cake so we can have the cake cutting and wish making rituals; I remember we always have birthday cakes and other goodies to celebrate our birthdays when we were young.  Those were precious memories.  Mom even brought over some of our childhood pictures.  It was so nice to see those pictures again.  Gosh, I really looked young back then!
 
Childhood Picture
Next to me was my older brother.  Doesn’t he look handsome?  I remember we had many birthday pictures with this background until we moved to the new place when I was 7 or 8.  I still remember those bright pink plastic plates we always use for birthday cakes!  Come to think of it, I should have made some jelly to go around mom’s birthday cake also!  :P  

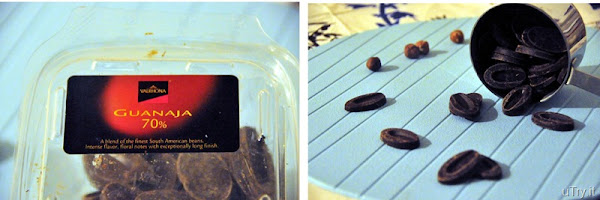
Valrhona Chocolate

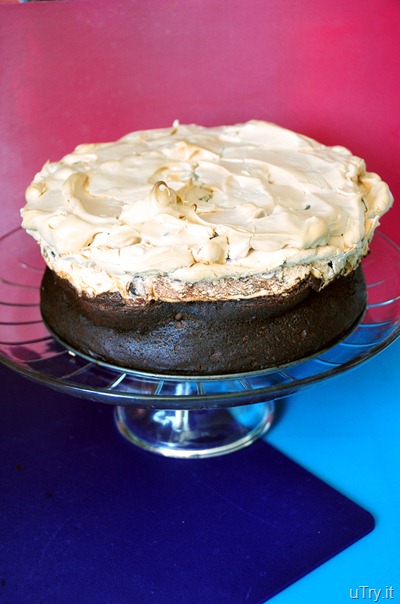
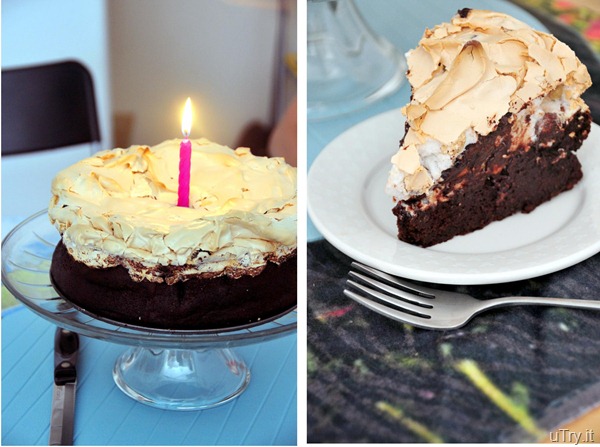
Back to the Chocolate and Hazelnut Meringue Cake.  I had so much fun making this cake because I knew my Mom would love it a lot.  I used some good quality bitter-sweet chocolate for the cake base (flourless).  It’s worth it to invest a little more on the chocolate because you can totally taste the difference.  The chocolate is so rich that you want to close your eyes, enjoy and savor every moment when you take your first bite (oh well, maybe that’s just me).  I love the contrasting texture of this cake.  The meringue is light and fluffy, the toasted hazelnuts add a nice crunch, along with the smooth and silky chocolate base.   Hope mom enjoyed this cake as much as I did.  Happy Birthday again, Mom.  I love you! 

Chocolate and Hazelnut Meringue Cake


Chocolate and Hazelnut Meringue Cake


Chocolate and Hazelnut Meringue Cake


Chocolate and Hazelnut Meringue Cake:
Makes one 9-inch cake
  • 10 tablespoons unsalted butter, plus more for pan
  • Cocoa Powder, for pan
  • 1 cup hazelnuts
  • 3/4 cup firmly packed light-brown sugar
  • 6 large whole eggs, separated
  • 4 large egg whites
  • 12 ounces bittersweet chocolate, melted and cooled, plus 4 ounces roughly chopped
  • 2 teaspoons pure vanilla extract
  • 1 tablespoon espresso
  • 1 pinch of salt
  • 1 tablespoon cornstarch
  • 1/4 teaspoon cream of tartar
  • 3/4 cup caster sugar
Preheat oven to 350 degrees. Butter a 9-by-3-inch spring form pan. Line bottom and sides with parchment. Butter parchment, and sprinkle with cocoa powder; tap out excess. Set aside.
Toast hazelnuts until fragrant and skins start to crack. Rub vigorously with a clean kitchen towel to take off skins. Let cool; roughly chop. Set aside.
In the bowl of an electric mixer fitted with the paddle attachment, cream butter and brown sugar until pale and smooth. Add egg yolks, one at a time, beating well after each addition, until mixture is light and fluffy. Add melted chocolate, vanilla, and espresso; beat until combined. Set aside.
In a clean mixer bowl, combine 6 egg whites and salt; using the whisk attachment, beat on high speed until soft peaks form, about 2 minutes. Stir one-third of the egg whites into chocolate mixture. Fold in remaining beaten egg whites just until combined. Pour batter into prepared pan, and bake 25 minutes.
Meanwhile, make meringue: Combine hazelnuts, chopped chocolate, and cornstarch in a small bowl, and set aside. Place remaining 4 egg whites and cream of tartar in a clean mixer bowl; using a clean whisk attachment, beat on high speed until frothy. With mixer running, slowly add caster sugar; continue beating until stiff peaks form, about 8 minutes. Fold in hazelnut mixture.
Remove cake from oven. Using an offset spatula, spread meringue mixture on top of cake, and return to oven. Bake until meringue is lightly browned and crisp, 25 to 30 minutes. Transfer pan to a wire rack; let stand 10 minutes. Run a knife around the edge of the cake to loosen, and release sides of pan. Let cool, about 30 minutes, before slicing and serving.