Friday, December 31, 2010

New Year, New Home, New Start…

First of all, I want to wish you all a Happy New Year!  For those of you who’s been following my blog, you know I’ve just moved.  Some of you might be curious to know how my new home/kitchen looks like.  Well, I guess the kitchen is pretty much the center of the house.  So, if you take a good look at the kitchen, you pretty much can tell how the rest of the house is, relatively.  I just want to show you two pictures of my old kitchen as a comparison.

Kitchen of the previous condo

I like my old kitchen.  There are many counter top space.   Decent appliances, although nothing fancy, and for sure not top of the line products.  To me, as long as everything functions well and works fine, I’m satisfied.  You can say, I’m not a picky person.  The lower left hand corner from the picture above shows the corner of our dinning table.  That’s the dining area where we have every meal.  Although there’s a formal dining area adjacent to the kitchen, we used that space as a play area for the kids.   

Kitchen of the previous condo

Are you ready to take a look at the new kitchen?  Just scroll down a bit after the drum roll please….


Kitchen of the new home

This is my new kitchen right before we moved in.  Of course, I have filled up the counter top space with my junks by now!  :P   Is it lovely?  You can imagine how much I love my new kitchen!!!  The lower right hand corner from the above picture is our new dining area, with a pretty awesome view!  You can take a closer look of the kitchen area from the picture below.  I really love my new spacious and beautiful kitchen.  I feel so blessed everyday when I prepared each meal for my family in this gorgeous kitchen. 

Kitchen of the new home

Originally, I planned not to shared a not so good news with you on my post.  Especially, on the New Year post.  However, my heart is telling me otherwise.  More so, when I talk about food and kitchen.  Recently, my Grandmother (living overseas) has not been feeling so well because of a minor incident.  She was in the ICU for a while and now she’s back home with my aunt.  However, she couldn’t eat solid food and couldn’t even keep her food down.  There’s a constant pain in her stomach that keeps her from getting a good rest.  When I prepare delicious food for my family, it breaks my heart and makes me feel sad that my Grandmother couldn’t even keep water or soup down in her stomach.  Come to think of it, I’ve never prepared a meal or cook anything for my Grandmother!  When I was young, she’s always the one who cook and took care of us. After my family (parents and siblings) immigrated to the States, I don’t even see my Grandmother often.  I just hope my Grandmother will get better soon, real soon.  If I get the chance, I really want to prepare a nice meal for her to enjoy.  If you don’t mind, please keep her in your prayers and wish her a speedy recovery. 

On the brighter side, my Grandmother just became a Christian recently.  My family has been praying for that for many years.  That really is the best Christmas gift to us.  Hopefully, her faith will give her new hopes.  May she finds comfort and supports during this tough time. 
Thank you for your precious time and prayers.  Happy New Year again to you and your loved ones.  Wishing you all a joyful, healthy, and prosperous 2011!
Friday, December 24, 2010

Orange-Chocolate Meringue Kisses…and Merry Christmas

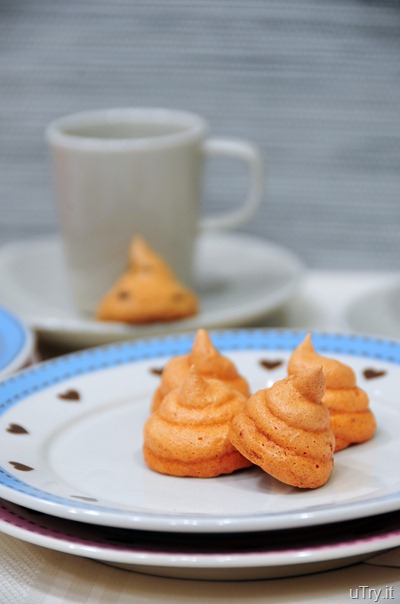
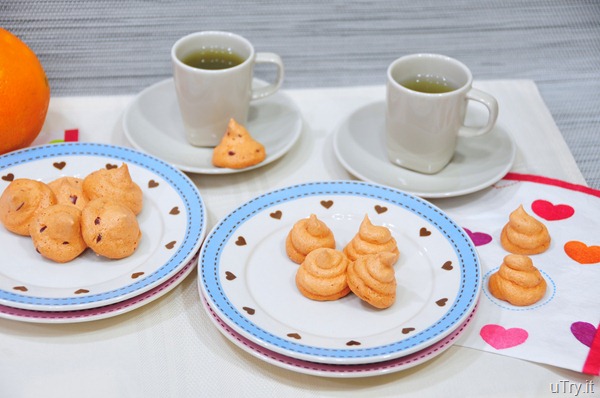
Orange-Chocolate Meringue Kisses

I couldn’t help but smile after I typed and read the title of this post.  It just happened to rhyme.  While most of you must be busy in the kitchen preparing a feast for tonight’s party, opening presents, having some wonderful time with your friends and family, or too busy checking emails with Christmas greetings, I just wanted to stop by with a quick post to wish all of you a blessed and Merry Christmas.  Most importantly, I want to wish all of you good health.

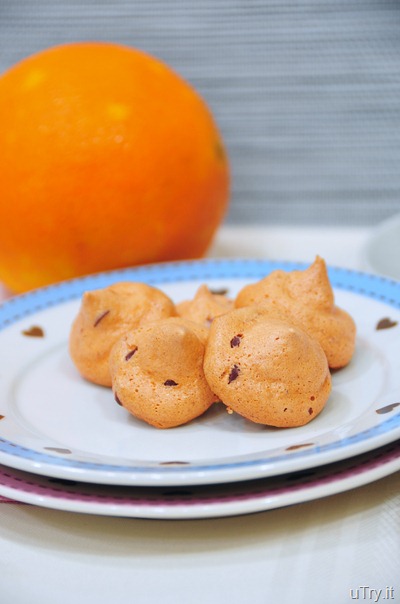
Orange-Chocolate Meringue Kisses

After the feast you have for Christmas dinner, these Orange-Chocolate Meringue Kisses are refreshing and delightful to have for a sweet ending.  They are airy and crunchy.  The flavor will explode in your mouth as they melt away.  I made 2 versions, one with mini chocolate chips and one without.  I definitely recommend you to try the one with the chocolate chips.  Chocolate and orange is one of my favorite flavor combination.  These Meringue Kisses are easy to make, too.  If you like any other flavor, go ahead and change up the Jell-O and extracts flavors in the recipe.  I may try lime, or raspberry next, what do you think?

Orange-Chocolate Meringue Kisses


Orange-Chocolate Meringue Kisses:


Makes: 48 cookies

3 large egg whites
1⁄8 teaspoon salt
1 package (3 ounces) orange Jell-O
1/4 cup caster sugar
1/2 teaspoon pure vanilla extract
1/2 teaspoon orange extract
Zest of 1 orange
1 cup mini chocolate chips
 

Preheat the oven to 275°F. Line 2 baking sheets with parchment paper or silicone mat.

Place the egg whites and salt in a large bowl and with an electric mixer fitted with the whisk attachment, beat on medium until frothy. Turn the speed to high and pour the Jell-O and then the sugar into the bowl in a slow, steady stream. Continue to beat until the egg whites are stiff and shiny, about 5 minutes.

With a rubber spatula, gently fold in the vanilla extract, orange extract, orange zest and the chocolate chips.
Scrape the meringue into a pastry bag fitted with a large plain tip and pipe the cookies, each about 1-inch in diameter, onto the baking sheets.

Bake the meringues until they are firm, about 40 minutes. Slide the parchment paper or baking mat with the cookies onto wire racks and let them cool for 5 minutes, then carefully peel them off the parchment paper.

Tuesday, December 21, 2010

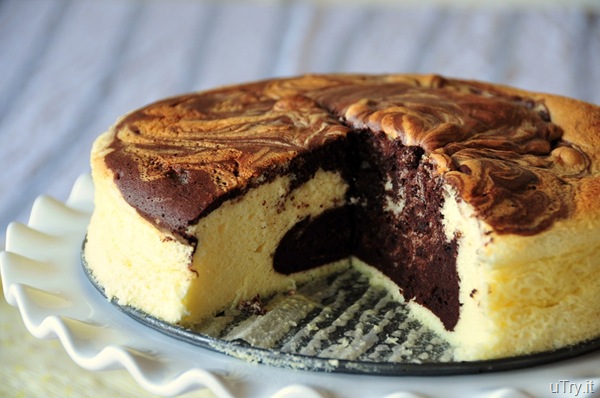
Marbled Japanese Cheesecake

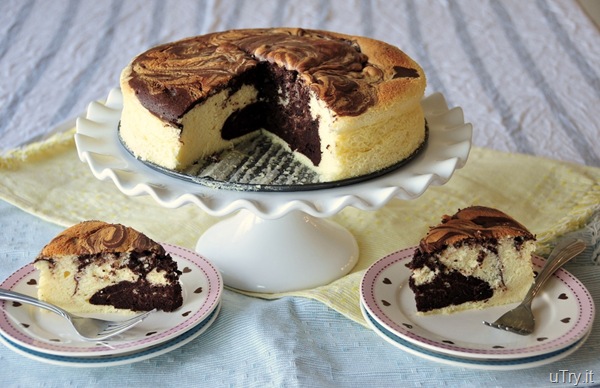
Marbled Japanese Cheesecake

The unpacking at the new place is progressing really well.  After opening more than 80 cartons, I’m a professional in opening boxes and can even do it with my eyes closed!  **Do not attempt at home though**  :P  I say the organizing part is 90% done around the house.  I’m so thrilled there are no more boxes lying around the living room, and so do my kids.  I have just arranged their little play area in the living room over the weekend and they are so happy with their new play area!  When I took out their toys from the cartons, they were so excited and treated the toys as if they were new.  Isn't that wonderful?

 Marbled Japanese Cheesecake


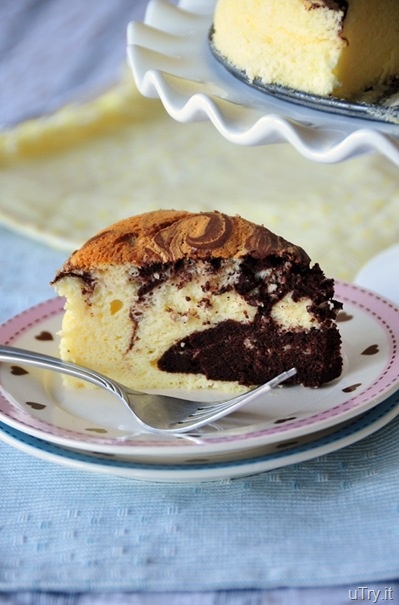
Not sure if any of you have tried the famous Japanese Cheesecake before.  They are crust-less, light as feather, fluffy and creamy, not too sweet and melt in your mouth kind of cake.  They are more similar to French Cheesecake with the light and fluffy texture, if you must compare.  Unlike the New York Cheesecake, which is dense and rich.  So, you won’t feel as guilty after having a huge piece of this Japanese Cheesecake.  Trust me, you’re going to want a huge piece of this cake!  Better yet, I made it marbled (with chocolate) this time because my 3 year old son requested it.  *Smile*  Sure he has some sophisticated palates, just like his mother.  hahaha… More than half of this cake was gone in less than a day!   You know how delicious it was.

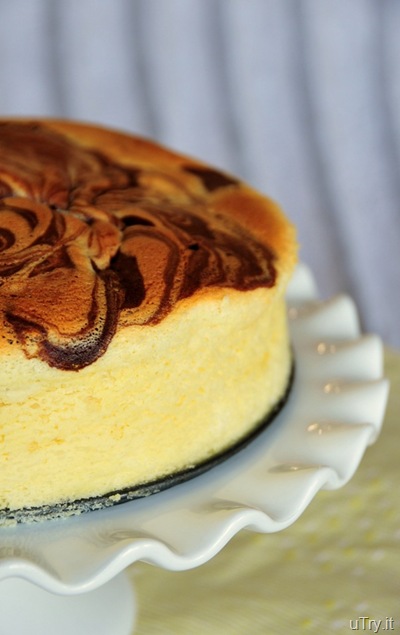
Marbled Japanese Cheesecake

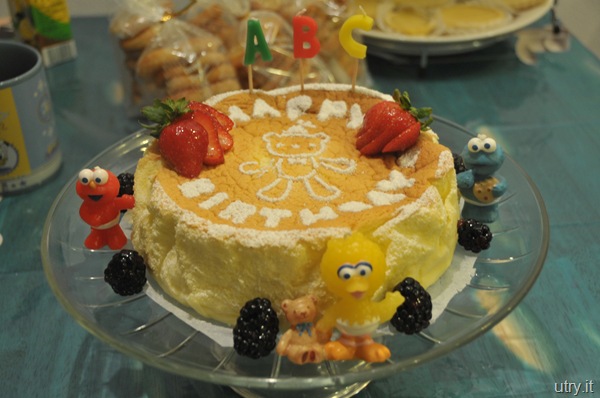
So, I baked another one over the weekend to bring to my parents’ place for a gathering with my brothers, brother's in-laws and my niece.  This year, we celebrated Christmas early at their house.  Seems like everyone loves this marbled version as much as the plain one.  Below is an old picture with the plain one I made for my son’s 2nd birthday last year.  I’ll include both recipes and let you decided whichever one you want to try first.  I love both of them!

Japanese Cheesecake

Looking at these pictures really makes me hungry and want a piece of this cake now!  Too bad they’re all gone by now.  Oh well, maybe I’ll make another one tomorrow when I get up!  If you do try this recipe, please kindly leave a comment and let me know how they turn out.  Also, please tell me if you like this Japanese Cheesecake over the traditional version.  I would love to hear from you.


Marbled Japanese Cheesecake


Japanese Cheesecake (plain):

Ingredients
8 ounces cream cheese, at room temperature
3 ounces whipping cream
3/4  cup ultra fine sugar (caster sugar for baking)
5 eggs, separated and at room temperature
2 tablespoons cornstarch
1/4 cup plus 2 tablespoons cake flour
1 1/2 teaspoons fresh lemon juice
5/8 teaspoon cream of tartar
a pinch of Kosher salt
1 ½ teaspoon Vanilla extract
boiling water (for water bath while baking)

Directions
Preheat oven to 350 degrees.

Line a 8-inch spring-form cake pan with parchment paper on the bottom and sides. Wrap 2 layers of foil paper on the outside of the cake pan to prevent water from going into the cake pan while baking.

Beat egg whites with a pinch of Kosher and cream of tartar until egg white is soft peak. Gradually add half of the sugar, beating on high speed until egg white is medium peak. Set aside.

In a separate bowl, beat cream cheese with remaining half of the sugar until smooth and fluffy.  Whisk in whipping cream, egg yolks, vanilla extract, lemon juice, until well combined. Turn mixer on low, add flour, and cornstarch until just combined.

Gradually fold beaten egg whites into the cream cheese mixture in 3 batches (Do not over mix). Pour batter into cake pan and smooth the surface.

Place cake pan into a larger roasting pan and place roasting pan in lower third rack of the oven.  Pour enough hot water into the roasting pan to come half way up the side of the cake pan.

Bake 55-60 minutes, or until a toothpick inserted in the middle of the center comes out clean.
 
 
Marbled Japanese Cheesecake:

Ingredients
8 ounces cream cheese, at room temperature
3 ounces whipping cream
3/4  cup ultra fine sugar (caster sugar for baking)
5 eggs, separated and at room temperature
2 tablespoons cornstarch
1/4 cup plus 2 tablespoons cake flour
11/2 teaspoons fresh lemon juice
5/8 teaspoon cream of tartar
a pinch of Kosher salt
1 ½ teaspoon Vanilla extract
3 tablespoons unsweetened cocoa powder
boiling water (for water bath while baking)

Directions
Preheat oven to 350 degrees. Line a 8-inch spring-form cake pan with parchment paper on the bottom and sides. Wrap 2 layers of foil paper on the outside of the cake pan to prevent water from going into the cake pan while baking.

Beat egg whites with a pinch of Kosher and cream of tartar until egg white is soft peak.  Gradually add half of the sugar, beating on high speed until egg white is medium peak. Set aside.

In a separate bowl, beat cream cheese with remaining half of the sugar until smooth and fluffy.  Whisk in whipping cream, egg yolks, vanilla extract, lemon juice, until well combined. Turn mixer on low, add flour, and cornstarch until just combined.

Gradually fold beaten egg whites into the cream cheese mixture in 3 batches (Do not over mix) Pour 3/4 of the cake batter into the cake pan.

Fold in cocoa powder into the remaining 1/4 of the batter. Pour the chocolate batter onto the cake pan. Use a knife to make marble patterns on the batter.  Place cake pan into a larger roasting pan and place roasting pan in lower third rack of the oven.

Pour enough hot water into the roasting pan to come half way up the side of the cake pan.  Bake 55-60 minutes, or until a toothpick inserted in the middle of the center comes out clean.


This recipe is link to:
Recipe Swap Thursday

Thursday, December 16, 2010

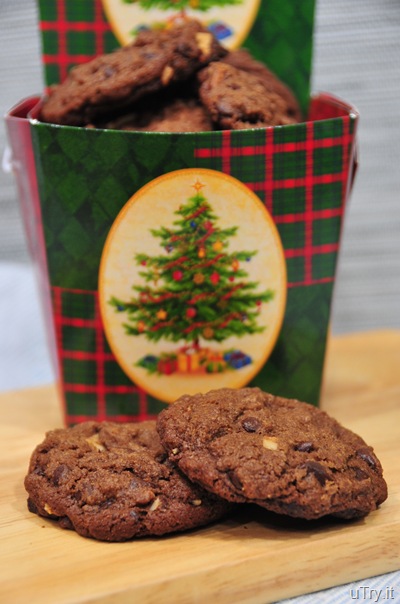
Triple Chocolate Almond Cookies

Featured on BlogHer.com

Triple Chocolate Almond Cookies 
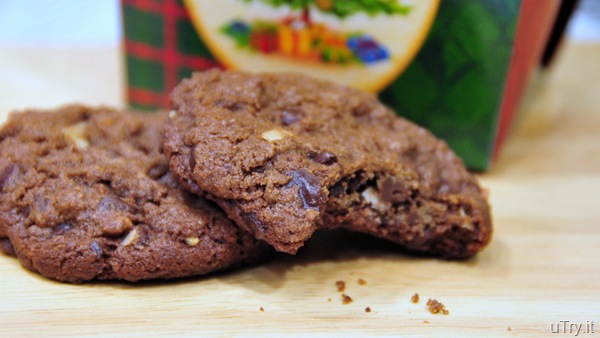
Christmas is just around the corner and there are parties and celebrations everywhere.  Of course, it’s also the time of the year we love to indulge in some wonderful cookies, lots of cookies, that is.  My mother-in-law signed up to attend a cookie exchange party and she asked me to help her bake up 7 dozens cookies!  Oh yes, 7 dozens, it was already a cut down from 10 dozens since some people couldn’t attend after all.  I’m happy and honored that my mother-in-law thought of me as soon as she knows she have to bake up some cookies to bring to the party.  :)


Triple Chocolate Almond Cookies

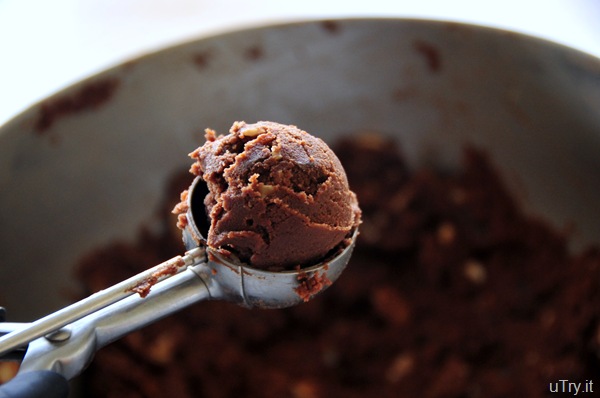
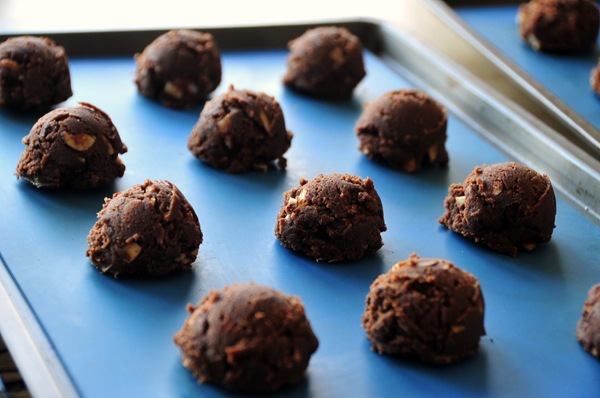
It was fun to make these cookies, packaged them, and taste tested them along the way!  The whole house smelled wonderful and it felt much more like home with the sweet smell of chocolate and cookies coming out of the oven!  The best part is, I got to enjoy some extra ones.  The picture below is the raw cookie dough waiting to be baked from the “assembly line" of my kitchen!

Triple Chocolate Almond Cookies

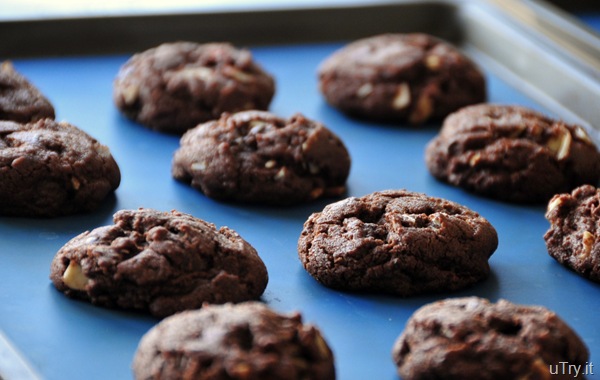
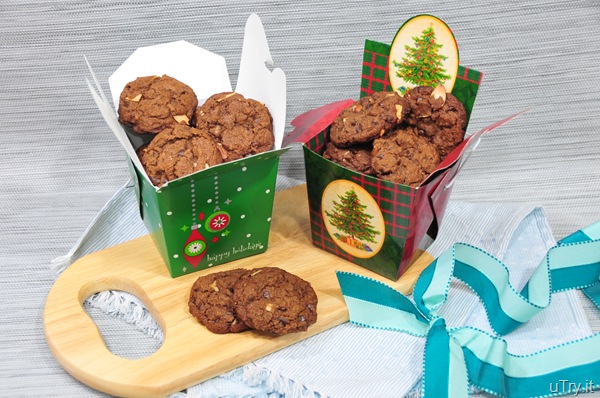
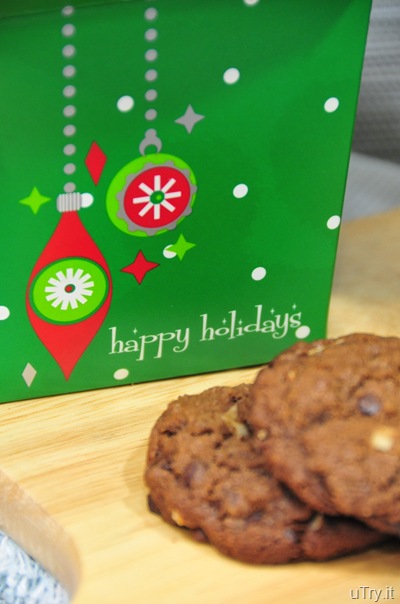
Ta-dah..…now they’re cooling off on the rack.  They’ll all jump into the beautiful holiday take-out boxes (or my tummy) soon!

Triple Chocolate Almond Cookies

These Triple Chocolate Almond Cookies are really wonderful.  They are crunchy outside and a little bit chewy inside.  They have great chocolate and almond flavor in every bite.  The almonds give it a nice nutty flavor and extra crunch.  Everyone loves them.  I’ve brought them to many different parties before and people always asked me for the recipe after they’ve tried them.  It’s really impossible to have just one!  Luckily, each batch makes 48 cookies so there are plenty to share and to indulge together.  Hope you all will make some and share with your family this holiday season. 

Triple Chocolate Almond Cookies

Sorry, just can’t help but bite into one when I was shooting these pictures.  They are too delicious!  :P  Guess I’ll be (happily) gaining weight this holiday season.

Triple Chocolate Almond Cookies

Happy Holidays everyone.  Hope you’ll all have a wonderful time with your family and love ones.


Triple Chocolate Almond Cookies


I'm sharing/linking this recipe at the Holiday Recipe Exchange.  Come join the fun at the My Baking Addiction and GoodLife Eats Holiday Recipe Exchange sponsored byScharffen Berger.


Triple Chocolate Almond Cookies: Printable Recipe
Makes 48 cookies
2 1/3 cups all-purpose flour
3/4 cup Dutch-processed cocoa powder
1 teaspoon baking soda
3/4 teaspoon salt
1 1/4 cups (2 1/2 sticks) salted butter, softened to room temperature
1 cup sugar
1 cup firmly packed dark or light brown sugar
1 large egg
1 teaspoon vanilla extract
½ teaspoon instant coffee
1 cup bittersweet chocolate chips
1 1/2 cups semisweet chocolate chips
1 cup sliced almonds


Preheat the oven to 350 degrees F.
In a medium bowl, combine the flour, cocoa powder, baking soda, and salt.
In the bowl of an electric mixer fitted with the paddle attachment, cream the butter and sugars on medium high speed until light and fluffy.  Add the egg, vanilla and instant coffee.   With the mixer on low, add the flour mixture and continue mixing until just combined.
Add the chocolates and almonds, mix until combined. Using two tablespoons or a small ice cream scoop, drop the dough two inches apart on sheet pans lined with parchment paper.  Bake for 15 minutes.
Cool the cookies on the cookie sheets over a wire rack. The cookies should be very soft when they are just out of the oven. They will firm up as they cool.


By the way, I just submitted this recipe @ Kitchen Corner's December Cook Off.  If you're interested to learn more about the Cook Off, here's the link and there will be voting later on.


Saturday, December 11, 2010

Zojirushi Rice Cooker--Product Review

Zojirushi Rice Cooker

We’ve been using this “new” rice cooker, almost every day, for more than 12 months now.  Before we purchased this new baby, we used an older model of Zojirushi rice cooker for more than a decade!  Yes, they do last that long!  That’s why I love Zojirushi’s products.  Luckily Unfortunately, the non-stick coating of the inner cooking pan of the old cooker started to come off.  That’s why we have to consider getting a new cooker.  Another option was to replace the inner cooking pan of the old one, which would only costs $35 to $40.  Why did we spend that extra $250 or so?  There are a few reasons, and I’m telling you, it’s worth every single penny! 

First of all, we’ve been eating brown rice for a few years now.  However, the texture of the brown rice varies quite a bit with different brands.  Some could be quite rough and chewy (especially true for the cheap brands).  This new rice cooker features 2 options for brown rice, a regular brown and GABA Brown (aka germinated brown rice).  It cooks the rice to a perfect consistency and texture every single time.  For the GABA Brown option, it takes a lot longer to cook though and here’s the explanation why.  If you’re interested to learn more about GABA rice’s health benefits, simply click here.
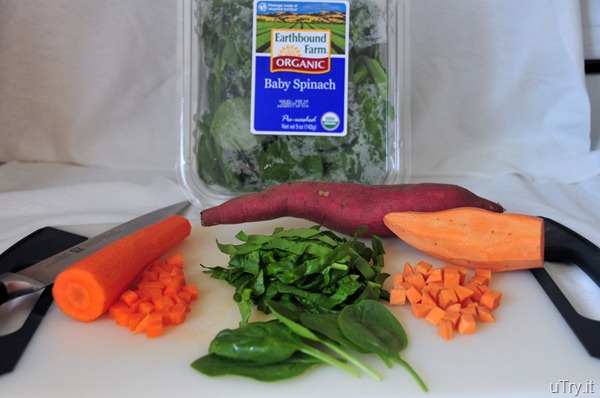
 Baby Porridge Ingredients


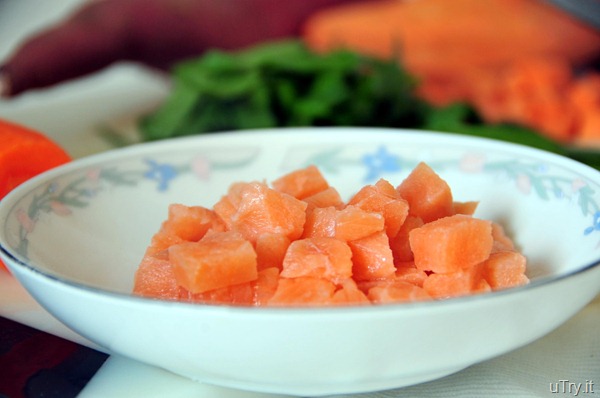
Salmon


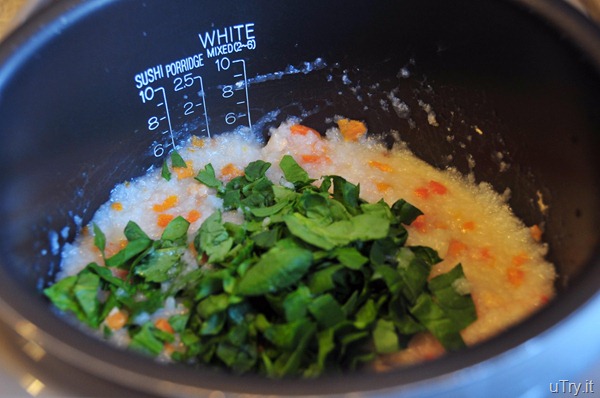
Another reason that convinced me to get this new cooker was because my daughter started to eat solid food, and this cooker has the porridge option!  Cooking porridge on the stove top is time consuming and needs a lots of attentions to prevent the rice from 'burning,' or to prevent the ingredients from sticking to the bottom of the pot.  With this rice cooker, making porridge is a breeze.  Simply chop and dump all the ingredient into the cooking pan, press a button, and you're all set!  It’s that simple! 


Baby Porridge Ingredients


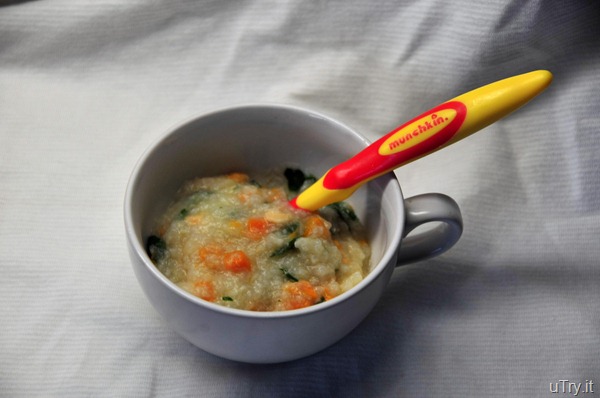
Baby Porridge


Baby Porridge

Also, this rice cooker comes with sushi rice, mixed rice and sweet rice cooking options.  There are quite a few recipes that come along with the user menu for reference as well. 

Last but not least, you’ll hear the twinkle twinkle little star melody when you press the “cooking” button!  Of course, I didn’t know about this feature until the first time I cook with it.  My kids just love the melody whenever I cook rice!  hahahaha…. 


Spicy Tuna Over Sushi Rice


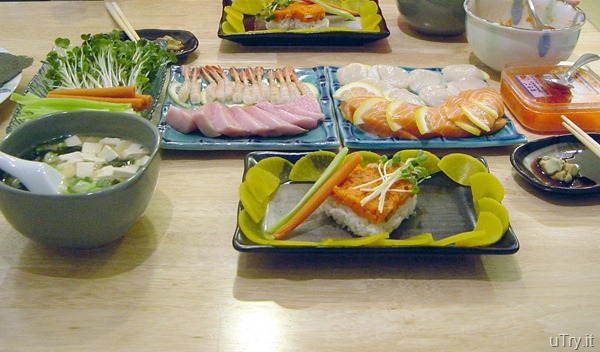
Japanese Feast

Sunday, December 5, 2010

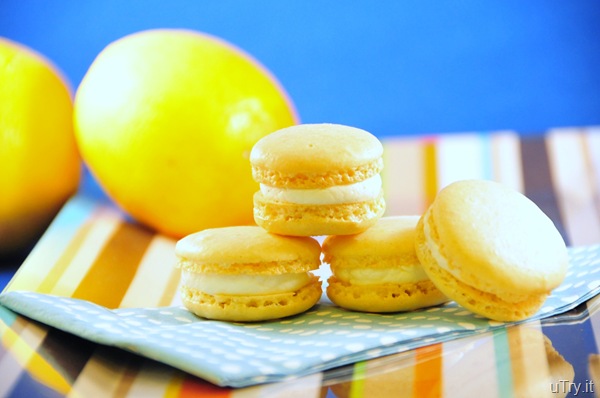
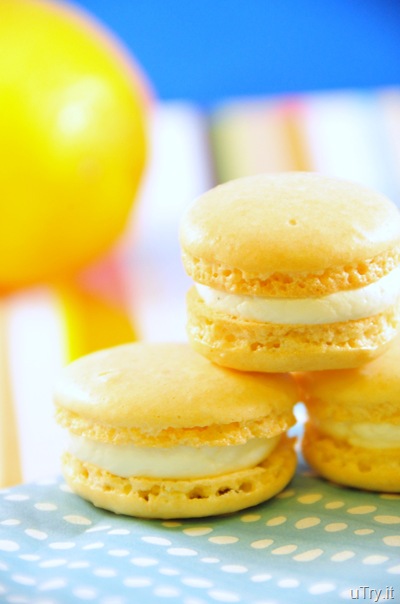
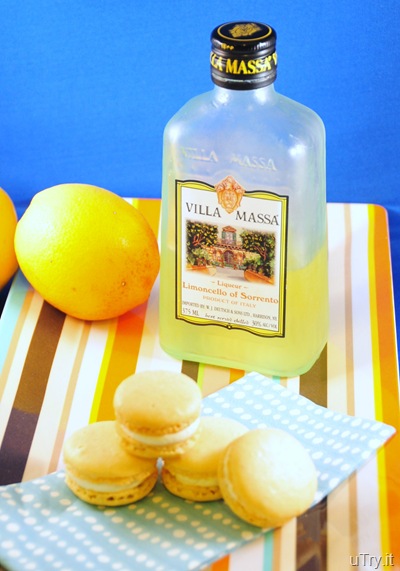
Meyer Lemons Macarons with Limoncello Buttercream

Meyer Lemons Macarons with Limoncello Buttercream

Finally, we’ve moved in to the new house!  I still couldn’t believe we’ve more than 80 cartons of stuffs!  Please don’t ask me what is inside these cartons.  I have no idea... even though I was the one who packed 90% of them.  It took the moving company more than 12 hours to move everything from the old house to the new house!  It’ll take me forever a while to unpack and organize everything for sure.  So, I’m going to keep my post short and sweet.  Of course, I’ll still spend time to write up and post my recipes!  ;)  That’s actually the best method to unwind a long “unpacking” day!


Meyer Lemons Macarons with Limoncello Buttercream

After the huge Thanksgiving feast, I craved for something more refreshing.  I thought of these Meyer Lemons Macarons with Limoncello Buttercream!  Not only they are refreshing and delicious, they are also addictive, dangerously addictive!  They are lemony, creamy, crunchy, chewy, rich, silky, and smooth all in one bite.  Did I mention they are addictive?!  Oh my, maybe my body is telling me I need some alcohol in the system!  If you’re not into limoncello, you can totally opt it out from the recipe.  I’ve made both versions and the kids’ friendly one is just as good. 

Meyer Lemons Macarons with Limoncello Buttercream


Meyer Lemons Macarons with Limoncello Buttercream:  
Printable Recipe
Makes about 30-35 filled macarons

For the shells:
3 egg whites (110 gram) (I like to use 2-3 day old egg whites)*
25 gram granulated sugar
200 gram powdered sugar
110 gram almonds
2 teaspoons of finely grated Meyer Lemon Zest
1/2 Teaspoon Vanilla Extract

In a stand mixer fitted with the whisk attachment, whip the egg whites to a foam, gradually add the sugar until you obtain a glossy meringue. Then, add the lemon zest and vanilla extract until well combined.

Process the almonds and powdered sugar in a food processor until the almonds are fine. It will break the powdered sugar lumps and combine your nuts with it evenly. Add them to the meringue and fold the mass carefully until you obtain a batter that flows like magma or a thick ribbon. The whole folding process shouldn't be more than 50 strokes.

Test a small amount on a plate: if the tops flattens on its own you are good to go. If there is a small beak, give the batter a couple of turns. Fill a pastry bag fitted with a plain tip with the batter and pipe small round (about 1.5 inches) onto baking sheets lined with parchment paper. Let the macarons sit out for an hour to harden their shells a bit. Preheat the oven to 280F and bake for 15-20 minutes, depending on their size. Let cool completely.

Limoncello Buttercream:
1/2 cup sugar
2 large egg whites
1 1/2 sticks (6 ounces) unsalted butter, at room temperature
1/2 teaspoon Vanilla Extract
Zest of 1 Meyer Lemon
2 tablespoons Limoncello
Juice of 1/2 a Meyer Lemon
Put the sugar and egg whites in a large heatproof bowl over a saucepan of simmering water and whisk constantly, keeping the mixture over the heat, until it feels hot to the touch, about 3 minutes. The sugar should be dissolved, and the mixture will look like marshmallow cream.

Pour the mixture into the bowl of a stand mixer fitted with the whisk attachment and beat the meringue on medium speed until it cools and forms a thick shiny meringue, about 5 minutes.

Switch to the paddle attachment and add the butter, one tablespoon at a time, beating until smooth. Once all the butter is in, add the vanilla extract, lemon zest, limoncello and lemon juice, beat the buttercream on medium-high speed until it is thick and very smooth, 6-10 minutes.  Taste for acidity, add more lemon juice if desired.  If not using right away, refrigerate for up to a week or freeze for up to 1 month.

To Assemble:
Put the limoncello buttercream in a piping bag and fill the macaron shell. Top with another shell to finish.

*Tips: To age the egg whites, simply place them in a covered container and store in refrigerator for 2-3 days, or uncover at room temperature overnight.

Tuesday, November 30, 2010

Thanksgiving Feast

As promised, I took pictures of the Thanksgiving feast and here they are.  If you’re interested in getting the recipe of anything you see below, please leave me a comment and I’ll try to get the recipe for you.

“Self Serve” California Rolls                                    “Self Serve” California Rolls


“Self Serve” California Rolls—These are so much fun to eat, and delicious.  Take a piece of nori (seaweed) and wrap the sushi rice, crab meat, avocado, sesame seed filling to create your own individual roll.  Not to mention, it’s great idea for parties because there’s minimal prep work and the nori stays crispy.


Egg Rolls
Egg Rolls—Filled with vegetables and glass noodles.  Crispy and delicious!


Mixed Salad
Mixed Salad—which is, to mix your own vegetable with the store bought dressings next to it!  Hahaha…


Honey Glazed Ham
Honey Glazed Ham—Nothing represent holiday food better than a leg of honey glazed ham…oh, maybe besides the turkey!  Almost forgot about the turkey :P


Glutinous Rice with Chinese Sausage and Shitake Mushroom
Glutinous Rice with Chinese Sausage and Shitake Mushroom—This is one of my favorites!  Sprinkle with a little bit chopped green onions on top and I can eat just that as my Thanksgiving dinner!  :D


Cheesy Penne Pasta with Broccoli and Cauliflower
Cheesy Penne Pasta with Broccoli and Cauliflower—Cheesy and delicious.


Korean Spicy Stir Fried Pork
Korean Spicy Stir Fried Pork—This dish demonstrates the well balanced of the sweet and spicy!  I want to get the recipe to make it again at home!


Cream Corn
Cream Corn—A holiday staple side-dish.


Orange Juice and Spices Brined Turkey
Orange Juice and Spices Brined Turkey—Juicy, flavorful and delicious.  I believe it looked beautiful too before it was carved.  :P


Creamy Mashed Potato
Creamy Mashed Potato—Smooth and creamy.


Roasted Beef
Roasted Beef—Great BBQ flavor and beefy.


Sweet Potatoes with Marshmallow
Sweet Potatoes with Marshmallow—Another holiday staple side-dish in our family.


Garlic Knots
Garlic Knots—Check out the recipe from my last post here.


Rice Cake with Red Bean Paste and Walnut
Rice Cake with Red Bean Paste and Walnut—Not too sweet, the edges are crunchy and the center is chewy, very yummy.


I bet you don’t believe we only have one type of dessert for the Thanksgiving feast, right?  I need to confess that I totally forgot to take pictures when we started to eat the desserts!  :P  This particular picture was taken before dinner was served.  The rest of the goodness were all in our tummies and memories.  We had custard tarts, pumpkin pies, smoked almond turtles, taro cakes, flan, etc.  They were all sweet and delicious.  Oh well, I’ll make it up to you by posting something sweet on my next blog post.  ;)

Thursday, November 25, 2010

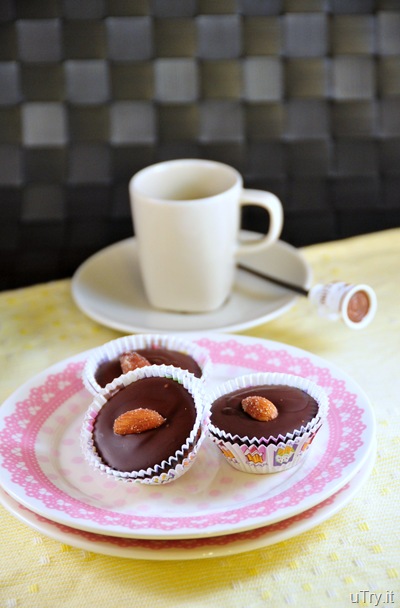
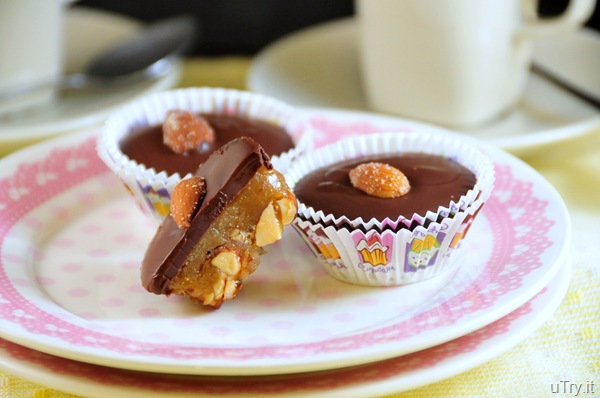
Smoked Almond Turtles and Garlic Knots

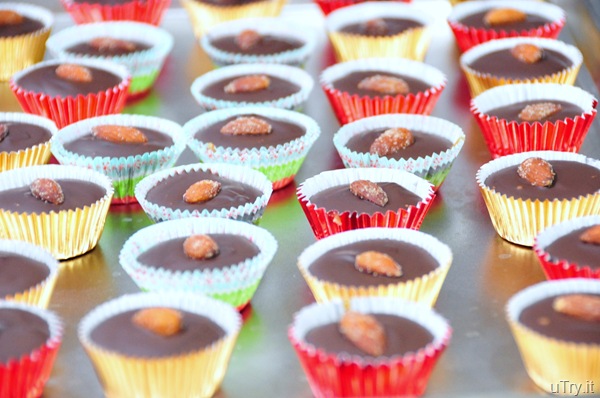
Smoked Almond Turtles

There is always, always, always something to be thankful for. I have many to be thankful for this year and I’ll continue to count my blessings every day.

I’m thankful for this lovely place called home, because it’s not just a house. It’s called home because it’s filled with love, and people I love.

I’m thankful for having many good friends in my life. Although we don’t see each other very often, but they’re like stars, I know they are always there. So, I keep them closed to my heart.


Smoked Almond Turtles

We should give without remembering and receive without forgetting. No one who achieves success does so without the help of others. I’m thankful that I have the abilities to give and have great friends and family that help and support me to become who I am today. 

Be thankful for what you have; you'll end up having more. If you concentrate on what you don't have, you will never, ever have enough.

It isn't what you have in your pocket that makes you thankful, but what you have in your heart. I believe the greatest things in life are free. The best and most beautiful things in this world cannot be seen or even heard, but must be felt with the heart.


Smoked Almond Turtles 
I’m thankful for all of you.  Who read and support my blog, weeks after weeks.  Left me comments and words of encouragement from time to time.  Thank you for all that you have given me. I hope that I can give it back... tenfold and more.  I will work my hardest to keep doing so.

I hope all of you have something to be thankful for this Thanksgiving. And let’s not forget those who are less fortunate around us.

This Thanksgiving, my family is going to have a gathering at my cousin’s house. We always have a big family gathering every year. I’m going to bring these Garlic Knots and Smoked Almond Turtles to share with them. Of course, I’m sharing my recipes with you all. For the rest of the feast, I’ll take pictures and post them up later on. Hope you all have a blessed and wonderful Thanksgiving.


Garlic Knots


Smoked Almond Turtles:
Makes 30 mini turtles
 
1 cup (5 ounces) coarsely chopped smoked almonds
1/2 cup heavy cream
1 stick (4 ounces) unsalted butter, at room temperature
1 1/2 cups light brown sugar
1 tablespoon water
1 cup bittersweet (60 percent cacao) chocolate chips (recommended: Ghiradelli)
 
Line 30 mini muffin pan with foil paper cups. Put the almonds on the bottom of each muffin cup and set aside.

For the caramel: In a 3-quart, heavy-bottomed saucepan, combine the cream, butter, sugar, and water. Stir over medium heat until the mixture is smooth. Bring the mixture to a boil and cook, without stirring, about 5 to 7 minutes. Let the mixture cool for 30 seconds. Using a long-handled, metal spoon, carefully spoon the caramel over the nuts. Allow the caramel to harden, at room temperature, for 1 hour.

Put the chocolate chips in a microwave safe bowl. Melt chocolate in microwave, stop and stir in 30 seconds intervals until all chocolate melted. Spoon the chocolate over the caramel and top each one with a smoked almond while chocolate is still soft. Refrigerate for 15 minutes. Let the turtles stand at room temperature for 30 minutes to allow the caramel to soften before serving.


Garlic Knots:
Makes about 36 knots

Dough
4 ½ cup bread flour
11/2 cup warm milk (around 115°F)
1 teaspoon kosher salt
3 tablespoon Sugar
2 tablespoon active dry yeast
4 tablespoon melted butter

Garlic Coating
2 tablespoons Olive Oil
4 tablespoon unsalted Butter
4 cloves Garlic, minced
1/4 cup finely chopped fresh Italian Parsley
sea salt to taste

Combine milk, butter, salt, sugar, and active dry yeast in a large re-sealable container or bowl. Mix to dissolve yeast.

Add flour.  Mix to incorporate flour, cover, and set in a warm spot to proof until doubled in volume (1 to 2 hours)

Set up your knotting station.  Grease a large wooden cutting board and a rolling pin with olive oil. Prepare a pizza cutter, a container of flour within easy reach. Then, line several sheet pans with parchment paper.
Oil your hands to help keep dough from sticking to them. Divide the dough in two parts.  Take the first half, put it onto the oiled board and slightly punch out the air bubbles in them.  Using the rolling pin, spread into an even rectangle approx. 5″x9″ and 1/2″ thick. Slice the rectangle into 1/2″x5″ strips.

Lightly sprinkle dough strips and board with flour.  Taking a strip and roll it back and forth to create an even rope. Tie into a knot (over, under, and through) and place it on lined sheet pan. Place knots about 1 1/2″ apart.  

Continue making the rest of the knots with the second half of the dough. After each sheet pan fills up, cover with a dry sack towel, and place in a warm spot to rise.
Preheat oven to 355° F

After knots have doubled in size, take off dry sack towel and place sheet pans in the oven.  Bake knots for approx. 13-15 minutes or until slightly golden, cool on wire rack.
While knots are cooling, make garlic coating.  In a small saucepan with low heat, gently warm olive oil, butter, and garlic. Cook it for a few minutes until soft & slightly golden. Off the heat, add chopped parsley and set aside.

Place knots in a large bowl and toss with garlic coating, season with sea salt to taste.

Best served warm, but still good at room temperature.