Sunday, April 24, 2011

Mocha Tiramisu Cupcakes

Mocha Tiramisu Cupcakes

I’ve been craving for some Tiramisu lately.  It’s one of my favorite desserts.  Hm…guess I really have a long list of favorites.  Anyhow, I can’t seem to find ladyfingers anywhere, which is one of the main ingredients in making Tiramisu.  I’ve tried to bake the ladyfingers but unfortunately, they weren’t that successful.  (Yeah, not everything came out of my kitchen are perfect.  Let’s be real.)  The homemade ladyfingers were not good enough for me to use them in my Tiramisu!  Fortunately, I came across the idea of Tiramisu Cupcakes (before I had a chance to drive down to a bakery to get my Tiramisu fix)!  What a genius idea, right?!   So, in the kitchen I went….

Mocha Tiramisu Cupcakes

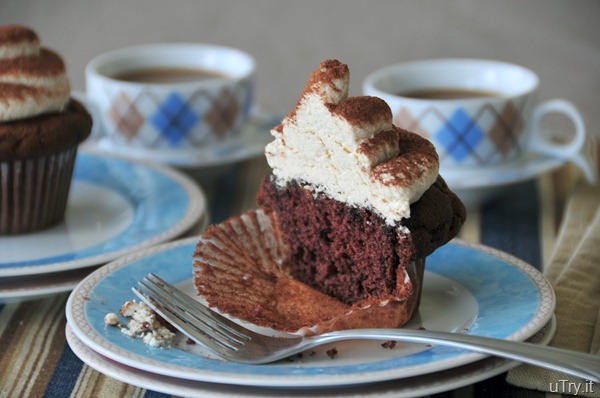
Instead of just regular Tiramisu cupcakes, I kicked it up a notch with a little more flavor, my favorite MOCHA!  Chocolate and coffee/espresso were just perfect for each other.  Since I filled up my inventory in Valrhona Cocoa Powder on my last trip to Whole Foods, I just couldn’t resist not to add it to my recipe!  :P  They were really chocolaty and addictive!   After you’ve tried Valhona’s Cocoa Powder, you’ll not go back to any other brand.  At least, that’s the case for me.  It’s a little bit more pricey, but totally worth every penny.  (By the way, I’m not compensated in anyway for saying these—although I wished they would pay me in chocolate/cocoa powder.  hahaha….These are just my own opinions.)
Mocha Tiramisu Cupcakes

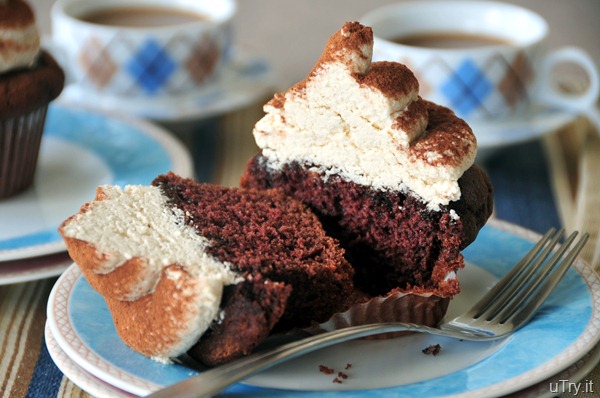
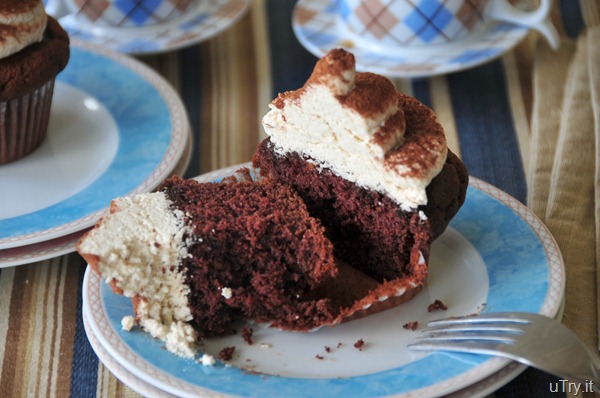
With Tiramisu in cupcake forms, it’s a perfect way to portion control!   Yes, I needed serious controls over these Mocha Tiramisu Cupcakes.  The cake itself was moist, with a lovely mocha flavor and a hint of Kahlua.  The syrup really did wonders to the cupcakes.  The Mascarpone frosting was light, creamy, smooth and fluffy.  Just like eating clouds….clouds that were packed with Tiramisu flavor.  If you love Tiramisu, you’ve got to try this recipe out.  It’s much easier than making the traditional Tiramisu.  At least I didn’t have to drive around to find the ladyfingers.  There’s no dipping or layering involved.  But the end results were as stunning and delicious as the traditional ones. 
Mocha Tiramisu Cupcakes

Hm…nom nom nom….

Mocha Tiramisu Cupcakes

Heavenly…..

Mocha Tiramisu Cupcakes

Need I say more?


Mocha Tiramisu Cupcakes:  (inspired by Martha Stewart’s Tiramisu Cupcakes)
Makes 14 cupcakes

Ingredients for the Chocolate cupcakes: 
12 tablespoons (1 1/2 sticks) unsalted butter, at room temperature
2/3 cup granulated sugar
2/3 cup light brown sugar, packed
2 extra-large eggs, at room temperature
2 teaspoons pure vanilla extract
1 cup buttermilk, shaken, at room temperature
1/2 cup sour cream, at room temperature
2 tablespoons brewed coffee
1 3/4 cups all-purpose flour
1 cup good cocoa powder
1 1/2 teaspoons baking soda
1/2 teaspoon kosher salt


Ingredients for the Espresso-Kahlua Syrup:

1/4 plus 2 tablespoons cup freshly brewed espresso
3 tablespoons Kahlua
3 tablespoons sugar

Ingredients for the Mascarpone Frosting:1 1/2 cup heavy cream
12 ounces mascarpone cheese, room temperature
3/4 cup confectioners' sugar, sifted
3 tablespoons Espresso-Kahlua Syrup (see above recipe)
3/4 teaspoon vanilla extract


For the Chocolate cupcakes:
Preheat the oven to 350 degrees F. Line cupcake pans with paper liners.

In the bowl of an electric mixer fitted with a paddle attachment, cream the butter and 2 sugars on high speed until light and fluffy. Lower the speed to medium, add the eggs, 1 at a time, then add the vanilla and mix well.

In a separate bowl, whisk together the buttermilk, sour cream, and coffee. In another bowl, sift together the flour, cocoa, baking soda, and salt.

On low speed, add the buttermilk mixture and the flour mixture alternately in thirds to the mixer bowl, beginning with the buttermilk mixture and ending with the flour mixture. Mix only until blended.

Divide the batter among the cupcake pans, around 1 rounded standard ice cream scoop per cup. Bake in the middle of the oven for 20 to 25 minutes, until a toothpick comes out clean. Cool for 10 minutes, remove from the pans, and allow to cool completely before frosting.

For the Espresso-Kahlua Syrup:

Stir together, espresso, Kahlua and sugar until sugar is dissolved. Let cool. (Reserve 3 tablespoons of the Syrup for the frosting.)

For the Mascarpone Frosting:
With an electric mixer on medium speed, whisk heavy cream until stiff peaks form. Set aside. In another bowl, whisk together mascarpone and confectioners' sugar until smooth. Then beat in 2 tablespoons of the reserved espresso syrup and vanilla extract until well combined and smooth. Gently fold whipped cream into mascarpone mixture until completely incorporated.

To Assemble:
Brush tops of cupcakes evenly with the remaining coffee-Kahlua syrup; repeat until all syrup has been used. Allow cupcakes to completely absorb liquid. Place frosting into a pastry bag with large round tip. Generously pipe frosting on cupcakes. Dust with cocoa powder just before serving.

This recipe is linked to:
Foodie Friday
Sweets For Saturday
Sweet Tooth Friday
Seasonal Saturday
Everyday Sister Sharing Sunday
Wednesday, April 20, 2011

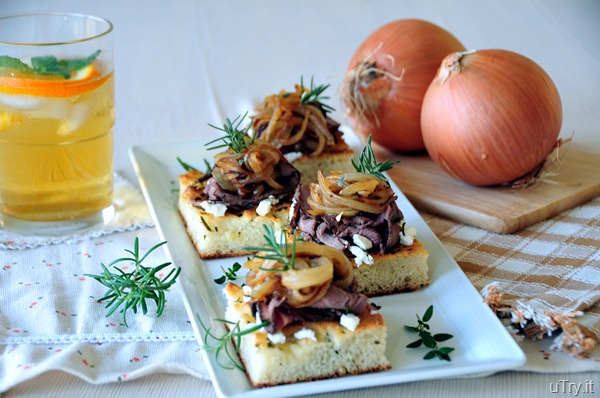
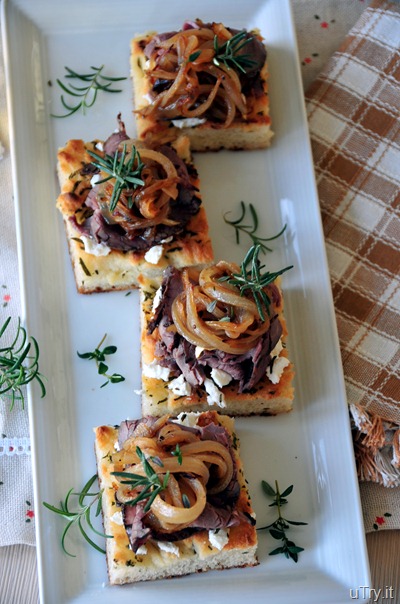
Caramelized Onion, Roast Beef and Goat Cheese Focaccia


288editedCaramelized Onion-Roast Beef and Goat Cheese Focaccia

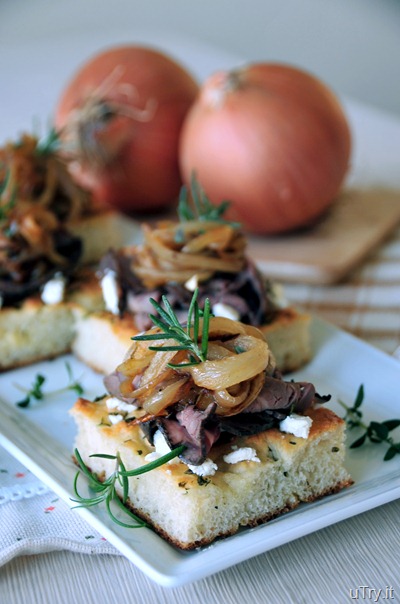
Not sure if you’ve noticed, many of my savory dishes includes Onion.  Onion is such a good aromatic ingredient in many dishes.  It enhances and accentuates the over all flavor of the dish without over powering other ingredients.  In many dishes, the onion functions as the aromatic ingredient.  However, onion is the star of this Caramelized Onion, Roast Beef and Goat Cheese Focaccia.  I especially adore caramelized onions. How can I not?  They are naturally sweet and the caramelized flavor is wonderful.
    Caramelized Onion-Roast Beef and Goat Cheese Focaccia

I’m glad that both of my kids love onions as much as I do.  When I was serving these Caramelized Onion, Roast Beef and Goat Cheese Focaccia the other day, my three and a half year old son ate the whole piece all by himself. Then, he requested for more caramelized onions!  Just the onions!  :)  I couldn’t help but smiled and gave him more onions.  After all, he has a very sophisticated palate, and I know exactly where he got his genes!  LOL

Caramelized Onion-Roast Beef and Goat Cheese Focaccia

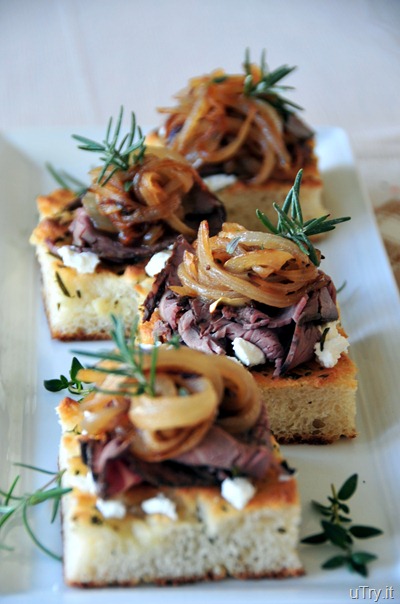
As promised from the previous post.  Here’s the “dressed up” version of the herbed Focaccia.  These Caramelized Onion, Roast Beef and Goat Cheese Focaccia are easy to make, and certainly elegant enough to serve at parties or gatherings as appetizers.  Yet, they are just simple, everyday ingredients.  Don’t you love that? If you’re not a fan of goat cheese, you can substitute that with your favorite type of creamy cheese.  You can also substitute the roasted beef with smoked turkey or any other kind of meat that you preferred.  Just make sure to be generous when you pile the caramelized onion on top and you’ll have a treat! 

Caramelized Onion-Roast Beef and Goat Cheese Focaccia

This recipe is an entry for April’s Kitchen Play sponsored by the National Onion Association.  This Caramelized Onion, Roast Beef and Goat Cheese Focaccia is inspired by the Beer-Braised Spring Onion and Herbed Goat Cheese Crostini.  Since my husband and I are not Beer drinkers, we don’t have any beer in the fridge.  But, I do have many bottles of red and white wine!  :)  So, I used some dry white wine to deglazed the pan when I sautéed the onion.  With a few springs of fresh chopped thymes, these caramelized onion turned out succulent, flavorful and amazing with it’s natural sweetness.
     
For more information about the Kitchen Play contest, please review the complete contest rules.
 
clip_image002         


Caramelized Onion, Roast Beef and Goat Cheese Focaccia:
Ingredients:
1 Recipe of Herbed Focaccia, cut into 3x3-inch squares**
2 Tablespoons olive oil
2 garlic cloves, minced
2 large yellow onions
3 tablespoons dry white wine
2 teaspoons fresh thyme leaves, minced
8 slices of roasted beef from the Deli
3 ounces goat cheese
For the Herbed Focaccia:**Please click here for the Herbed Focaccia recipe**

For the Caramelized Onions:
Heat olive oil in a large skillet over medium to low heat and add the onions and garlic.  Sauté for 15 to 20 minutes, stirring frequently, until there is almost no moisture remaining in the skillet. Add 1/2 teaspoon salt, 1/4 teaspoon pepper, the wine, and thyme. Continue to cook for another 10 minutes, until the onions are lightly browned. Remove from heat.
 
To assemble:
Crumble the goat cheese evenly on Focaccia squares.  Evenly divided the roasted beef, about 1/2 a slice for each Focaccia square.  Pile the caramelized onion on top.  Garnish with a spring of rosemary or thyme and serve.

Friday, April 15, 2011

Rosemary, Thyme and Oregano Focaccia

New Herbs

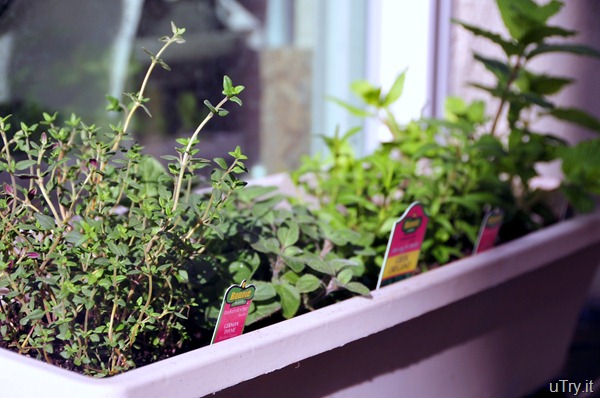
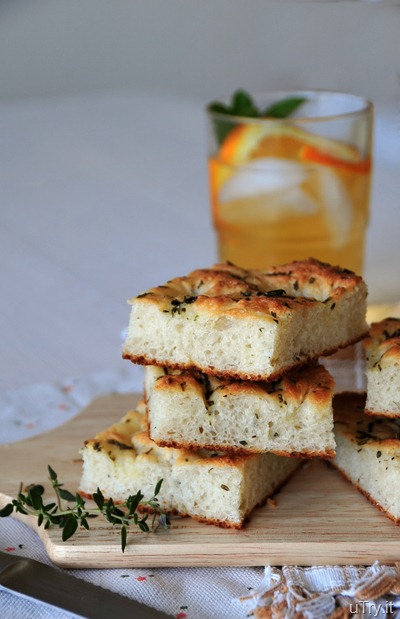
A few weeks ago, I’ve planted my new herbs, just in time for Spring.  Unlike last time around, I planted them in a rectangular pot (less crowded) and placed them right outside my kitchen window to get some sunlight.  There are thyme, oregano, tarragon and mint in this pot.  I have some rosemary in a separate pot (the only survivor from my last herb planting).  It’s soothing to see the greens while looking outside my kitchen window.  I’ve been using the herbs a lot lately and this Rosemary, Thyme and Oregano Focaccia is one of the creations using my favorite herbs.  

Rosemary, Thyme and Oregano Focaccia  
I made these Rosemary, Thyme and Oregano Focaccia in my trusty bread machine to save time in kneading.  If you don’t have a bread machine, no worries, I included the instructions without a bread machine for this recipe!  This is a really easy flat bread recipe and you can’t really mess it up.  I used some good quality organic extra virgin olive oil in this bread.  The olive oil adds a lovely fruity flavor to the bread, it also makes the bread fluffy on the inside and crusty on the outside.  The fresh rosemary gives the bread a piney and woodsy scent; the thyme is lemony and refreshing, and the oregano adds a depth of sweetness.  I especially love the golden brown crust on this bread!  Hm…wash it all down with a glass of iced tea and I call it a perfect afternoon pick me up.  This is one way to enjoy this Rosemary, Thyme and Oregano Focaccia.  I’ll show you in a different post on how to dress it up, and make a perfect appetizer, brunch or light supper out of this wonderful Focaccia.  Stay tuned. 

Rosemary, Thyme and Oregano Focaccia

***If you haven’t enter the two leaves and a bud’s Complete Tea Samplers Giveaway, please click here to enter. 


Rosemary, Thyme and Oregano Focaccia:

Makes 11x17-inch Flat Bread

1 1/4 cups warm milk
2 1/2 teaspoons active dry yeast
3 tablespoon sugar
2 1/2 cups bread flour, plus additional for kneading
2 teaspoons sea salt, for sprinkling
1/2 cup extra-virgin olive oil, divided (plus more for greasing the pan)
2 tablespoons fresh rosemary, finely chopped
1 teaspoon fresh thyme, finely chopped
1teaspoon fresh oregano, finely chopped

Direction with bread machine

In the bowl of the bread machine, add ingredients in the order of warm milk, sugar, 1 teaspoon sea salt, 1/4 cup olive oil, bread flour and yeast.  Set the bread machine for dough setting according to manufacturer’s menu.  (my bread machine’s dough setting would knead the dough for 30 minutes and let it proof for the first round while keeping the dough warm).

When dough is ready, take it out from the machine and put on a slightly floured surface.  Knead it by hand 1 or 2 times to deflate it.  Give it a sprinkle of flour if the dough is really sticky.

Brush an 11x17-inch jelly roll pan with olive oil.  Put the dough onto the jelly roll pan and begin pressing it out to fit the size of the pan. Drizzle the remaining 1/4 cup of olive oil on top of dough and continue to stretch the dough to fit the pan.  As you are doing so, spread your fingers out and make finger holes all the way through the dough.  Sprinkle the top with rosemary, thyme, oregano and remaining sea salt.

Put the dough in a warm place until it has doubled in size, about 1 hour. While the dough is rising a second time, preheat the oven to 425 degrees F.

Bake 20 to 25 minutes or until the top of the loaf is golden brown. Remove the focaccia from the oven and cool on wiring rack before cutting and serving.

Direction without bread machine.

Combine the warm milk, yeast and sugar in a small bowl. Put the bowl in a warm place until the yeast is bubbling, about 15 minutes.

In the bowl of a mixer fitted with a dough hook, combine the flour, 1 teaspoon of sea salt, 1/4 cup olive oil and the yeast mixture on low speed. Once the dough has come together, continue to knead for 5 to 6 minutes on a medium speed until it becomes smooth and soft. 

Transfer the dough to a clean, lightly floured surface, then knead it by hand 1 or 2 times.  Give it a sprinkle of flour if the dough is really sticky.

Coat the inside of the mixer bowl lightly with olive oil and return the dough to the bowl. Cover it with plastic wrap and put it in a warm place until the dough has doubled in size, about 1 hour.

Brush an 11x17-inch jelly roll pan with olive oil.  Put the dough onto the jelly roll pan and begin pressing it out to fit the size of the pan. Drizzle the remaining 1/4 cup of olive oil on top of dough and continue to stretch the dough to fit the pan.  As you are doing so, spread your fingers out and make finger holes all the way through the dough.  Sprinkle the top with rosemary, thyme, oregano and remaining sea salt.

Put the dough in the warm place until it has doubled in size, about 1 hour. While the dough is rising a second time, preheat the oven to 425 degrees F.

Bake 20 to 25 minutes or until the top of the loaf is golden brown. Remove the focaccia from the oven and cool on wiring rack before cutting and serving.

This Recipe is Linked to:
Garden Variety Wednesday

Wednesday, April 13, 2011

Virtual Bake Sale Update

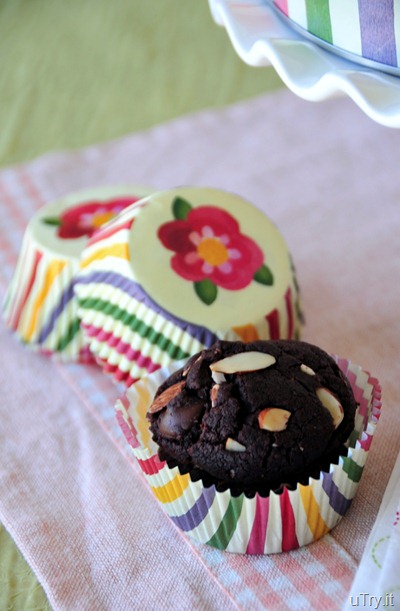
Triple Chocolate Almond Cookies

I would like to take this opportunity to thank everyone who participated, placed a bid, and/or helped spread the words on the Virtual Bake Sale that benefits the Japan Earthquake victims.  We raised a total of $8269 in just one day, for all the baked goods sold in the auction.  So, thank you everyone!  For the rest of the details about the bake sale, please visit The Tomato Tart’s blog

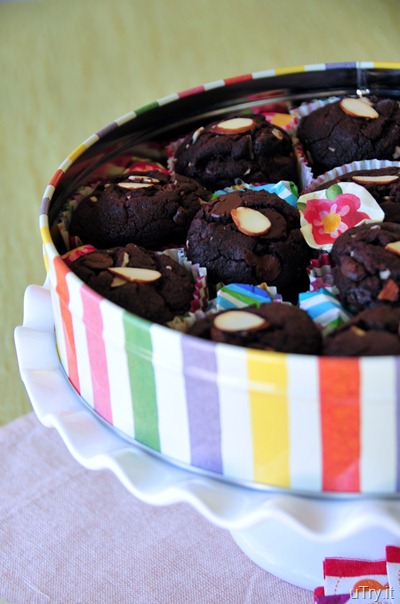
Triple Chocolate Almond Cookies

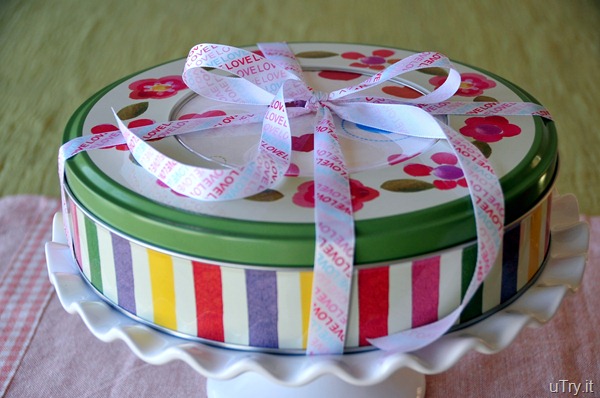
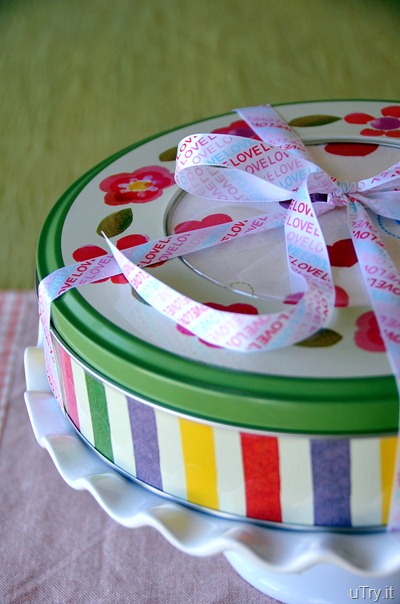
On Monday, I shipped out two dozens of these Triple Chocolate Almond Cookies to the action winner.  The cookies should arrive today, I hope they stay intact in this lovely cookie tin.

Triple Chocolate Almond Cookies
This is such a beautiful cookie tin, just perfect for two dozens cookies.  Baked with love, from my kitchen to yours.  I packed some heart shape printed napkins on top of the cookies inside the tin so the cookies won’t move around during shipping.  Plus, the recipients can have some napkins to use while enjoying the cookies. 

Triple Chocolate Almond Cookies

I hope the winner and her family would enjoy these cookies as much as my family does. Thank you again!

Triple Chocolate Almond Cookies

Sunday, April 10, 2011

Homemade Granola


There is no doubt that Spring is here and Summer is approaching fast.  At least, that’s how it feels in Southern California.  With the temperature rising, I crave for cool treats in the afternoon as a pick-me-up.  However, I’m kind of watching my waist line (if there’s one) because I want to get ready for the bikini season.  Hahaha…who am I kidding!?  Let me rephrase it.  I guess I just don’t want to look too over-weight when I have to wear short sleeves.  Fact: I’ve never put on my bikinis after having my kids.  I don't dare to look at, or imagine, the “before and after” pictures. Yike…Hopefully, someday in the future, my bikini collection will see the sunlights again! 


Homemade Granola

Who said healthy snacks can’t be tasty?  After today, I hope you’ll change your mind on that.  At least, my family and I did.  These Homemade Granola not only are super duper easy to make, they are to die for.  I love the flaky and crunchy texture of the toasted coconut, oats and almonds.  The honey adds a lovely sweet tone, but not overly sweet.  The vanilla extract accentuate these granolas with a lovely sweet aroma.  When these granolas are baking, your whole house would smell sweet and wonderful.  I say, it’s even better than breads or cookies baking in the oven!  You’ve got to give it a try to find out.

Homemade Granola

In this recipe, I added the Homemade Granola on the bottom of the mini martini glasses.  Top with fresh raspberries and strawberry yogurts, and of course, MORE granolas on top!  This granola is also a wonderful topping for ice cream, gelato or sorbet.  Simply add them to your favorite bowl of cereal or oatmeal would take your morning breakfast to a whole new level.  They are definitely perfect with any cool treat!  But before you add them onto anything, try to refrain yourself from eating the whole batch right out of then oven!  Yes, they are really that good!   :)

Homemade Granola


Homemade Granola:
Makes: 4 cups 
2 cups old-fashioned rolled oats
1 cup sweetened shredded coconut
1 cup sliced almonds
pinch of kosher salt
3 tablespoons butter, melted (Vegan option: substitute with vegetable oil or coconut oil)
1/3 cup honey (Vegan option: substitute with 4 tablespoons of agave)
1/2 teaspoon vanilla extract
Preheat the oven to 350 degrees F.
In a large mixing bowl, toss the oats, coconut, almonds and salt together.  In a small bowl, whisk together the butter, honey, and vanilla. Pour the butter mixture over the oat mixture and stir with a wooden spoon until all the oats and nuts are coated.
Pour onto an 11 by 17 by 1-inch sheet pan lined with foil. Bake, stirring every 5-7 minutes with a wooden spatula/spoon, until the mixture turns a nice, even, golden brown, about 15-20 minutes*.
Remove the granola from the oven and allow to cool, stirring occasionally.  Store the cooled granola in an airtight container. 


*Note: I've made many more times of these Granola after this post.  If you're using a larger sheet pan, the baking time might be less.   As soon as the Granola turn golden brown, remove them from the oven.  they will crisp up as they cool.  

Serving suggestions:
1) I munch on them as snacks!  Yeah, 4 cups isn’t really a lot.
2) Spoon a tablespoonful on the bottom of a mini martini glass (or a bowl), top with fresh berries (I used raspberries here), then, spoon your favorite yogurt (I used strawberry yogurt) on top.  Top with more homemade granola goodness and enjoy! 
3) Simply sprinkle over ice cream, gelato or sorbets.
4) Add to your favorite breakfast cereal or oatmeal

This recipe is linked to:
Sweets for Saturday
Mouth Watering Monday
Fresh, Clean and Pure Friday

Wednesday, April 6, 2011

Vegetarian Chop-Suey (羅漢齋) Semi-Home Made?

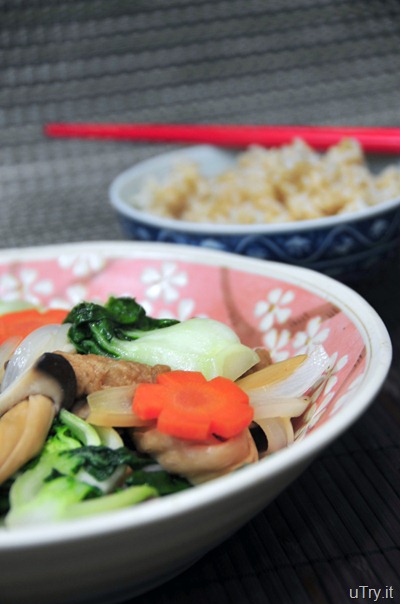
Vegetarian Chop Chuey (羅漢齋)

I’m a meat lover and don’t think I can ever convert to a vegetarian.  However, I also love vegetables to a point that I got to have vegetables everyday (although not every single meal).  Each week, there would be a day (maybe two in the future) that I prepare meatless dishes only and this is one of the vegetarian dish that I make most often for this special day of the week.   

Vegetarian Chop Chuey (羅漢齋)

Why a meatless day for a carnivore?  I guess my body is telling me I need to “detox”!  After consuming all the meats for a week, my body longs for a dish that is light and easy to digest.  During the summer, I often make salads.  (You can find some of my salad recipes here, here and here.)  But for winter or cooler days, it’s better to have a hot and hearty dish.  This Vegetarian Chop-Suey dish fits the bill.   Want to know why it is semi-home made?  You’ll see why as you read along.  

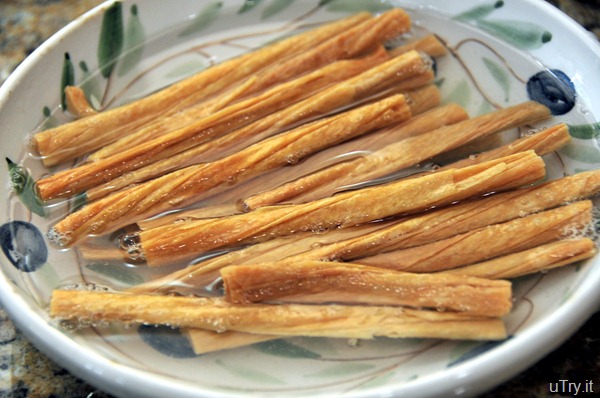
First, we need some vegetarian protein sticks.  What a funny name, huh?!  They are actually dried soybean curd.  They are convenience to use, nutritious and has a great texture.  You can find them in most Asian supermarkets. 

Vegetarian Protein Stick

Soak them in hot tap water for 10-15 minutes.  Drain and gently squeeze out excess water and they’re ready to be used for the stir fry.  During the cooking process, these Vegetarian Protein Sticks will absorb quite a bit of the sauce.  So, they turn out to be very flavorful and delicious.
 Vegetarian Protein Stick

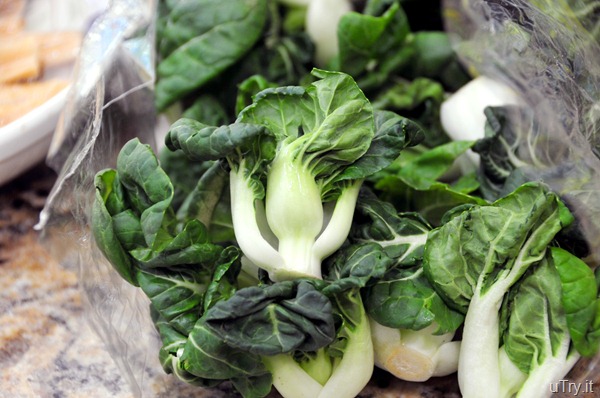
Up next, some beautiful baby Bak Choy.  I always love the baby version as they’re more tender.  Wash and drain them well.  I cut some of the bigger ones in half, vertically, so all of them cook evenly.

Baby Bak Choy 
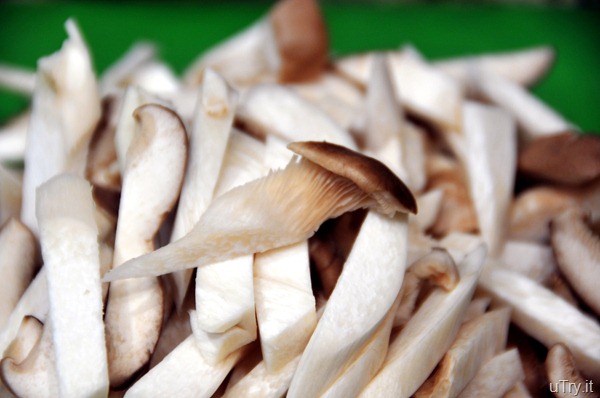
What make this dish so hearty?  The star ingredient is King Trumpet Mushroom.  The nick name for these mushroom in Chinese is “chicken drumsticks mushroom” or “abalone mushroom”.  It is because of their shape resemblances the drumsticks, and their texture is similar to the abalone.  These mushrooms are super meaty and add so much texture to the dish.    

King Trumpet Mushroom

Simply julienne them into thin strips and they are ready to go.  Of course, thin strips mean faster cooking time too.

King Trumpet Mushroom

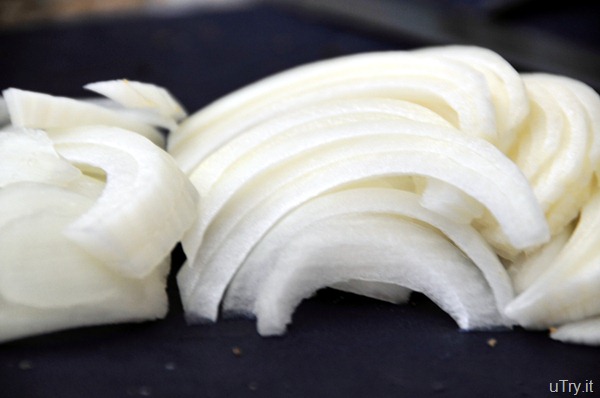
Up next, the sweet yellow onions.  Simply thinly sliced them and sautéed them until crisp-tender.  They add a wonderful tender-crisp texture and sweet flavor to this dish.  
 
Onions


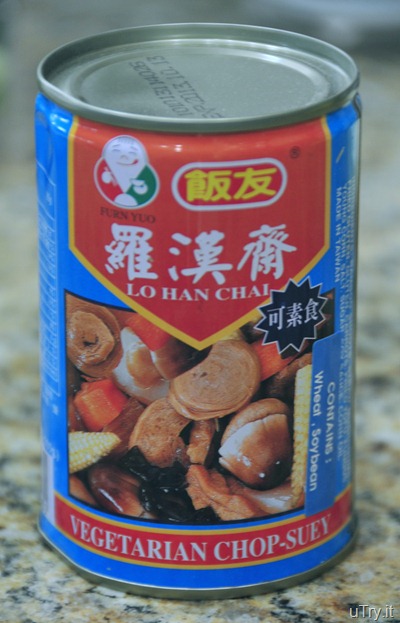
Last but not least, the secret ingredient to make this dish 'semi-home made' (and my life much easier) is a can of vegetarian chop-suey (羅漢齋).  I buy these cans all the time and never pay attention to the English name until now.  :)  The term chop-suey literally means the mixture of many chopped ingredients.   Which is exactly what’s in this can.  There are bamboo shoots, straw mushrooms, fried gluten, carrots, fried tofu, fungus, baby corn, soy sauce, salt and sugar, etc.  It’s fully seasoned and the sauce in this can is delicious.  You don’t need to add much to the rest of your ingredients except white pepper and sesame oil. 
 
Vegetarian Chop Chuey (羅漢齋)

I’m seriously considering having 2 meatless days a week instead of just 1.   With a dish so healthy and so easy to make, why not?  The most important thing is, you’ll feel GOOD after eating it.  I can guarantee that you won’t even miss the meat (for that day, at least).  Try this recipe out, your body will thank you afterwards. 

Vegetarian Chop Chuey (羅漢齋)


I created this Vegetarian Chop Suey dish as an entry for April’s Kitchen Play sponsored by the National Onion Association. This dish is inspired by the Onion-Bacon Salad with Warm Crème Fraîche Dressing.  This is a cooked, Chinese version of the salad dish.  Why? It is because as much as my kids LOVE onions, they only eat them cooked.   They surely did enjoy this dish.
For more information about the Kitchen Play contest, please review the complete contest rules.
 
clip_image002         


Vegetarian Chop-Suey (羅漢齋) Semi-Home Made:
Servings: 4

Ingredients:
1/2 a medium yellow onion, julienned
1/2 carrot, cut into thin disks
20 Vegetarian Protein Sticks, soaked in hot tap water for 10-15 minutes, drain and gently squeeze out excess water
1 pound of baby Bak Choy
1 pound of King Trumpet Mushroom, julienned
1 can (14.5 ounce) vegetarian chop-suey (羅漢齋)
a pinch of white ground pepper
a dash of toasted sesame oil

In a wok or heavy-duty sauté pan with medium-high heat, add 2 teaspoons of vegetable oil or olive oil.  Sauté the onion, carrot and baby bak choy together until crisp tender, season with a little bit of salt if desired.  Remove to a large serving dish. 

In the same wok, add another 2 teaspoons of oil and sauté the King trumpet mushrooms until tender, 4-6 minutes depending on the size of your strips.   Season with a little bit of salt, a pinch of white ground pepper and a dash of sesame oil.  Taste one strip to check on seasoning and doneness.  Remember, don’t add too much salt as the canned chop-suey is well seasoned.  Remove to the same large serving dish with the bak choy mixture.

Next, pour the entire can of vegetarian chop-suey (羅漢齋) in the wok with the softened vegetarian protein sticks, cook until sauce is boiling.  Return the mushrooms and bak choy mixture back to the wok.  Stir occasionally and cook until heated through.  Check seasoning, add a pinch of pepper and a dash of sesame oil if needed.  Serve with a bowl of rice or noodle and enjoy.


This recipe is linked to:
Full Plate Thursday
Foodie Friday
This Week's Craving

Saturday, April 2, 2011

Two leaves and a bud TEA COMPANY--Product Review and Giveaways

 
Two Leaves and a Bud

Those who know me well should know that I’m a tea lover.  Many of my afternoon treats go perfectly with a cup of tea. However, I still love my French Roasted, rather strong coffee in the morning. That’s about the only thing that can really wakes me up (besides my baby' girl’s crying).  But throughout the day and especially around tea time, I really prefer a cup of hot tea.  Until I tried the tea sachets from two leaves and a bud, I didn’t know what I’ve been missing.  Their organic tea tastes like nothing I’ve ever had before.  They are rich, complex, fragrant, and simply unforgettable. 

Two Leaves and a Bud--Complete Sachet Sampler

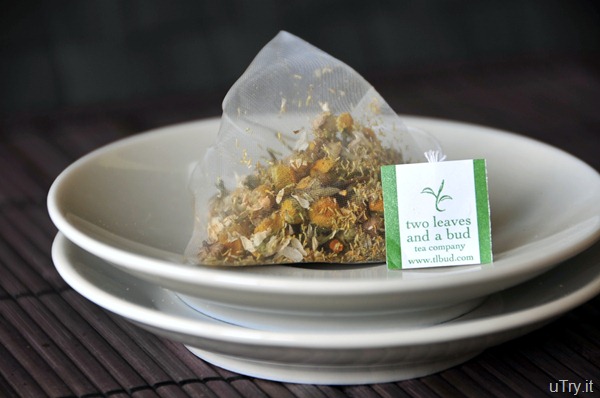
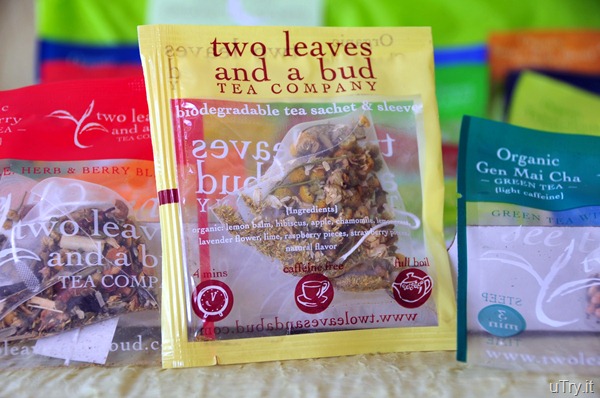
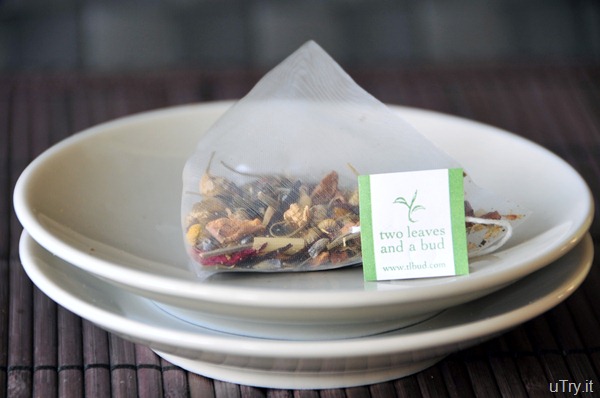
Two leaves and a bud sent me a box of Complete Sachet Sampler to try (see above picture).  It contains one of each two leaves and a bud tea, a total of 18 sachets.  It’s a genius way to try out which flavor you love most before you place an order for a specific flavor.  I think it’ll also make a great gift for a tea lover and the like.  The only issue I have is that it’s impossible to pick just one favorite.  All of them are unique and flavorful in its own way.  For instance, take a look at the Organic Chamomile sachet picture below.  Do you see those generous amount of delicious little flower in one sachet?  I couldn’t resist but to sniff it right after I opened the package.  The sweet scent came right through along with a rich apple scent.  It’s the best chamomile tea I’ve ever had, by far.  Besides the sweet floral and apple scent, it came with a hint of honey taste as well.  I sure did enjoyed a relaxing afternoon with a cup of hot Organic Chamomile tea in my hands.

Two Leaves and a Bud

If you’re new to tea drinking and don’t know much about tea, hop on to two leaves and a bud’s website to learn more.  They are truly passionate about tea and focus on providing their customers with the best quality of products.  There are simple instructions on how to brew each tea and there’s a knowledge center link on the site.  However, if you’re lazy like me and don’t like to read too much, no big deal. The brewing instructions are printed on each sachet!  See the package below, suggestion brew time is 4 minutes, this Organic Chamomile is caffeine free, and the water temperature for brewing should be a full boil.  Informative, right?  Plus, there’s a list of ingredients on each package as well.  Don’t you love that?  Last but not least, the tea sachet and sleeve are biodegradable too!

Two Leaves and a Bud

Up next, I tried the Organic Orange Sencha.  I love green tea and this particular one is delicately blended with Italian red orange that gives it a hint of citrus flavor.  It really did perk up my taste buds and my spirit.

Two Leaves and a Bud

Another beautiful sachet is the Organic Pomi-Berry (see picture below).  Do you see the lovely chamomile and forest berries in it?  When you can see the whole tea leaves, petals and herbs inside the sachet, you know these are quality ingredients.  I love it, especially, you can make iced-tea from the Pomi-Berry. Yes, you heard me right, iced-tea.  So perfect for spring and summer. 

Two Leaves and a Bud

It’s naturally sweet with a lovely berry flavor that isn’t too herbal.  You can add a little bit of sugar or agave to sweeten it up.  For me, they are perfect as it is with its natural sweetness.  Look at the vibrant color.  So festive to serve at any parties or celebrations.  It’s refreshing, slightly tangy and smooth. 

Two Leaves and a Bud

I only named a few and the rest of the sachets are just as wonderful.     

Two Leaves and a Bud

***This giveaway is closed.  The winners will be announced shortly.***

Moving on to the giveaways.  Two leaves and a bud is so generous.  They are giving out 2 Complete Sachet Samplers to 2 lucky uTry.it readers.  Here are the rules on how to enter the giveaway.  This giveaway is open to anyone with an U.S. mailing address.  It will be closed on May 2, 2011, PST midnight.  The winners will be announced within 1 week after the giveaway is closed.  Please include your email address on your first entry/comment so I can contact you if you are one of the lucky winners. (For example: amy [at] utry [dot] it)  There are 8 ways to enter this giveaway.

1) Mandatory entry: Please visit two leaves and a bud’s website, browse around and let me know which tea you would love to try and leave a comment on this post. (gets 1 entry)


Optional entries (feel free to do any or all of the following to get extra entries):

2) Follow two leaves and a bud on Facebook (gets 2 entries) and tell me in the comment section that you did.  Leave a separate comment for each entry.  Sample comments:  “I am following two leaves and a bud on Facebook, entry #1” ; “I am following two leaves and a bud on Facebook, entry #2”


3) Sign up T-mail on two leaves and a bud’s website (gets 2 entries) and tell me in the comment section that you did.  Leave a separate comment for each entry.  (See sample comments above.)

4) Sign up as an uTry.it follower and leave a comment to let me know that you did.  If you’re already my follower, thank you for your supports and leave me a comment to let me know you’ve already signed up. (gets 1 entry)

5) Subscribe to my RSS feed so you won’t miss out on future giveaways, and leave a comment to let me know that you did. (gets 1 entry)

6) “Like” uTry.it on Facebook and leave a comment to let me know that you did. (gets 1 entry)

7) Share this giveaway on Facebook with your friends including a link back to this post, come back and leave a comment to let me know that you did. (gets 1 entry)

8) Write a blog post about this giveaway, come back and let me know that you did (gets 2 entries).  Please leave a separate comment for each entry.  (see # 2 above for sample comments)

If you can’t wait to try two leaves and a bud’s wonderful tea, here’s another good news for you.  Two leave and a bud is offering the first 25 uTry.it readers a 20% off on your entire online purchase!  Just use the promotional code UTRYIT2011 at check out.  (Please note that the promotional code cannot be combined with other promotions on their site) What are you waiting for?  Hop over to two leaves and a bud and try them today.  You’ll be glad that you did.

Thank you for stopping by today and have a wonderful weekend.  Cheers (raising my tea cup)!    


*Disclaimer: I received the free samples for the purpose of this review and I am not compensated in any way to write this post.  All comments and opinions are 100% my own.


This post is linked to:
Hearth and Soul Hop