Thursday, March 31, 2011

The winner of the Culinary Smackdown Battle--Cookies


WOW is exactly what came to my mind when I saw all the amazing and delicious cookie entries from the Culinary Smackdown Battle—Cookies!  I want to thank everyone of you who participated in this contest.  However, as you all know, only one person can win!  It’s truly hard to just pick one winner because, to me, all of you are truly talented and generous in sharing your delicious cookie recipes.  All of you are winners to me.  Out of 120 entries…there are quite many that stand out and make it even harder for me to pick just one winner.    Before we go to the winner announcement, here’s a recap on the prizes:

1) Giada De Larentiis Embroidered Apron – a $15 value
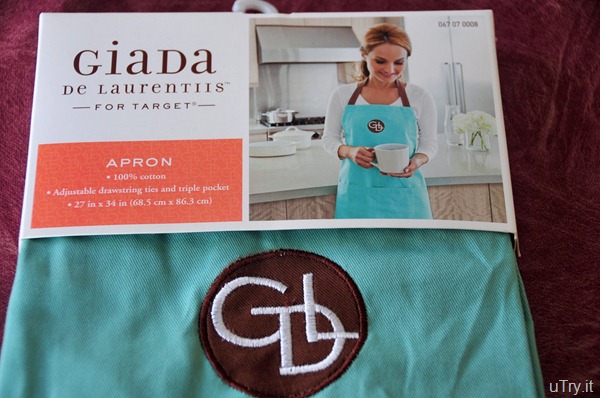
Apron
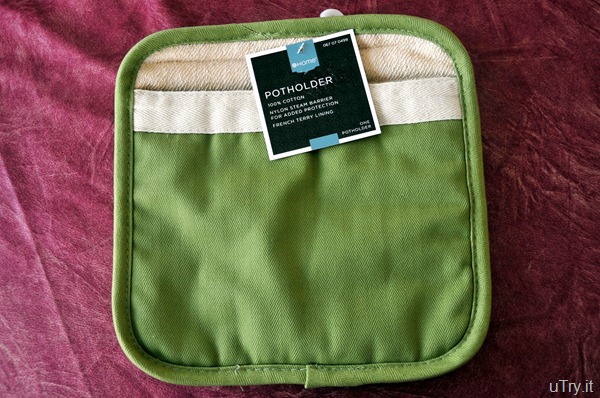
2) Home brand Potholder – a $5 value

Potholder

And the winner is……


Strawberry-Nutella Thumbprint Cookies from Sinfully Spicy


Strawberry-Nutella Thumbprint Cookies from Sinfully Spicy
Picture from  Sinfully Spicy

Congratulations to Tanvi from Sinfully Spicy!  Check out her post on these cookies.  I love her notes and her detail pictorial on the recipe as well!  Well done, Tanvi! 
So, Tanvi, please grab the badge below and be the host for April’s Culinary Smackdown Battle.  Have fun and enjoy!  I look forward to the theme that you’re going to come up with for next month’s contest.       


Before we go, here are a few recipes that I selected as Honorable Mentions.  They are (in random order)…

Chocolate Peanut Butter Cup Cookies from My Five Men

Chocolate Peanut Butter Cup Cookies from My Five Men
Picture from My Five Men

These Chocolate Peanut Butter Cup Cookies have the classic flavors combination and they are so much fun to eat!  If you haven’t check out My Five Men’s blog and her recipes, you should.  I really enjoy reading her blog and the little stories that she shares with us…and all her mouth watering recipes!


Apple Jacks Cookies from Sweet as Sugar Cookies

What a creative use of Apple Jack cereal to add flavors and colors to these cookies!  Lisa from Sweet as Sugar Cookies hosts a linky party every Saturday called Sweets for Saturdays and it’s a great success.  Link up your recipe and  meet other foodies and bloggers for fun.  You’ll be glad you did.  Did I tell you yet?  Lisa is a really sweet person, sweet as sugar cookies!  ;)
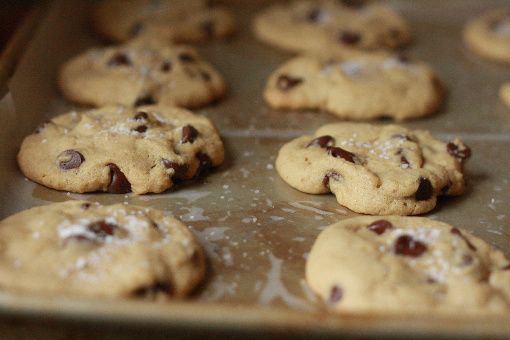

Chocolate Chip Goodness from Could I Have That?
Picture from Could I Have That?
Boy oh boy, I don’t think anyone can resist these Chocolate Chip Goodness!  They are simply mouth watering.  Samantha from Could I Have That? has a beautiful blog.  She is talented.  I love her photography and her modeling of wonderful outfits she picks each week.  Her blog and recipes are fun to read.
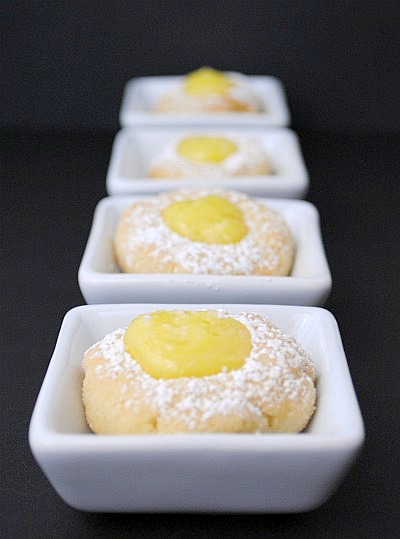

Lemon Curd Thumprint Cookies from You Made That?
Picture from You Made That?
These Lemon Curd Thumbprint cookies are just too cute to eat.  Each one is unique and looks like a beautiful daisy to me.  Suzanne from You Made That? is creative and artistic.  Her recipes and crafts are always amazing and beautiful.  If you want your guests to ask you the same question “You made that?” because they are amazed by the wonderful products or treats you created, you’ve got to try Suzanne’s recipes and crafting tips. 


Double Vanilla Delights~Rainbow Cookies from Munchin Munchies
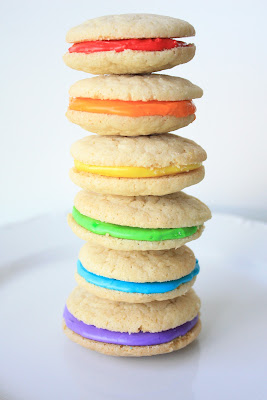
Picture from Munchin Munchies
Looking at these colorful Rainbow Cookies makes me feel happy! I’m sure I’ll be even more happy if I can have a few bites!  If you haven’t visit Munchin Munchies, you don’t know what you’ve been missing out!  I love her creative and beautiful recipes.  They are always fun to make and fun to eat.  Her munchins are super adorable too!   

Thank you again for everyone who participated in this contest!  Hopefully, we’ll have another fun event like this real soon!  :) 
Thank you for stopping by and have a wonderful day you all.
Sunday, March 27, 2011

Friendly Reminders

Just a quick note to remind you that the deadline to submit your entry to the Culinary Smackdown Battle—Cookie is 3/29/2011.  You still have 1 day left to submit your recipe if you haven’t done so.  The winner will be announced on 3/31/2011.  So, don’t forget to hop back here to check out the winner announcement.  The prizes for this contest are:

1) Giada De Larentiis Embroidered Apron – a $15 value

Apron

2) Home brand Potholder – a $5 value

Potholder


Another reminder is the Virtual Bake Sale to benefit the Japan earthquake victims.  The auction for the bake sale will be held at The Tomato Tart’s Blog on 3/30/2011.  Please visit her blog to check out all the goodies available for the bake sale.

Online Bake Sale for Japan! March 30!


Thank you for stopping by today and have a wonderful week ahead.

Wednesday, March 23, 2011

Matcha (Japanese Green Tea) Mousse Cheesecake with Pistachio Crust

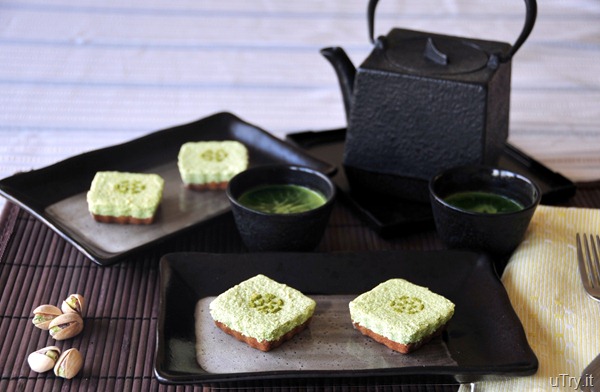
Matcha (Green Tea) Mousse Cheesecake with Pistachio Crust

I’ve purchased this square mini baking pan for a while but haven’t had a chance to put it to good use.  In my mind, I’ve created recipes using this pan, recipes such as mini cheesecakes or individual quiches for future parties or gatherings (yeah, I day dream about food all the time! LOL).  When I found out the theme on Dessert Wars for March, I couldn’t be happier!  To celebrate St. Patty’s Day, the theme for March is GO GREENMatcha (Japanese green tea) is one of the flavor I’ve always wanted to incorporate into a cheesecake.  While matcha might not be a popular ingredient in western desserts, it’s commonly used in Asian cuisines especially baked goods. 

Matcha (Green Tea) Mousse Cheesecake with Pistachio Crust

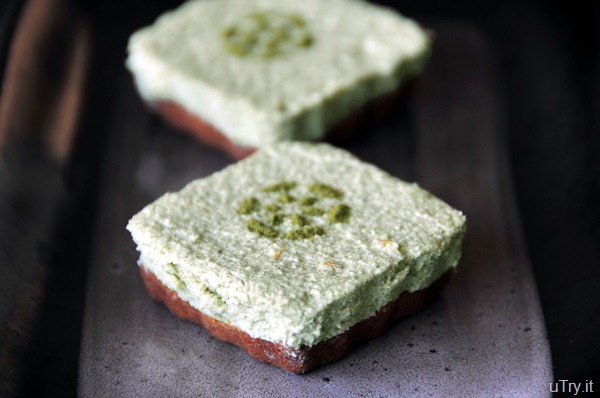
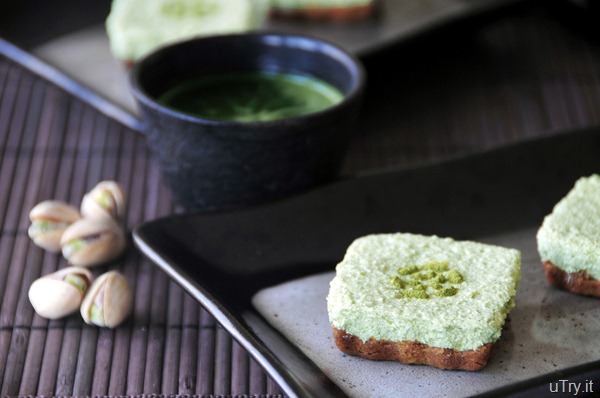
Japanese bakery shops are one of my favorite places to visit.  They always infused western desserts with a unique twist of their own.  I love Japanese bakeries especially their cakes.  Japanese cakes are known for their moist, creamy, light and airy texture, and not overly sweet taste.  This Matcha Mousse Cheesecake with Pistachio Crust is definitely a delightful creation that fits into all of the descriptions above.  In addition to that, the pistachio crust certainly enhance the over all flavor and texture of the cake.  This crust is crunchy and slightly crumbly with a lovely nutty and buttery flavor.  I can’t wait to make these Matcha Mousse Cheesecake with Pistachio Crust again and serve them in our next family gathering. 

If you haven’t check out the Virtual Bake Sale to benefit the Japan earthquake victims, please click here for more details.  Thank you for those who helped spread the words or signed up to donate a baked good, or plan to bit on some products.  I truly appreciate your help and supports. 
   

Matcha (Green Tea) Mousse Cheesecake with Pistachio Crust

For now, I need to hurry up and submit this recipe to Dessert Wars!  It’s my first time participating their contest and I’m really excited about it.  Look at the prize package for March below and you’ll know why.  They do have many generous sponsors.  If you have a wonderful recipe to share, jump right in for the fun.  Be sure to read the rules here before you enter though.

Matcha (Green Tea) Mousse Cheesecake with Pistachio Crust


The March prize package includes:

Whisk  and cupcake necklace from Moon & Star Designs
Beanilla  Sampler Pack of Vanilla Beans
Lenox Personalized Musical Cupcake
1,000 ideas for Decorating Cupcakes, Cookies & Cakes
Unlimited Layers: A Recipe for Turning Your Passion into Profits
Organic Valley $50 Gift Certificate
Organic Prairie $50 Gift Certificate
Theme Kitchen $50 Gift Certificate
BEKA Cookware Crepe Pan


***Update*** I’m so thrilled and honored that I’ve won the Dessert Wars contest for March.  I enjoyed creating the recipe, making these treats and meeting other bloggers through Dessert Wars.  Thank you for hosting such a fun contest.  Click here to see the Winner Announcement post. 


Matcha (green tea) Mousse Cheesecake with Pistachio Crust:
Makes: 24 (2-inch square)

For the crust:
1/4 cup unsalted shelled pistachios
1/2 stick unsalted butter, cut into small pieces
1/4 cup granulated sugar
1/4 teaspoon vanilla extract
1/4 teaspoon salt
3/4 cups all-purpose flour

For the Mousse: 3/4 cup heavy cream
3/4 cup powdered sugar (divided)
6 ounce cream cheese, room temperature
6 ounce mascarpone cheese, room temperature
3/4 teaspoon vanilla extract
zest of 1/2 lemon
1/2 teaspoon lemon juice
1 1/2 teaspoons unflavored gelatin powder, dissolved in 1 tablespoon cold water
1 tablespoons matcha powder (plus more for dusting)
3 tablespoons hot milk

Preheat oven 350F.

In a food processor, pulse the pistachios until finely ground. Then add in butter, pulse until butter becomes pea size. Add sugar, vanilla extract, salt and flour, process until incorporated and the dough is crumbly.

Using the bottom of a shot glass, press 1 tablespoon of dough over the bottom the baking pans (with removable bottoms).  Bake the crust for 8 to 10 minutes or until golden brown. Let crust cool on a wiring rack.

Stir matcha powder and gelatin mixture into hot milk until completely dissolved. Let cooled.

In a stand mixer with whisk attachment, beat heavy cream until foamy, add 1/4 cup of the powdered sugar and beat until stiff peaks form. Set aside.

In the same mixer bowl with paddle attachment, beat cream cheese, mascarpone cheese and remaining powdered sugar until smooth. Add vanilla extract, lemon zest, lemon juice and matcha mixture and beat until well combined.

Fold whipped cream mixture into cream cheese mixture in 3 batches until well combined. Pour onto cooled crust and refrigerate for at least 2 hour or until ready to serve. Dust top with matcha powder right before serving.

This recipe is linked to:
Full Plate Thursday 
Foodie Friday
Sweet Tooth Friday
Melt in your mouth Monday
Fresh Food Friday
Everyday Sister Sharing Sunday

Friday, March 18, 2011

Birthday Cupcakes for a Little Princess

Birthday Cupcakes

My niece’s 5th Birthday is approaching and my brother asked me to bake some cupcakes for her school’s birthday celebration.  Of course, how can I pass on any opportunity to bake some cupcakes.  Plus, they are for my lovely niece.  Of course, I happily said yes.  

Birthday Cupcakes

Looking at the cupcakes from another angle…ah….I wanted to dive right in!  hahaha….I made vanilla, strawberry, and chocolate cupcakes and topped them off with swirls of vanilla bean buttercream and fresh strawberry buttercream.  Then, sprinkled some of them with a little sugar pearls and heart shaped sprinkles.  I guess most kids love sprinkles, including me.  :P  These buttercreams are to die for.  They are creamy, smooth and fluffy with the right amount of sweetness.  I love the little tangy flavor from the fresh strawberry buttercream.  And the one with vanilla bean buttercream, it’s fragrant and sweet.  The vanilla bean makes such a difference on the taste.  

Birthday Cupcakes

Here’s a special one for the little princess!  I hope she’ll like it.


Birthday Cupcakes

I ended up with 2 full boxes and some, for my 2 little cupcake monsters at home.  I’m waving these cupcakes goodbye….before I seal off the boxes.

Birthday Cupcakes

One last peek….

Birthday Cupcakes

Happy Birthday, Princess Belle!  Wish you good health, joy and happiness for the coming year and more.  :) 


I’m submitting this to the Mystery Box Cupcake Challenge: Birthdays!  The winner of this challenge will receive prizes from:
Thank you to all the prize sponsors!

This post is linked to:
Sweets for Saturday

Wednesday, March 16, 2011

A Virtual Bake Sale to Benefit the Japan Earthquake Victims

It’s devastating and heartbreaking to watch the news and videos about the tragic earthquake and tsunami in Japan.  I can’t quite comprehend what the Japanese are going through now.  How frighten and helpless to watch their houses, their towns, and their families being swept away by the waves and nothing much they can do about it.  It reminds me how fortunate I am to sit comfortably at home, sharing a hot meal with my family and loved ones.    

 Picture of rescue workers searching for Japan earthquake victims
 
Instead of sitting here, thinking of another recipe and cook up a storm, I want to ask something of you, my readers and friends.  My fellow blogger Sabrina from The Tomato Tart is organizing a virtual bake sale to help the victims over in Japan.    

All proceeds will go to Second Harvest Japan. There will be an auction for items over at her website on March 30, 2011, and the winner will have their baked goods shipped directly to them from the producers. Won’t you help her out by participating in the bake sale?

You don’t have to be food blogger or baker to participate. You can either bid on an item or donate a baked good. Just contact Sabrina over at The Tomato Tart and tell her that you want to help out. She’ll send you the details. Or simply by spreading the words about this bake sale, I truly appreciate your help.

To participate, please contact Sabrina at the address below.
Bakesale Address
 
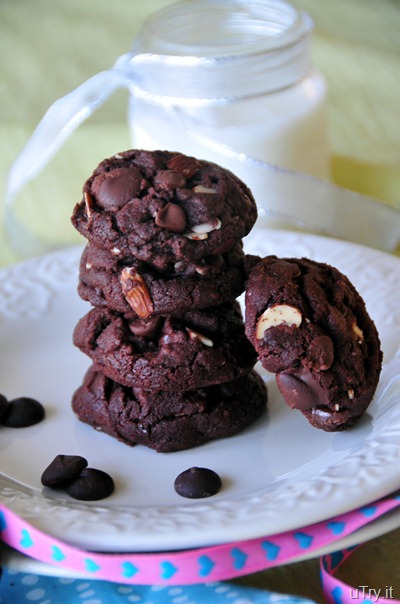
I’ll be baking the famous Triple Chocolate Almond Cookies for the bake sale.  If you’re interested in the recipe, please click here.

Triple Chocolate Almond Cookies

It’ll be a long journey for the Japanese to recover.  My prayers are with the victims and those who are affected by this natural disaster in any way.  Yes, they might have lost their personal belongings and properties, but let’s not lose hope.  Please lend a helping hand and show that we care.  I hope you’ll join me in the bake sale.  Thank you for stopping my today and have a wonderful rest of the week.


badge_small

Monday, March 14, 2011

Mini Egg Tarts (迷你蛋撻)--Hong Kong Bakery Style

Before we start our regular post, I just want to take a moment of silence with you to remember those who are affected and have lost their home, family, loved ones, or their lives in the recent earthquake and tsunami in Japan.  My heart goes out to the victims.  Let us all lend our hands to those who are in need, in whatever way we could.
        
**************************************************************

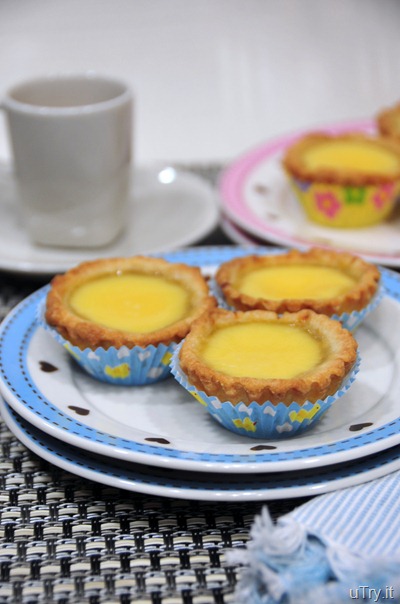
Egg Tarts

Egg tarts (蛋撻) or egg custard tarts are baked pastries commonly found in Hong Kong and many other Asian countries, which consist of an outer pastry crusts that are filled with egg custard.  Egg tarts (蛋撻) were introduced in Hong Kong in the 1940s by Chinese tea diners (茶餐廳), one of my favorite place to go after school, with my classmates, to enjoy an afternoon tea. The egg tarts were then introduced in western cafes, bakeries and even dim sum restaurants.  Nowadays, there are many variations of these egg tarts, but the traditional ones are the most popular, still.  Hong Hong egg tarts have two main type of crusts, they are the “cookie” crusts and puff pastry crusts.  Some high-end pastry shops even top these egg tarts with bird’s nest (a delicacy made from the salivary excretions of the swiftlet).  I know that doesn’t sound too appetizing but many believe the bird’s nest has many health benefits, such as aiding digestion, alleviating asthma, improving focus, and an overall benefit to the immune system.  Although I’m no expert in confirming these health benefits, I can tell you that the bird’s nest is very, very ,very expensive; averaging a whooping $60 USD per ounce (by weight, yes, it’s ounce, NOT pound).


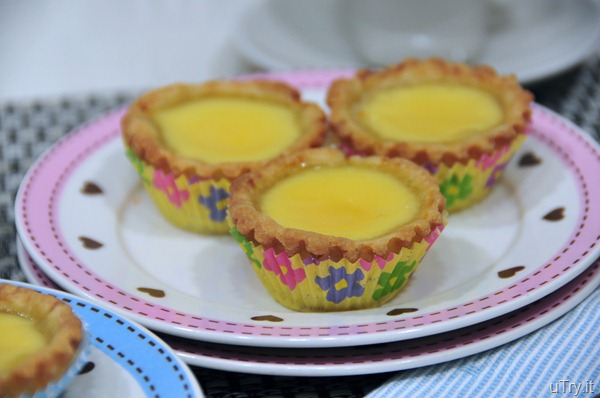
Egg Tarts

Back to these egg tarts, I personally preferred the “cookie” crust (actually, it a very simple pastry crust) over the puff pastry crust, and it is also the kind of recipe that I’m sharing with you.  This crust is buttery, crumbly, crispy on the edges and very delicate.  If you preferred the puff pastry ones, by all means go for it.   I have yet to attempt to make my own puff pastry, so I don’t have a recipe available.  Fortunately, many supermarkets do carry the ready to use puff pastry in the frozen baking/pie crust section to make lives easier.  I made these egg tarts in mini size and they are perfect 2-bite treats.  My kids love them in minis.  Perfect for their little hands and mouths.  :)  And of course, every thing look super cute in mini size.

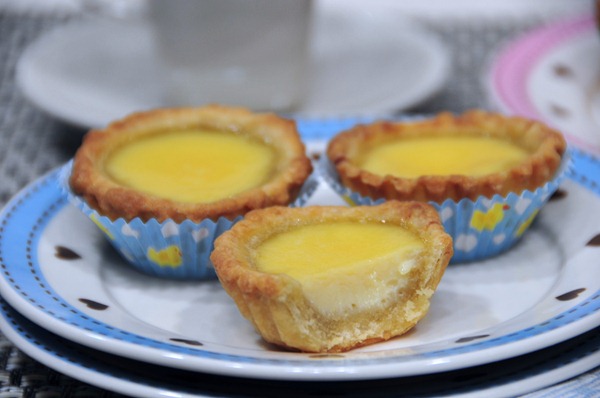
Egg Tarts

The egg custard filling is smooth and soft.  The texture resembles crème brûlée or pod de crème, very creamy and not too firm.  It’s exactly how a perfect egg tart should be.  I love the fact that these egg tarts are made with simple ingredients and they turn out to be amazingly tasteful.  It’s best to enjoy them with a cup of hot Hong Kong-style milk tea!  These egg tarts surely brings back many childhood memories.  All sweet and warm memories.     
 
Egg Tarts

**Note: In case if you’re wondering how the mini tart molds look like, please click here.

Come join the fun at the My Baking Addiction and GoodLife Eats Holiday Recipe Swap sponsored by Breville.


Mini Egg Tarts:
Makes 24 mini egg tarts—2 3/8-inch diameter and 3/4-inch height
Ingredients of crust:
1/2 cup powdered sugar
1 1/2 cups all purpose flour
4 1/2 ounces (9 tablespoons) cold salted butter, diced
1 large egg, whisked
a dash of vanilla extract
Ingredients of custard:
1/4 cup sugar
6 oz milk
2 large eggs
2 ounces evaporated milk
1/2 tsp vanilla extract

In a food processor fitted with a steel blade, add powdered sugar, flour and butter . Pulse until the butter is in the size of peas.  Add the egg and vanilla extract and process until the dough comes together.  Place dough on a floured board and form into a disk.  Wrap in plastic and chill for 30 minutes.

Meanwhile, work on the custard.  Heat milk and sugar in a small sauce pan until simmer, stir until sugar is completely dissolved.  Remove from heat.  Whisk egg, evaporated milk and vanilla extract together until well combined.  Pour into sugar mixture.  Sift egg mixtures twice to make custard is smooth.

Preheat oven to 400F. On a floured surface, roll out the dough to around 1/4-inch thickness. Cut dough with a cookie cutter that is about 4-inch in diameter and fit into tart tins.  Don't stretch the dough when placing it in the tins or it will shrink during baking. Cut off the excess by rolling the pin across the top of each tins. Line the tart shells with a piece of parchment paper and fill them with rice or lentils. Place on a baking sheet and bake the crust for 8 minutes or until the edges are slight brown. Remove from oven. 
Lower oven temperature to 350F.  Remove rice or lentils and parchment paper from shells.  Fill shells with custard mixture.  Return to the oven and bake for another 10-12 minutes or until the custard is set.  Cool tarts in the tins on wiring rack for 3-5 minutes. Remove from tin and cool on rack. Best serve warm.

This recipe is linked to:
Full Plate Thursday 
Foodie Friday

Tuesday, March 8, 2011

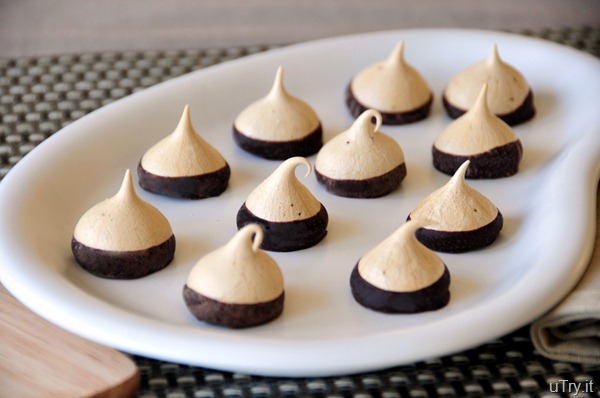
Mocha Meringue Kisses

Mocha Meringue Kisses

You’re right, more meringue cookies.  I really think I need some help over here.  NO, not help with eating my cookies!  I’m officially hooked with meringue cookies, both making and eating them!  Well, I don’t think there are any therapies out there for this kind of addiction, are there?  Why am I hooked?  Probably, it’s because these cookies are so versatile.  I get to make them into different shapes and different flavors, pretty much like French macarons.  On the other hand, they are much forgiving than macarons.  For sure you don’t have to worry if your meringue cookies turn out to have “feet” or not, cracked tops, or worse, sticking on your baking sheet!  Yeah, unfortunately, all of the above issues happened to me during macarons making in the past, they are too temperamental.  Quite the opposite, meringue cookies turn out to be perfect every single time.  Any way you want to shape them, they are willing to play along, just like a good husband or boyfriend should be. hahaha….okay, that’s a bad analogy.

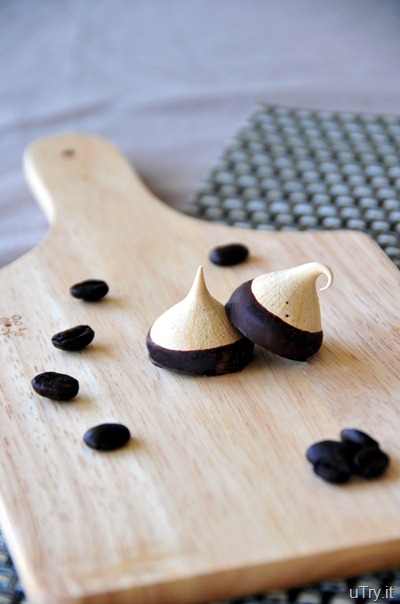
Mocha Meringue Kisses

These Mocha Meringue Kisses are crunchy, crispy and airy.  They melt in your mouth and burst with espresso flavor.  Pop a few of these in the morning and you can skip your cup of joe.  Or even better, pop a few of these while sipping your cup of joe, there you go!   :)


Mocha Meringue Kisses


Mocha Meringue Kisses:
Makes: 5 dozens 3/4-inch cookies


3 large pasteurized egg whites, at room temperature
a pinch of kosher salt
3/4 cup caster (superfine baker's) sugar
1/8 teaspoon cream of tartar
1/2 teaspoon vanilla extract
2 tablespoons instant espresso powder
3/4 cup bittersweet chocolate chips (for dipping)

Preheat the oven 200 degrees F. Line a baking sheet with parchment paper. Set aside.

In a stand mixer fitted with the whisk attachment, beat the egg whites and salt until frothy, about 2 minute. With the machine on medium-high speed, gradually add the sugar, about 1 tablespoon at a time. Add the cream of tartar, vanilla extract, and espresso powder. Increase the speed to high and beat until the mixture is thick, shiny and holds stiff peaks, about 5 to 7 minutes. 

Transfer meringue into a pastry bag fitted with a large plain tip.  Pipe meringue in 3/4-inch diameter and 1-inch apart onto lined baking sheets. Bake for 45 minutes.  Rotate the pan and bake for another 45 minutes. Turn off the oven and allow the meringues to cool completely while still in the oven, about 2 hours.

In a microwave safe bowl, melt chocolate chip on high.  Stir every 30 second intervals until melted.  Let melted chocolate cool slightly.  Dip the bottom of the meringue cookies into the melted chocolate and place them back onto the lined baking sheet.  Refrigerate for 15 minutes or until chocolate harden.

This recipe is linked to:
Foodie Friday
Full Plate Thursday
Sweet Tooth Friday

Monday, March 7, 2011

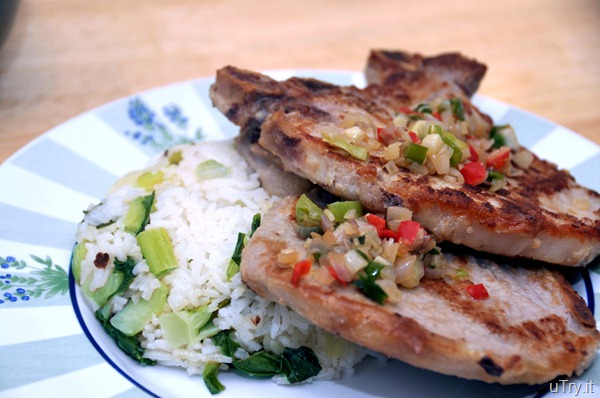
Pork Chops with Vegetable Rice (排骨菜飯)—An award winning recipe, no kidding!

Pork Chops with Vegetable Rice (排骨菜飯)


I meant to share this delicious recipe with you all since a while back but never got a chance to do so.  There were always something that got in the way.  Either I had a new dessert creation that I couldn’t wait to post (that happened more than once), or like the giveaway post that’s time sensitive (I want to make sure the winners get the prize(s) before Valentine’s Day).  And the most recent Culinary Smackdown Battle!  By the way, if you haven’t enter your cookie recipe for the Battle, come join us for the fun here.

However, I have a big reason to share this recipe with you sooner, like now!  Yes, you’ve got it, this recipe that just won the Asian Home Cooking Contest!  I’m so thrilled and couldn’t be more happy to share this great news and this wonderful recipe with you.   It’s a wonderful feeling knowing someone out there appreciate your recipe and the love you put into your dishes.

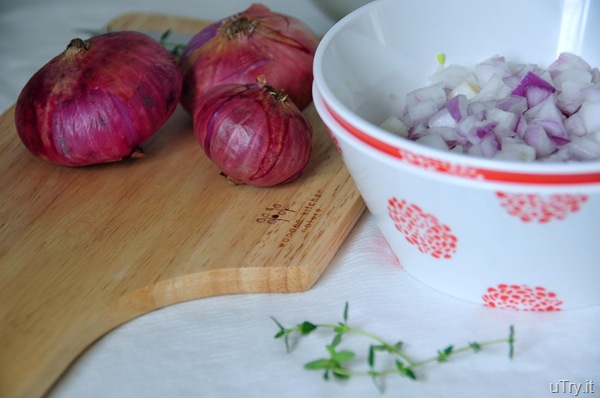
Pork Chops with Vegetable Rice (排骨菜飯) is a Classic ShangHai dish. My husband and I both love ShangHai cuisine and this is what I would make whenever we crave for the 排骨菜飯. This Pork Chops with Vegetable Rice is comforting, delicious and satisfying. Of course, I put my own little twist on the recipe by adding the shallots toppings.  They are delicious!  Just make sure you get the bone-in, thin cut type of pork chops.  That way, the cooking time is shorter and you’ll get moist and juicy pork chops with a flavorful crust. 

Shallots

Click here for the link of the recipe that I submitted to the contest.  This site have quite many other Asian dishes as well.  Although I haven’t try others’ recipes, but they all look wonderful and delicious.  Be on the lookout for their next recipe contest.  I can’t wait to see what the theme will be. 
Thank you for stopping by today and have a wonderful week.


Pork Chops with Vegetable Rice (排骨菜飯):

Servings: 4
8 thin pork loin chops
1 lb baby bok choy (青江菜)
2 cups Jasmine rice
2 cups chicken stock
1/2 teaspoon chicken bouillon granules
2 teaspoons minced garlic
3 tablespoons minced shallot
1 red chili pepper, finely diced
2 green onions, finely diced
3 slices ginger
A dash sesame oil
1 teaspoon fish sauce
1/2 teaspoon sugar

Marinade:
2 teaspoons light soy sauce
1 teaspoon sugar
1 teaspoon corn starch
1 teaspoon Shaoxing wine
1/8 teaspoon white pepper
1/4 teaspoon kosher salt
1/2 teaspoon chicken bouillon granules

Mix pork chop with marinade ingredients and marinade for 20 minutes.

Rinse rice and cook in a rice cooker, adding chicken stock instead of water until liquid reaches water level required on rice cooker’s menu (add water if needed).

Rinse baby bok choy and drain well. Roughly chop into pieces. Set aside.

Heat 2 tablespoons of oil in a sauté pan at medium high heat. Cook pork chops until both sides are lightly golden brown and cooked through. Remove and place on a platter.

In the same pan, add ginger slices followed by bok choy and cook until softened. Sprinkle chicken bouillon granules and combine well. Add sesame oil and discard ginger. Drain well. Toss bok choy into cooked rice, stir to combine. Add salt, to taste. Cover and set aside.

Sauté shallots, garlic, chili, and green onions in the same sauté pan until shallots softened and fragrant. Stir in sugar and fish sauce. Remove from heat when sugar dissolved.

To serve, place a scoop of bok choy-rice on a serving plate, top with pork chops and shallots mixture.

This recipe is linked to:
Foodie Friday

Thursday, March 3, 2011

Amazing Transformation—Roasted Potatoes with Herbs de Provence to Sausage Hash Brown

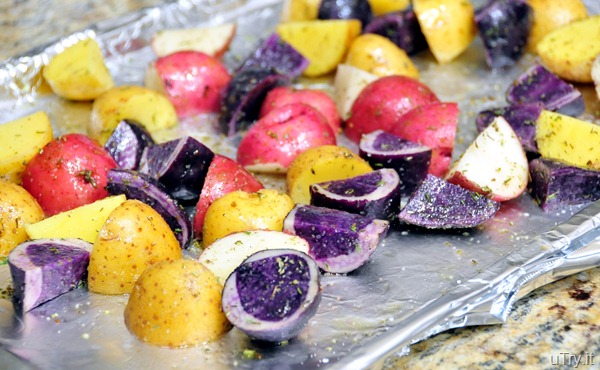
Roasted Potatoes with Herbs de Provence

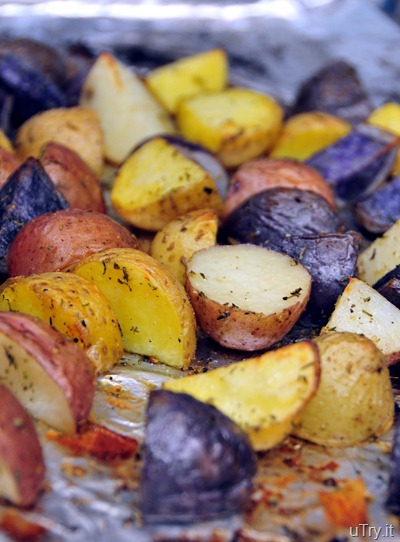
Yes, amazing transformation!  Unfortunately, it’s not on my body (I wished though)!  hahaha…of course, I’m talking about food here on my blog.  If you ever run out of side dish ideas, here’s a quick and simple recipe for you. Roasted Potatoes with Herbs de Provence.  I found some multi-color mini potatoes from the market the other day, they were perfect for roasting.  Simply drizzle them with olive oil, season with salt, pepper and Herbs de Provence.  Roasted in the oven until they are golden brown and fork tender.  I love the fragrant that the Herbs de Provence brings to this dish, it really made the flavor pops and not over-powering the natural flavor of the potatoes.

Roasted Potatoes with Herbs de Provence

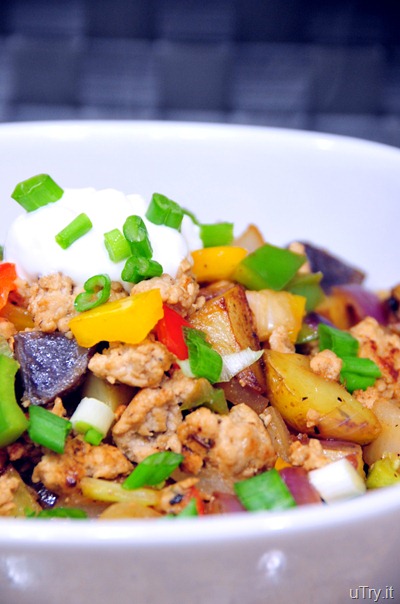
We couldn’t finished all of the potatoes that night, so, I saved them for the next day and transformed them into Sausage Hash Brown.  To make the sausage hash brown, I used some red onions, green, red and yellow bell peppers and ground pork (yeah, I didn’t have sausage at home so I made my own).  I think it’s healthier to make your own sausage because you can use leaner meat or even substitute with ground turkey.

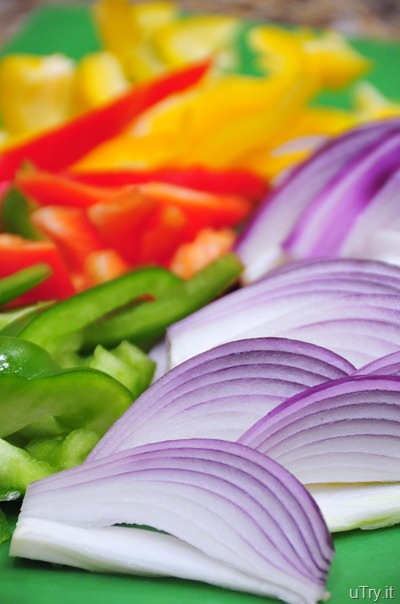
Vegetables

Chopped up the vegetables, seasoned the ground pork.  Then, brown the meat and sautéed the vegetables until they are crisp-tender.  Tossed them back together and there you have it.  It’s that simple. 

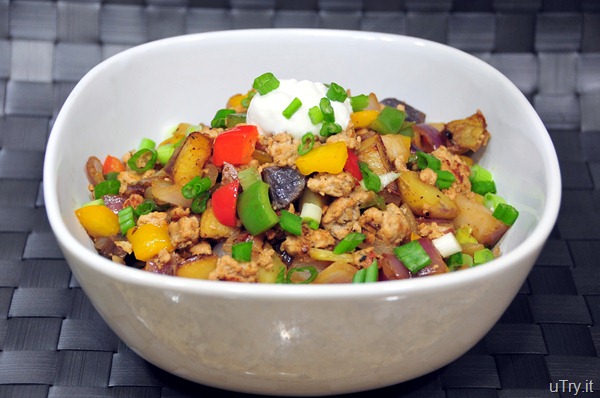
Sausage Hash Brown

For a finishing touch, I added a dollop of sour cream and sprinkles of green onions on top.  My kids gobbled up their hash brown in record time!  It was that delicious.

Sausage Hash Brown


Roasted Potatoes with Herbs de Provence:
2 pounds of multi-color mini potatoes (or any varieties you can find)
2 tablespoon olive oil
2 teaspoons Herbs de Provence
Kosher salt and freshly grounded black pepper to taste

Heat oven at 475F.  Wash, pat dry and cut potatoes into 1 1/2-inch cubes.  Just make sure they are all around the same size for even cooking.  I left the skin on because that’s the good stuff.

Place potatoes on a baking pan, drizzle with olive oil and slightly toss to coat.  Arrange potatoes in a single layer.  Season with Herbs de Provence, salt and pepper.

Roast in oven for 20 minutes, insert a fork to check doneness.  If they’re not as fork tender as you like, put them back to the oven and roast for another 5 minutes until you’re satisfied.  Total roasting time depends on the size of the potatoes.

Rest for 3-5 minutes before serving.  They’re extremely hot when they’re first out of the oven.


Sausage Hash Brown:
1 pound of Roasted Potatoes with Herbs de Provence
1 pound of ground pork (I used lean ground pork, you can also use ground turkey)*
1 teaspoon kosher salt
1/2 teaspoon black pepper
1/2 teaspoon sweet paprika
1/2 teaspoon fennel seeds, toasted and grinded
1 red onion
1/2 each of green, red and yellow bell peppers
2 green onion, finely chopped
Sour cream

In a large mixing bowl, mix ground pork with salt, pepper, paprika, and grounded fennel seeds. 
Diced the potatoes and vegetables into bite-size pieces.

In a heavy sauté pan over medium-high heat, add a tablespoon of olive oil and brown the ground pork until cook through.  Break them up into bite-size pieces with a wooden specula while browning. Place in a large serving bowl and set aside.

In the same skillet, add 2 teaspoons of olive oil and sauté the potatoes until edges are brown.  Remove from heat and place them into the same bowl with the meat.

Add a teaspoon of olive oil in the same skillet and sauté the vegetables until crisp-tender.  Add the meat and potatoes mixture back to the pan and cook until heated through.
Serve with sour cream and sprinkle with green onions on top.

*Note: if you used ground pork butt, which contains higher percentage of fat, use less oil while cooking and might need to drain off excess oil before cooking the potatoes and vegetables.

This recipe is linked to:
Full Plate Thursday
Fresh Bites Friday

Tuesday, March 1, 2011

Culinary Smackdown Battle—Cookies

It was a pleasant surprise to found out that I’ve won the February’s Culinary Smackdown Battle - Hand Held Meat "Pies" on Pretend Chef’s blog

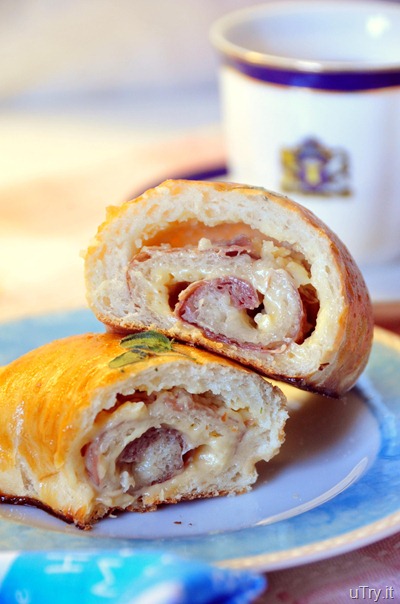
My entry was Prosciutto di Parma with Smoke Gouda Crescent.  If you’re new to my blog or don’t remember these crescents, click here for the post.   There’s a video tutorial along with the recipe if you’re interested. 

Prosciutto and Smoke Gouda Crescent

To carry on the “tradition” being the Culinary Smackdown Battle winner, it is my honor to host the Culinary Smackdown Battle for March.  Since the theme for the past 2 months is savory dishes, I think it’s time for some sweet treats.  One of my favorite sweet treats to make is cookies.  So, it will be the theme for this month’s battle.

Culinary Smackdown Battle - Cookies will be held throughout the month of March. Entries submission starts on March 1st, 2011 through March 29th, 2011. I will be announcing the winner on March 31st. To enter the contest, simply link up your entry below.  One entry per person please, and don’t forget to link back to this post on your recipe post so others can see what sweet treats were cooking back here. 

The cookie entry doesn't have to be a new creation.  It could be a previous blog post you already have.  The Smackdown Battle is open to anyone, anywhere in the world.  I'll select the winner at the end of the month and the winner will host the next month's contest.  The main purpose for this "Battle" is for fun and get to know other bloggers and foodies out there.

Okay, we all need some incentives for contest, don’t we?  Here are the prizes for winning the the Culinary Smackdown Battle.

1) Giada De Larentiis Embroidered Apron – a $15 value

Apron

2) Home brand Potholder – a $5 value

Potholder

Giada De Larentiis is one of my favorite chefs from the Food Network, so I picked this beautiful apron as the prize along with the Potholder.  I think the green shade is pretty and perfect for spring.  Hope you like the prizes.  I'll be looking forward to seeing all of the wonderful treats you're going to submit.