Tuesday, November 30, 2010

Thanksgiving Feast

As promised, I took pictures of the Thanksgiving feast and here they are.  If you’re interested in getting the recipe of anything you see below, please leave me a comment and I’ll try to get the recipe for you.

“Self Serve” California Rolls                                    “Self Serve” California Rolls


“Self Serve” California Rolls—These are so much fun to eat, and delicious.  Take a piece of nori (seaweed) and wrap the sushi rice, crab meat, avocado, sesame seed filling to create your own individual roll.  Not to mention, it’s great idea for parties because there’s minimal prep work and the nori stays crispy.


Egg Rolls
Egg Rolls—Filled with vegetables and glass noodles.  Crispy and delicious!


Mixed Salad
Mixed Salad—which is, to mix your own vegetable with the store bought dressings next to it!  Hahaha…


Honey Glazed Ham
Honey Glazed Ham—Nothing represent holiday food better than a leg of honey glazed ham…oh, maybe besides the turkey!  Almost forgot about the turkey :P


Glutinous Rice with Chinese Sausage and Shitake Mushroom
Glutinous Rice with Chinese Sausage and Shitake Mushroom—This is one of my favorites!  Sprinkle with a little bit chopped green onions on top and I can eat just that as my Thanksgiving dinner!  :D


Cheesy Penne Pasta with Broccoli and Cauliflower
Cheesy Penne Pasta with Broccoli and Cauliflower—Cheesy and delicious.


Korean Spicy Stir Fried Pork
Korean Spicy Stir Fried Pork—This dish demonstrates the well balanced of the sweet and spicy!  I want to get the recipe to make it again at home!


Cream Corn
Cream Corn—A holiday staple side-dish.


Orange Juice and Spices Brined Turkey
Orange Juice and Spices Brined Turkey—Juicy, flavorful and delicious.  I believe it looked beautiful too before it was carved.  :P


Creamy Mashed Potato
Creamy Mashed Potato—Smooth and creamy.


Roasted Beef
Roasted Beef—Great BBQ flavor and beefy.


Sweet Potatoes with Marshmallow
Sweet Potatoes with Marshmallow—Another holiday staple side-dish in our family.


Garlic Knots
Garlic Knots—Check out the recipe from my last post here.


Rice Cake with Red Bean Paste and Walnut
Rice Cake with Red Bean Paste and Walnut—Not too sweet, the edges are crunchy and the center is chewy, very yummy.


I bet you don’t believe we only have one type of dessert for the Thanksgiving feast, right?  I need to confess that I totally forgot to take pictures when we started to eat the desserts!  :P  This particular picture was taken before dinner was served.  The rest of the goodness were all in our tummies and memories.  We had custard tarts, pumpkin pies, smoked almond turtles, taro cakes, flan, etc.  They were all sweet and delicious.  Oh well, I’ll make it up to you by posting something sweet on my next blog post.  ;)

Thursday, November 25, 2010

Smoked Almond Turtles and Garlic Knots

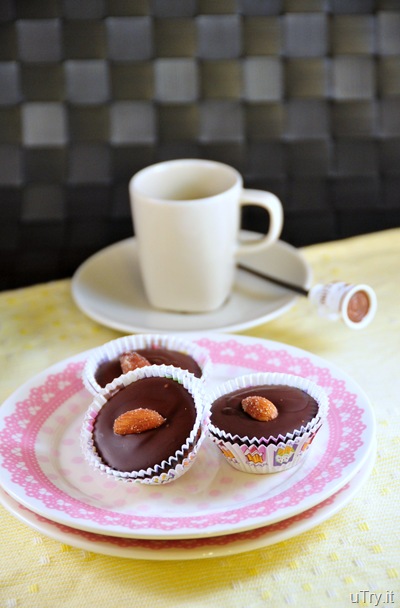
Smoked Almond Turtles

There is always, always, always something to be thankful for. I have many to be thankful for this year and I’ll continue to count my blessings every day.

I’m thankful for this lovely place called home, because it’s not just a house. It’s called home because it’s filled with love, and people I love.

I’m thankful for having many good friends in my life. Although we don’t see each other very often, but they’re like stars, I know they are always there. So, I keep them closed to my heart.
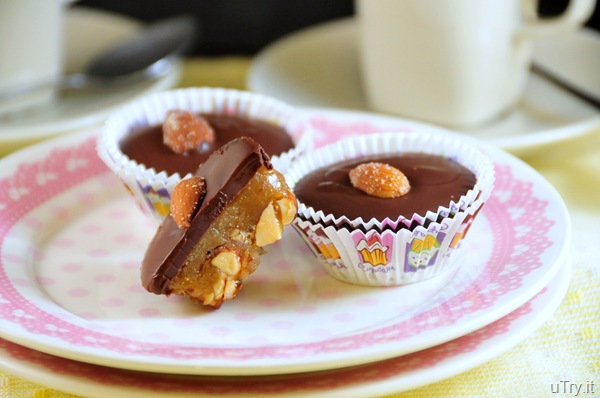

Smoked Almond Turtles

We should give without remembering and receive without forgetting. No one who achieves success does so without the help of others. I’m thankful that I have the abilities to give and have great friends and family that help and support me to become who I am today. 

Be thankful for what you have; you'll end up having more. If you concentrate on what you don't have, you will never, ever have enough.

It isn't what you have in your pocket that makes you thankful, but what you have in your heart. I believe the greatest things in life are free. The best and most beautiful things in this world cannot be seen or even heard, but must be felt with the heart.
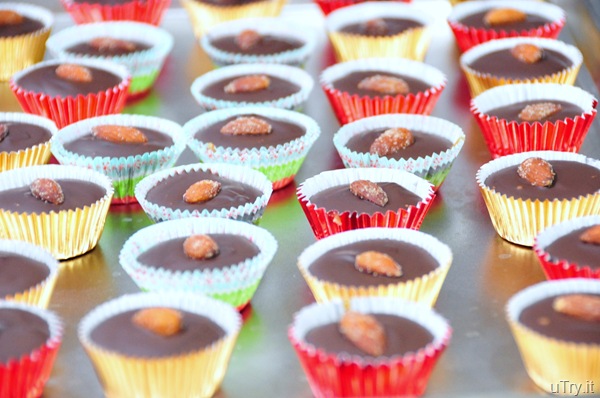

Smoked Almond Turtles 
I’m thankful for all of you.  Who read and support my blog, weeks after weeks.  Left me comments and words of encouragement from time to time.  Thank you for all that you have given me. I hope that I can give it back... tenfold and more.  I will work my hardest to keep doing so.

I hope all of you have something to be thankful for this Thanksgiving. And let’s not forget those who are less fortunate around us.

This Thanksgiving, my family is going to have a gathering at my cousin’s house. We always have a big family gathering every year. I’m going to bring these Garlic Knots and Smoked Almond Turtles to share with them. Of course, I’m sharing my recipes with you all. For the rest of the feast, I’ll take pictures and post them up later on. Hope you all have a blessed and wonderful Thanksgiving.


Garlic Knots


Smoked Almond Turtles:
Makes 30 mini turtles
 
1 cup (5 ounces) coarsely chopped smoked almonds
1/2 cup heavy cream
1 stick (4 ounces) unsalted butter, at room temperature
1 1/2 cups light brown sugar
1 tablespoon water
1 cup bittersweet (60 percent cacao) chocolate chips (recommended: Ghiradelli)
 
Line 30 mini muffin pan with foil paper cups. Put the almonds on the bottom of each muffin cup and set aside.

For the caramel: In a 3-quart, heavy-bottomed saucepan, combine the cream, butter, sugar, and water. Stir over medium heat until the mixture is smooth. Bring the mixture to a boil and cook, without stirring, about 5 to 7 minutes. Let the mixture cool for 30 seconds. Using a long-handled, metal spoon, carefully spoon the caramel over the nuts. Allow the caramel to harden, at room temperature, for 1 hour.

Put the chocolate chips in a microwave safe bowl. Melt chocolate in microwave, stop and stir in 30 seconds intervals until all chocolate melted. Spoon the chocolate over the caramel and top each one with a smoked almond while chocolate is still soft. Refrigerate for 15 minutes. Let the turtles stand at room temperature for 30 minutes to allow the caramel to soften before serving.


Garlic Knots:
Makes about 36 knots

Dough
4 ½ cup bread flour
11/2 cup warm milk (around 115°F)
1 teaspoon kosher salt
3 tablespoon Sugar
2 tablespoon active dry yeast
4 tablespoon melted butter

Garlic Coating
2 tablespoons Olive Oil
4 tablespoon unsalted Butter
4 cloves Garlic, minced
1/4 cup finely chopped fresh Italian Parsley
sea salt to taste

Combine milk, butter, salt, sugar, and active dry yeast in a large re-sealable container or bowl. Mix to dissolve yeast.

Add flour.  Mix to incorporate flour, cover, and set in a warm spot to proof until doubled in volume (1 to 2 hours)

Set up your knotting station.  Grease a large wooden cutting board and a rolling pin with olive oil. Prepare a pizza cutter, a container of flour within easy reach. Then, line several sheet pans with parchment paper.
Oil your hands to help keep dough from sticking to them. Divide the dough in two parts.  Take the first half, put it onto the oiled board and slightly punch out the air bubbles in them.  Using the rolling pin, spread into an even rectangle approx. 5″x9″ and 1/2″ thick. Slice the rectangle into 1/2″x5″ strips.

Lightly sprinkle dough strips and board with flour.  Taking a strip and roll it back and forth to create an even rope. Tie into a knot (over, under, and through) and place it on lined sheet pan. Place knots about 1 1/2″ apart.  

Continue making the rest of the knots with the second half of the dough. After each sheet pan fills up, cover with a dry sack towel, and place in a warm spot to rise.
Preheat oven to 355° F

After knots have doubled in size, take off dry sack towel and place sheet pans in the oven.  Bake knots for approx. 13-15 minutes or until slightly golden, cool on wire rack.
While knots are cooling, make garlic coating.  In a small saucepan with low heat, gently warm olive oil, butter, and garlic. Cook it for a few minutes until soft & slightly golden. Off the heat, add chopped parsley and set aside.

Place knots in a large bowl and toss with garlic coating, season with sea salt to taste.

Best served warm, but still good at room temperature.

Monday, November 22, 2010

Zero Cleaning (Afterwards) Barbequed Baby Back Ribs with Roasted Vegetables

Baby Back Ribs with Roasted Vegetables

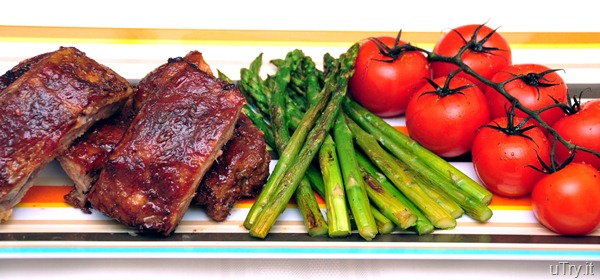
We’re in the packing stage of the move, which means chaos in the house!  That also means we’ve got the house we like! Yay….While I'm busy with packing, I don’t have too much time to cook these days.  So, I love this easy recipe that doesn’t dirty any pots and pans.  Yes, you heard me right, ZERO dirty pots and pans!!!   Isn’t it amazing?  Well, I guess all of us love an easy and convenience recipe like this one every now and then.  These baby back ribs and vegetables are roasted in the oven.  They are already delicious!  I couldn’t wait to cook them on a grill (after I get an outdoor grill at my new place, hehehe).  I bet grilling will add some smoky flavors to them, which means more deliciousness!  But until then, I’m happy with these scrumptious ribs as is.

Vegetables

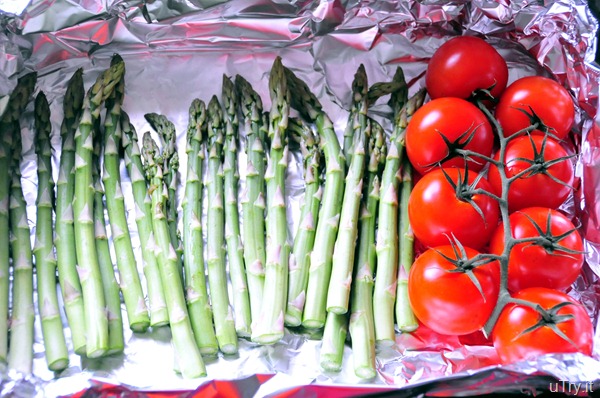
As I started packing, I couldn’t believe the volume of junks we’ve accumulated over the past few years.  I found so many “surprises” in the storage areas that I don’t even remember we had them.  If something stay in the storage for so many years without being used or noticed, I strongly believe they belong to the trash.  Why move them to the new house and use up the storage space?  Well, this is the chance for the major clean up!           
 
Seasoned Vegetables

Besides all the junks that I have found, there are also some useful things that I’ve forgotten.  I found a few old cookbooks in the kitchen and they’re definitely moving to the new house with me.  :)  Guess I’ll have to cook up a few dishes from these cook books after we settled down at the new place.  Maybe bake up a couple dozen of cookies to make the new place feel more like home.    

Baby Back Ribs with Roasted Vegetables

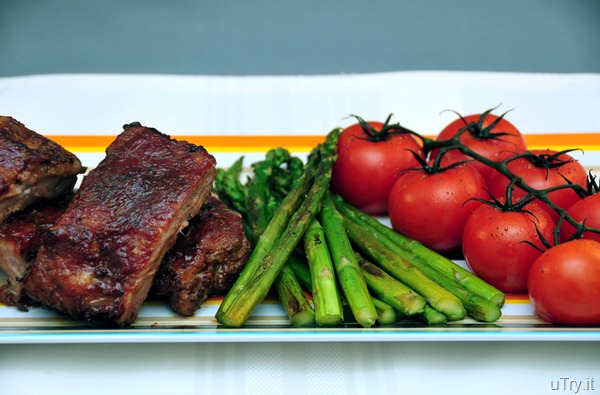
Meanwhile, I’m afraid we might have to enjoy a few more nights of baby back ribs before the move.  They are juicy and flavorful.  Don’t think anyone would mind having these more often.  And yes, I prefer a home cook meal any day over take outs, even during the packing and moving.  Oh well, maybe until I pack up the very last baking sheet in the kitchen, I guess! 

Baby Back Ribs with Roasted Vegetables


Barbequed Baby Back Ribs And Roasted Vegetables:

Ingredients

Dry Rub
2 tablespoons light brown sugar, tightly packed
2 teaspoons kosher salt
1/2 teaspoon chili powder
1/4 teaspoon ground black pepper
1/8 teaspoon cayenne pepper
1 teaspoon paprika
1/4 teaspoon onion powder

2 whole slabs pork baby back ribs
2-3 tablespoons BBQ sauce (any brand you preferred)
1 pound asparagus
2 pounds tomatoes on the vine
 
In a bowl, combine all dry rub ingredients and mix well. Place each slab of baby back ribs on a baking sheet lined with heavy-duty aluminum foil, shiny side down. Sprinkle each side generously with the dry rub. Massage and pat the dry rub into the meat. Marinate the ribs for 2 hours.

Preheat oven to 250 degrees F. Cover ribs over the baking sheet with heavy-duty aluminum foil, shiny side down. Bake the ribs in the oven for 2 hours.

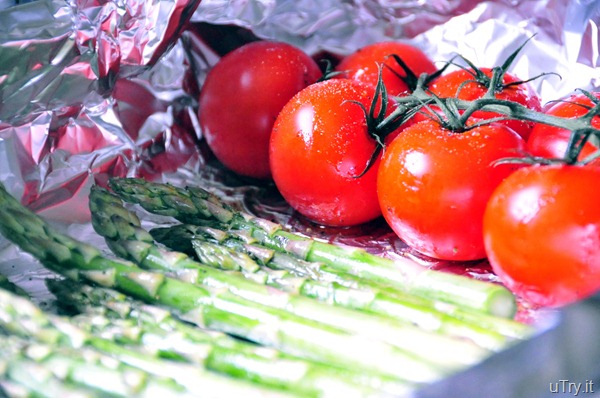
Wash and pat dry vegetables.  Trim off 2-3 inches of the asparagus ends (toss the ends or save them to make stock).  Place vegetables on a baking sheet lined with heavy-duty aluminum foil, shiny side down. Drizzle with olive oil, sprinkle salt and pepper on top.  Gently toss them for even coating. 

Remove ribs from oven and brush the BBQ sauce onto the ribs. Increase oven temperature to 400 degrees F.  Return ribs to oven uncover and bake with the prepared vegetables for 15 minutes. Slice each slab into 2 rib bone portions. Serve with roasted vegetables.

Notes: I really love this dish because when you’re done cooking and eating. Just toss the aluminum foil and you’re done! Minimal clean ups, except you might have to lick your fingers clean!  :P

Thursday, November 18, 2010

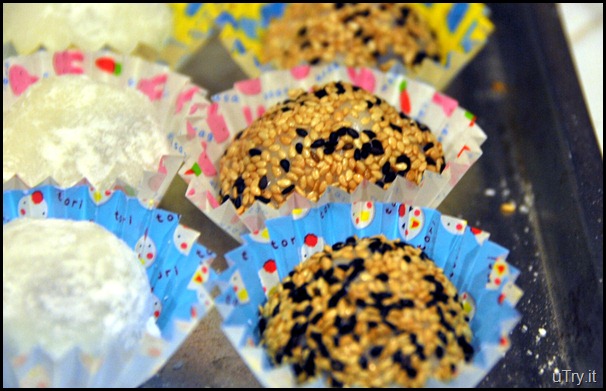
Black Sesame Seed Mochi

Black Sesame Seed Mochi

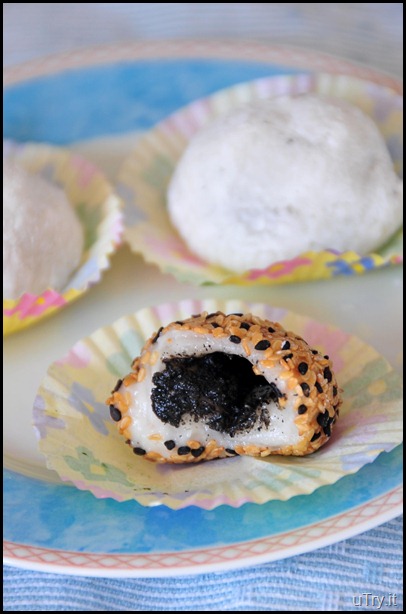
The other day when I was rolling out dough to make a loaf of bread.  Out of nowhere, my son asked me if I’m making Black Sesame Seed Mochi (he calls them “Gee-Mah”, means sesame in Chinese).  I guess rolling out dough for bread/buns reminds him the similar process in making Mochi!  Isn’t he smart?  :)  Since that day, he’s been asking me to make him some “Gee-Mah, everyday!!!  A few times a day!!!  It’s not that I don’t want to make the Mochi for him.  But let me explain to you all, a batch of Mochi makes 36 mini ones, and they CAN’T be refrigerated because cold temperature would harden the rice cake.  The Mochi usually only last for around 3 days, more or less depending on the weather, at room temperature.  I hesitated to make them just for his and my enjoyment for 3 days and waste whatever we couldn’t finished (yeah, my hubby doesn’t eat anything too sticky!)  I’m pretty sure that my son (not even 3 year old) and I can’t finish all 36 Mochi in 3 days, doesn’t matter how much we love them.  So, I promised my son I would make Mochi when Grandma and Grandpa visit.  Hence, they can take some home.  So, when my Mom called the other day and informed us they’ll visit the day after for lunch, my son was overjoyed!  Of course, he was very excited because he got to spend time with his Grandparents!  :D 

Black Sesame Seed Mochi

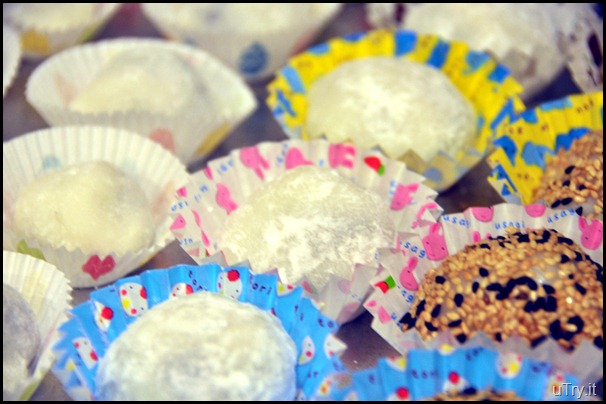
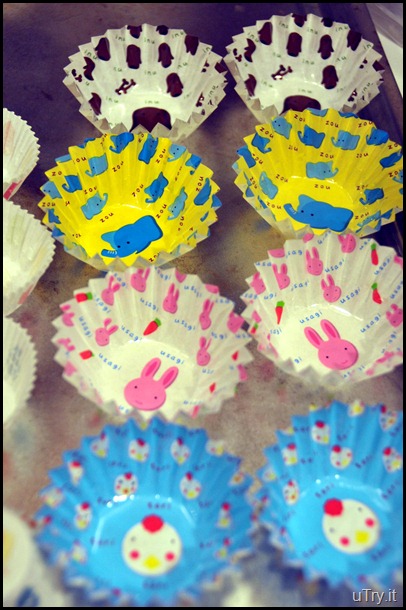
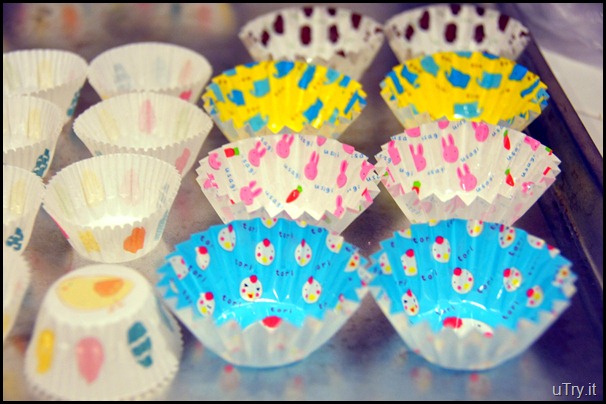
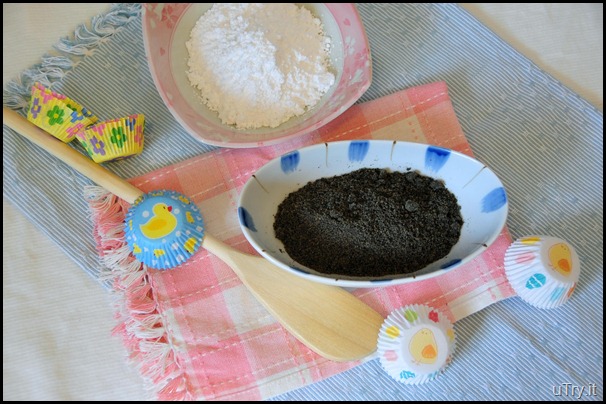
As usual, my parents bought Dim Sum over to our place and we all had lunch together.  After lunch, my Dad went for a walk with my son at the community playground.  I was chatting with Mom and I mentioned how my son has been asking me to make Mochi for him.  Coincidently, my Dad had been requesting Mom to make the same thing for him!  :)  And for the same reason, my Mom didn’t make them!  LOL…  Didn’t people say great minds think alike!?  Oh well, I guess the sweet tooth runs in the family.  So, here we go, I was getting the bento cups and mini muffin cups ready for the Mochi.  Aren’t they cute?

Bento Cups


Bento Cups and Mini Muffin Cups

Besides black sesame seed fillings, you can also fill these Mochi with red bean paste.  They are available in most Asian markets, fresh or canned, very convenience.  However, I personally don’t like red beans, so, I only fill them with black sesame seeds paste.  These Black Sesame Seed Mochi are soft, chewy, fragrant, and flavorful!  Those coated with toasted sesame seeds outside got an extra crunch and toasted flavor.  Yum…


Black Sesame Seed Mochi Ingredients


Black Sesame Seed Mochi


Black Sesame Seed Mochi: Printable Recipe

Servings: 36 (1-inch Mochi)

Ingredients:
1 Pound Glutinous Rice Flour
3 Cups Water
1 Cup Sugar
1/2 Cup Toasted Black and White sesame seeds (or 1/4 Cup Potato Starch), to coat mochi
 
Ingredient for Black Sesame Seed Filling:
150g (around 1 cup) Black Sesame Seed Powder
150g (around 1 cup) Powdered Sugar
1/2 cup Vegetable Shortening
 
In a medium bowl, mixed sesame seed powder, powdered sugar and shortening with a pastry blender (or a fork if you don't have one) until well combined, set aside.

In a medium pot, bring water to boil. Add sugar and stir with a wooden spoon until all sugar dissolved.

Remove from heat and add glutinous flour all at once and stir quickly to combine. Set stove to the lowest heat setting and return pot to stove, stir mochi dough until no lumps. It'll be very hard to stir at the end as the dough thickened (that also means it's ready). Remove from heat.

Let dough cool down a bit until it's not too hot to handle.  Meanwhile, place toasted sesame seeds and/or potato starch on a shallow plate, separately.  Take a small portion of dough (about 1 tablespoon) and knead it a few times in your palms.  Form it into a small disc.  Spoon 1 teaspoon sesame filling onto the dough and fold the edges to seal the mochi.

Lightly roll it into a ball shape using both palms, then coat with toasted sesame seeds or potato starch. Place them in the mini paper muffin cups until ready to serve.

Tips: Wear a pair of disposable plastic gloves while handling mochi dough as the dough is very sticky.  Before handling the dough, spray a little cooking spray on plastic gloves and rub your hands together for even distribution. Thus, the dough won't stick on the gloves either.


This recipe is link to:
Sweets for a Saturday

Saturday, November 13, 2010

Earl Grey Pots de Crème and Honey Lace Cookies

Earl Grey Pots de Crème and Honey Lace Cookies

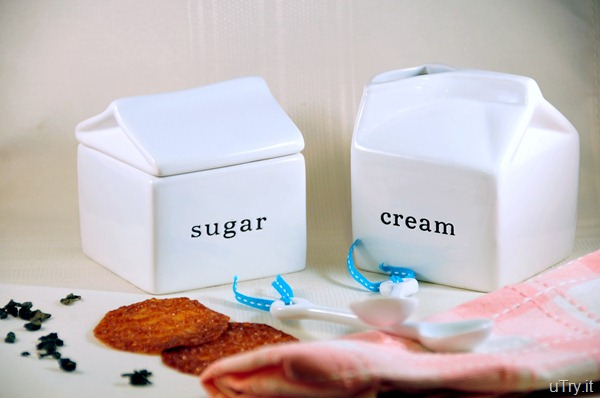
There are so many things that are meant to be with one another and compliment each other’s existence.  For example, salt and pepper, bread and butter, sugar and cream, my hubby and BMW me, of course!  (Sorry Honey, I can’t resist not to put BMW here.)  Whoever knows my hubby well would agree with me, heheheh…Recently, I’ve found another pair!  Earl Grey Pots de Crème and Honey Lace Cookies.

Sugar and Cream + Honey Lace Cookies

Both of the treats are made with simple ingredients and yet, they are out of this world delicious.  I love their simplicity with a sophisticated twist.  Just like lives, I enjoy the most simple things in life.  Such as a cup of hot coffee to wake me up in the morning, oh wait, I think it’s the crying of my baby girl that wakes me up every morning;  A big hug and a kiss from my 3 year old son;  A thank you from my hubby after dinner to show his appreciation; A phone call from my best friend in Canada just called to say hello; Or, my parents and in-laws visit us to play with their grandkids.  I cherish and treasure every moment.                

Earl Grey Pots de Crème

If you are familiar with, or love, Earl Grey Tea, you have to give this recipe a try.  The texture is smooth, creamy and silky. The lemon zest elevates the tea flavor and bring out the best of it.  The tea flavor really comes through in this recipe.  It’s sweet, it’s fragrant and it’s unforgettable.      


The Honey Lace Cookies are crunchy, flavorful and melt in your mouth goodness.  Please try to refrain yourself from eating the whole batch without waiting on the Earl Grey Pots de Crème!  Oh well, they’re so easy to make, maybe you can consider making an extra batch to enjoy while you wait for the Pots de Crème to set.  Because that is exactly what I did!  :P


Earl Grey Pots de Crème and Honey Lace Cookies


By the way, I've submitted the Honey Lace Cookies recipe for the Los Angeles Time Holiday Cookie Bake-Off.  Please vote for me by clicking on the picture below!  Thank you! 


Earl Grey Pots de Crème:

Servings: 4

1 cup heavy cream
1 cup whole milk
2 tablespoons Earl Grey tea leaves
4 egg yolks
1/4 cup sugar
1/2 teaspoon grated lemon zest
1/8 teaspoon salt
 
Preheat oven to 325 degrees. In a small saucepan, bring the cream, milk, and tea leaves just to a boil over medium heat. Turn off heat; let steep for 30 minutes.

In a medium bowl, whisk together egg yolks, sugar, lemon zest, and salt. Reheat infused cream over medium heat; slowly whisk into yolk mixture. Strain through a fine sieve into a bowl to extract as much liquid as possible without pressing on tea leaves. Discard leaves.

Divide infused cream among four 6-ounce ovenproof cups. Cover cups tightly with aluminum foil, poking a hole to let steam escape. Arrange cups in a roasting pan large enough to hold the cups without touching one another. Pour boiling water into roasting pan, until water comes halfway up the sides of the cups.

Bake until custards are set but still slightly wobbly in centers, about 30 minutes.  Carefully remove baking pan from oven. Transfer cups from the hot water to a wire rack, remove foil and let cool about 30 minutes. Cover cups with plastic wrap; chill in the refrigerator until custards are firm, at least 2 hours and up to 3 days. Serve with Honey Lace Cookies on the side (recipe follow).

Honey Lace Cookies:

Makes 22 Cookies

2 tablespoons unsalted butter
2 tablespoons light brown sugar
1 1/2 tablespoons honey
A dash of Vanilla extract
2 tablespoons all-purpose flour
Pinch of salt
 
Preheat oven to 375 degrees. Line two large baking sheets with Silpats or parchment paper. Set aside. In a small saucepan, melt butter, sugar, and honey until sugar melted completely.  Remove from heat.  Whisk in flour, vanilla extract and salt until smooth.

Working quickly, drop 1/2 teaspoon of batter onto prepared baking sheets, at least 3 inches apart. Bake until cookies spread and turn golden brown, about 6 minutes. Transfer sheet to a wire rack; let cool completely. With your fingers and a toothpick, carefully remove cookies from pan.

This recipe is shared with:
This Week's Craving

Monday, November 8, 2010

Hazelnut Cookies

Hazelnut Cookies

Things had been a little hectic around the house.  As I mentioned from the previous post, we’ve found a house that we really like.  So, we’ve made an offer and the seller accepted it.  Which means, we have to go through the loan process, home inspection and a few things here and there to prepare for the purchase of this new place (assuming everything went smoothly).  On one hand, I’m really happy and excited about this change.  This new house is almost everything that we’ve dream of.  On the other hand, I’m terrified!  Having the idea of packing, moving, cleaning, unpacking, and organizing to do in the very next month gives me headache.  Not to mention, it's also a big change for us financially.  I feel like I’m already stressed out and needed a break.  After all, purchasing a new house is a stressful event, no matter how pretty the house is. 

Hazelnut Cookies

Well, I better remind myself that all these chores and processes are somewhat temporary.  They will end at certain point in time, except for cleaning and tidying, which are pretty much on-going.  Come to think of it, it’s better that we move sooner than later so we can have the new place ready before the holiday seasons.  One thing I’m pretty sure is that once we’ve settled down, we’ll really enjoy this new home.    

Hazelnut Cookies

So, just let me unwind and take a short break for the moment.  Let my imagination takes me to lay down on the greenest pasture next to a quiet lake.  Let the gentle breeze glides through my hair.  Let me enjoy the beautiful blue sky filled with tulip and Verbascum-shaped clouds (just like the shapes of these Hazelnut Cookies).  Let me close my eyes, enjoy a cup of coffee and a few hazelnuts cookies.  Life is wonderful!  Then, I heard a high pitch voice screaming from behind, “Mommy, Mommy, come play with me!”  And that’s the sweet voice of my 3 year old son, waking me up from my day dream!  Alright, break time is over and I’m back to reality.  How come no one told me the working hours of a stay at home mom is 24 by 7 when I “applied” for the job?  Oh well, guess I should have known better.  :)

Hazelnut Cookies


Hazelnut Cookies:
Makes 48 1-inch diameter cookies
1 2/3 cups all purpose flour
½ tsp baking powder
¼ tsp salt
½ cup (4 oz) unsalted butter, room temperature
¾ cup + 2 Tablespoons sugar
1 large egg, room temperature
1 tsp vanilla extract
1/3 cup ground toasted hazelnuts
extra all purpose flour for rolling out the dough
 
In a bowl, whisk together flour, baking powder and salt and set aside.
In stand mixer with paddle attachment, cream the butter and sugar on medium speed until light in color and fluffy.

Scrape the bowl sides and bottom well.  While mixer is on low speed, gradually add the egg and vanilla extract. Mix to combine and scrape bowl sides as needed.
With mixer still on low speed, add the dry ingredients gradually until incorporated. Add ground hazelnuts and mix until a uniform dough is formed.

Divide dough into 2 pieces and flatten into ½ inch thick discs. Wrap in plastic wrap and refrigerate for 2 hours to firm up dough. At this point the dough can be double wrapped and frozen for up to 2 weeks. To defrost dough, place in refrigerator overnight.

Preheat oven to 325 degrees F, line cookie sheet pans with parchment paper.

On a floured board, place a piece of the dough and dust top with flour. Gently roll out the dough to 1/8 inch thick. Using a cookie cutter, cut out cookies and place on sheet pan, leaving 1 inch apart between cookies.

Bake for 10-11 minutes or until edges are golden brown.  Transfer to wire racks with a spatula to cool completely.


This recipe is linked to:
Foodie Friday

Thursday, November 4, 2010

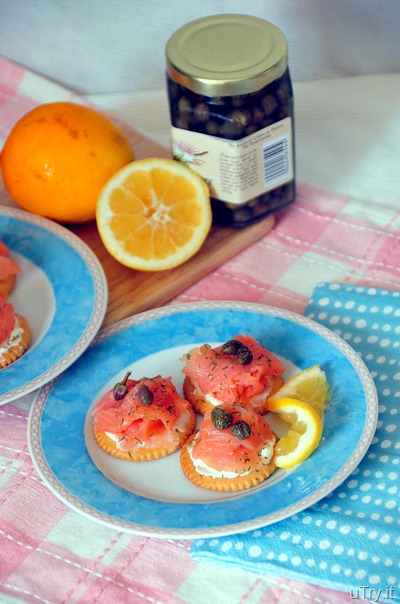
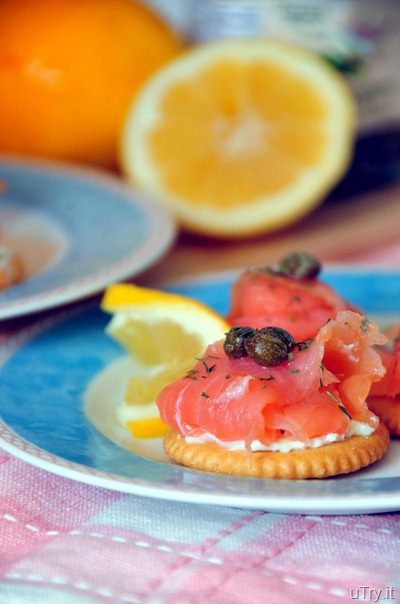
High Tea--Smoke Salmon and Brie Crackers

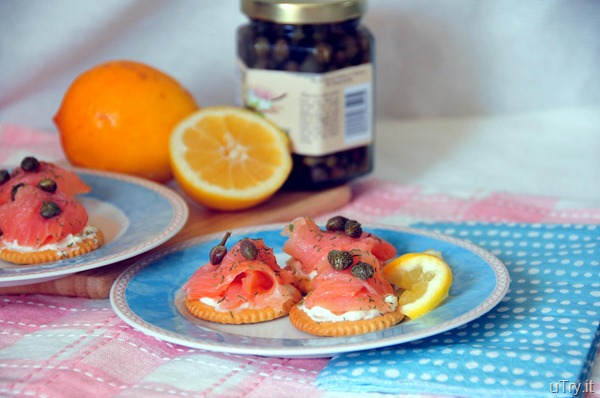
Smoke Salmon--Appetizers

In Hong Kong (where I grew up), "tea" denotes a light meal served in mid-afternoon from 2pm to 6pm.  This is a practice that Hong Kong people adopted from the British concept of Afternoon Tea during the late period of British colonial rule. Afternoon Tea is common, although not a meal served daily (oh well, it is served daily in my home though). The food taken consists of some light meals or snacks such as sandwiches, toast, or more substantial fares served together with milk tea, coffee, Horlicks, Ovaltine, yuenyeung, lemon tea for Western style food, and Chinese tea for Chinese style food.  Elaborate versions of English-style Afternoon Tea is often described as "High Tea" by Hong Kong people.

Smoke Salmon--Appetizers

Whatever you want to call it, High Tea, afternoon snack, or light meal, you name it, we'll take it.  As long as I can continue to serve it at home.  I can skip lunch (if I had a huge brunch or breakfast that day), but I can never skip the afternoon tea.  It’s more than a ritual, according to my stomach.  When the clock strikes 4pm, you bet I’ll be in the kitchen area looking for snacks.  Today, I have some companies over at my place.  So, I prepared something more elegant this afternoon.  Don’t let the look trick you though, they’re super easy to make.  They’re best served with a cup of black tea or lemon tea.  This is such a perfect afternoon!     

Smoke Salmon--Appetizers


Smoke Salmon and Brie Crackers:
Makes: 16 Crackers

Ingredients:
16 Crackers (whatever brand you preferred)
8 Pieces of Smoke Wild Salmon
1/2 Lemon
2-3 Ounces of Brie
2 Tablespoons Capers
Dill (fresh or dry)

Spread a teaspoon of brie on each cracker. Top with 1/2 a piece of salmon each and squeeze a few drops of fresh lemon juice over the salmon. Top each salmon with a few capers, sprinkle some dill on top and enjoy.

Note: I think this could be the easiest recipe, ever! LOL